
Prepared by
Judith Brace
and
Ralph R. White and Stephen C. Bass
Illustrated by
Anne Brace
with special display illustrations by
Kathleen R. Rafferty
A cooperative project, sponsored jointly by Peace Corps
and the National Audubon Society.
Peace Corps
Information Collection & Exchange
Manual M0007
1977
INFORMATION COLLECTION & EXCHANGE
Peace Corps' Information Collection & Exchange (ICE) was established so that the strategies and technologies developed by Peace Corps Volunteers, their co-workers, and their counterparts could be made available to the wide range of development organization and individual workers who might find them useful. Training guides, curricula, lesson plans, project reports, manuals and other Peace Corps-generated materials developed in the field are collected and reviewed. Some are reprinted "as is"; others provide a source of field based information for the production of manuals or for research in particular program areas. Materials that you submit to the Information Collection & Exchange thus become part of the Peace Corps' larger contribution to development.
Information about ICE publications and services is available through:
|
The Peace Corps Internet Web Site address: http://www.peacecorps.gov Please note the new Peace Corps Mailing Address from July 1998 on is: ICE/ Peace Corps 1111 20th Street N.W. Washington, DC 20526 USA |
|
Add your experience to the ICE Resource Center. Send materials that you've prepared so that we can share them with others working in the development field. Your technical insights serve as the basis for the generation of ICE manuals, reprints and resource packets, and also ensure that ICE is providing the most updated, innovative problem-solving techniques and information available to you and your fellow development workers. |
About this manual...
Reply form...
Foreword
Introduction
Chapter 1: The self-contained conservation education center
Planning
The building
Landscaping
The nature trail
Conservation demonstration area
Outdoor exhibits
Exhibits
Signs and labels
The conservation education center in shared facilities
Source materials - Chapter 1
Chapter 2: Conservation education in a school
A school conservation education outline
1. First Year: Looking at Your Environment
2. Second Year: Change in the Natural World
3. Third Yeah: How Environment Differ
4. Fourth Yeah: Talking Care of Natural Resources
5. Fifth Year: Use of Natural Resources
6. Sixth Year: Responsibility for Environmental Conservation
Conservation science fair
Source materials - Chapter 2
Chapter 3: Conservation education in a health center
Nutrition
Sanitation
Health
Source material - Chapter 3
Chapter 4: Conservation education in an agricultural extension center
Soil conservation
Erosion
Erosion control methods
Results of erosion
Control of nutrient loss
Source materials - Chapter 4
Chapter 5: Conservation education in a community center
Cooperative programs
Leadership training
The community environment
Source materials - Chapter 5
Appendix A: Exhibit and study materials
Visitor participation exhibits
Suggested exhibits
Collections for exhibit and study
Visual aids for exhibits
Display poster - Life pyramid/food chain
Introduction to concepts
Concepts about the ecosystem
Concepts about populations
Population poster
Concepts about water, soil and air
Studies about soil
Studies about water
Studies about the sun's energy
Studies about plants
Source materials - Appendix A
Appendix B: Nature Trails
Purpose of a Natural Trail
Characteristic of a Nature Trail
Constructing a nature trail
Features proposed for labeling and explanation along a nature trail in South East Asia
Source materials - Appendix B
Appendix C: Landscaping
Suggestions
Compost
Transplanting
How to select and collect seeds
Growing seeds
Suggested site plan
Source materials - Appendix C
Appendix D: Signs, labels and guides
Signs
Labels
Guides
A suggested nature trail guide for Guatopo national park, Venezuela
Source materials - Appendix D
Appendix E: Public facilities
Rest stops
Picnic areas
Latrine facilities
A calabash washstand
Parking
Source materials - Appendix E
Appendix F: Live animals
The collection
Aquariums
1. A freshwater aquarium
2. A marine aquarium
Terrariums
Ants
Earthworms
Cardboard insect box
Mammal cages
An outdoor bird attraction
Source materials - Appendix F
Appendix G: Endangered species
A school program
A community program
Endangered animals of selected countries
Source materials - Appendix G
Selected organizations concerned with conservation education
Selected environmental research centers
Glossary
Teaching Conservation in Developing Nations is a how-to manual. It is designed as a working tool for Peace Corps Volunteers and other development workers: the suggestions which have been presented for conservation education activities or centers can be adapted as appropriate to any job or setting. The purpose of the manual is to help Volunteers and others to incorporate conservation education into their day-to-day community activities, and to suggest resources for those who choose to become more deeply involved in any aspect of environmental education.
The Preparation of Teaching Conservation in Developing Nations has been a cooperative project sponsored jointly by the Peace Corps and the National Audubon Society. The publication was initially undertaken by Ralph R. White and Stephen C. Bass for the National Audubon Society. Mr. White, while a Peace Corps Volunteer in Thailand, was instrumental in the development of a Nature Education and Wildlife Center for the Royal Thai Forestry Department. He subsequently worked at the National Audubon Society with Mr. Bass, naturalist/planner, and Kathleen R. Rafferty, cartographer/illustrator, to adapt his experience for other centers in developing nations. Their original document was then submitted to the Peace Corps information Collection and Exchange, which undertook to expand and adapt it for broader use, with the assistance of writer/editor Judith Brace and illustrator Anne Brace.
Teaching Conservation in Developing Nations is the seventh manual in the "Appropriate Technologies for Development" series being published by the Peace Corps. Since 1961 Peace corps Volunteers have worked at the grassroots level in countries around the world in program areas such as agriculture, public health, and education. Before beginning their two-year assignments, Volunteers are given training in cross cultural, technical and language skills. This training helps them to live and work closely with the people of their host countries. It helps them to live and work closely with the people of their host countries. It helps them, too, to approach development problems with new ideas that make use of locally available resources and that are appropriate to the local cultures.
Recently the Peace Corps established an information Collection and Exchange so that these ideas developed during service in the field could be made available to the wide range of development workers who might find them useful. Materials from the field are now being collected, reviewed, and classified in the information Collection and Exchange system. The most useful materials are being shared as widely as possible. The information Collection and Exchange provides an important source of field-based research materials for the production of ''Appropriate Technologies for Development" manuals such as Teaching Conservation in Developing Nations.
|
Note to the Reader Due to the high demand for this publication, it has been reprinted without revision (e.g., selected organizations). Updates to the manual are now in progress. - May 1997 |
Contributors...
Judith Brace, co-author of Teaching Conservation in Developing Nations, has written and edited a variety of reports and articles on conservation, environmental planning, and urban affairs. She has also conducted research projects in comparative education in several developing nations.
Ralph R. White served as a Peace Corps Volunteer in Thailand, where he worked with the Royal Thai Forestry Department. He subsequently worked at the National Audubon Society, and co-authored the manual, based on his experiences in Thailand.
Stephen C. Bass, who helped to research and co-author the manual, has served as a naturalist/planner for the National Audubon Society Nature Center Planning Division.
Anne Brace, who provided the illustrations for the manual, is currently studying at Scripps College, Claremont, California. Ms. Brace has provided illustrations for a variety of publications; her most recent work is in the field of animation.
Kathleen R. Rafferty, who prepared the special display illustrations for the manual, is a cartographer for the National Audubon Society Nature Center Planning Division.
Many thanks are also due to Brian Bedell and William J. Manly of the National Audubon Society, James A. Sherburne of the Smithsonian institute, and Richard A. Saunier of the inter-American Development Bank, for their technical review of materials in this publication.
For your convenience, a reply form has been provided on the following page. Please send it in and let us know how the manual has helped or can be made more useful. If the reply form is missing from the manual, just write your comments, suggestions, descriptions of problems, etc., on a piece of paper and send them to: CONSERVATION EDUCATION; Peace Corps information Collection and Exchange; 806 Conn. Ave.; Washington D.C. 20525; U.S.A.
PLEASE RETURN THIS FORM
NOTE TO THE USER: This manual was published because the Peace Corps and the National Audubon Society wish to help in an area of growing worldwide interest. In order to provide the most effective help, the preparers of the manual need to know how it is being Used, or how you feel it could better serve your needs. Please fill in the following form and return it to:
Teaching Conservation in Developing Nations
Peace Corps/ICE, 8th Floor
1990 K Street, NW
Washington, DC 20526 U.S.A.
WHEN WE RECEIVE THIS FORM, WE WILL AUTOMATICALLY PLACE YOUR NAME ON A MAILING LIST SO THAT YOU WILL RECEIVE:
*Updates and/or additions and corrections to the manual, as they become available; and
*Notice of other publications which may be of interest to you.
If you have questions on the material presented in the manual, or if you run into problems implementing the suggestions offered here, please note them in the space provided. Use additional paper if you have to, in order to be as specific as you can about the problem. Wherever possible, we will try to provide you with or direct you to an answer.
|
Date |
___________ |
|
Your name |
___________ |
|
Your company or agency, if any |
___________ |
|
Your address |
___________ |
1. How did you find out about the Peace Corps/National Audubon Society Teaching Conservation in Developing Nations manual? How did you get your copy?
2. Which parts of the manual have you found most useful? Least useful? Why?
3. Did you find the manual easy to read, too simple or too complex, complete or incomplete?
4. How has this manual helped your work? What have you done to apply the information?
5. Can you recommend additional information which you feel should be included in a new edition of the manual?
6. What were your successes using the manual or implementing any of the suggestions? Problems? Please describe completely.
7. Do you have other recommendations?
Privacy Act Notice: Furnishing the information requested herein is completely voluntary. It is requested under authorities contained in the Peace Corps Act (22USC 2501 et seq.). The only uses which will be made of this information are as follows: 1) For management purposes involving the format of future issues of this publication; 2) For incorporation in a mailing list for this and other similar publications.
The natural resources of any country---its land, its rivers, its forests, and the like---are crucial to supplying the population with such basic necessities as food, water, and energy.
Unfortunately, human activities, particularly in the sectors of agriculture and forestry, often involve the destruction of these resources. Clearing of land for grazing and crop production, when followed by over-grazing oh improper agricultural practices, leads to a never-ending need to clear more, and often less stable, land. Such overutilization and deforestation of land (especially if combined with a rapid increase in human population and the demands that accompany such an increase) destroys the ecosystems necessary to human survival, silting up rivers, destroying watersheds, rendering soil unproductive, and ultimately leading to famine and the spread of disease.
This does not mean that land should not be developed to meet basic human needs. What it does mean, however, is that there is an immediate need to balance planning for development with conservation practices. Reforestation, rotational grazing, management of domestic herds, watershed management, development of alternative protein and renewable energy sources, improvement of sanitation, and wildlife management are a few of the ways in which natural resources can be used wisely or restored.
Before people will accept any of these methods as necessary, however, they must have an awareness of the environment and an understanding of the reasons for conservation of natural resources. This manual, it is hoped, will provide Peace Corps Volunteers and other field workers with ideas, activities, and resources for incorporating conservation education into their day-to-day community activities. For awareness and understanding stimulated by conservation education can lead to interest, participation, and, hopefully, action on the part of people who are becoming more and more dependent upon the sound use of their own natural resources.
James A. Sherburne
Program Manager
Smithsonian/Peace Corps Environmental Program
People will not preserve and protect a natural environment which they do not understand or respect. When people learn about the relationship of all forms of life to each other and to the earth, they begin to have a responsible attitude toward natural resources and their wise use.
The goal of conservation education is to lead the public through a series of steps about nature, land and natural resources. These are:
- awareness
- understanding
- respect
- responsibility
- action
The purpose of this manual is to show that conservation education can be presented in a variety of ways and in a variety of situations, and that there is no single method of presentation. The ideas which are presented here are to stimulate your own ideas which will relate to your own situation. It is generally easier if you have a physical setting such as a government building, a school, a community or other local center in which to present an on-going conservation education program by means of pictures and posters, exhibits and collections, films and discussions. This manual has been structured around this kind of setting.
The manual begins with a Chapter dealing with a self-contained conservation education center in order to give you the broadest possible range of ideas that could be used in presenting conservation education. Although you may not be planning this sort of center, as you read the Chapter look for general ideas which you could use in other ways. The Chapters which follow tell of ways in which a conservation education program can be incorporated into your activities if you are working in a school, a health center, an agricultural extension center or other community services. Again, as you read these Chapters, look for ideas you can use. The Appendices help you to carry out specific suggestions which are presented in the Chapters; at the end of the manual there is a list of places which can provide you with further information, and a Glossary of the environmental words used in the manual.
Do not feel that it is necessary to have a formal setting in order to educate people about their environment. If you are a community leader, or a health or agricultural extension worker who visits several communities, you will find that many of the ideas presented in the manual can be adapted for informal presentation in your situation. If you are a school teacher, use the portions of the school conservation education program (Chapter 2) that are suitable to the needs of your school's community.
What is important is to start people thinking about how to improve their own lives by improving their natural environment. In addition to the ideas suggested in this manual, you might prepare a short daily message to be presented on the local radio to encourage people to start thinking about the practice of erosion control as a means to reduce crop loss (see Chapter 4). Or you might prepare a short weekly feature in the newspaper to tell which local animals are endangered, and why (see Appendix G).
All of these are ways to help you develop your community's interest and responsibility toward the environment. If you can bring an understanding of environmental interdependence to Just one area of community life, you have made a contribution to conservation as a whole.
A full-scale conservation education center consists of an interpretive building for visitors and an area of natural land with a trail for nature study.
The advantage of a full-scale conservation education center is that the entire facility can be planned around the directly visible and accessible characteristics of the local environment. Indoor exhibits explain and expand on what is seen out-of-doors. The outdoor trail demonstrates in a natural setting the interaction of the grasses, flowers, trees, fish, birds, insects, reptiles, mammals and geological features found there.
This kind of conservation education center aims for a complete presentation of the local environment and will include concepts which reflect the various specialized relationships of the region. If, for example, lack of water is a major environmental factor, study can focus on the inter-related effect this has on the soil, on the adaptation of plant and animal life, and on health and food problems.
If you are planning a full-scale conservation education center, you are probably working with a government agency and will have the technical assistance as well as financial support necessary for this major effort.
The land selected for use by the conservation education center will probably be part of an existing reserve of government land. If possible, considerations in the selection of the center's site should include:
1. ease of access by visitors;
2. variety of land features: water, open space, wooded area, land formations;
3. variety of wildlife population.
A desirable minimum site size for a full-scale center is 10 hectares. If a conservation education center is being considered within a city's limits, and a site this large is not to be found, it may be possible to use several smaller sites with each section assigned a different conservation education use.
Your site layout should be the result of careful preliminary planning to determine the kind of facilities you will offer. Will you be visited by school classes, by people in buses or cars, by hikers or picnickers? Will the nature trail be for general study only or will you want to include additional smaller trails which study a single feature, such as geology?
In its broadest form, a conservation education center could include not only the interpretive building and trail, but also a small-scale farm or natural resources management area where government technicians could demonstrate effective conservation practices for agriculture, such as:
|
Soil conservation practices |
Compost pile |
|
Forest management practices |
Crop storage |
|
Reforestation |
Well with pump or windlass |
|
Small vegetable garden |
Smoke house |
|
Pond for fish cultivation |
Honey bee hive |
Once you have decided what the conservation education center will provide for its visitors, you can then make a site plan to place each facility in the most desirable spot.
The Nature Trail (See Appendix B. Nature Trails) should link the most interesting natural features of the site.
The Interpretive Building should be located at the point of departure and return of the nature trail loop.
Picnic, Latrine and Parking facilities (see Appendix E, Public Facilities) should be located near the interpretive building.
Wherever facilities are provided, make it a point to do as little damage to the site as possible. Plan carefully to avoid cutting trees, to avoid excess earth-moving, to avoid unnecessary destruction of ground cover. Practice conservation techniques to reduce erosion, such as re-channeling water drainage, filling depressions with stones or gravel, rebuilding worn-away banks and planting ground cover.
In planning the building you must decide what kind of indoor facilities you will be able to offer. The basic need is for an interpretive room where the exhibits are located. The interpretive space should be large enough that you can use it for a group meeting room, or for showing slides or films, if these are available from a government service.
Wall space can be Used for graphics, posters and hanging exhibits; counter tops can hold collections, aquariums or terrariums. Cabinets can provide storage for alternate exhibits and materials which might be loaned to schools.
Will you be able to provide office space for the center's staff? Can you provide a small laboratory for staff use and student training? Can you provide a small library where conservation books, magazines, photographs and other resources could be made available to the public? Can you provide a workshop for preparation of exhibit and interpretive materials? Can you provide indoor toilet facilities?
A simple layout such as the one suggested in Figure 1 can be adapted according to your program and resources.
The building materials should be chosen to blend with the surroundings. A building which clashes with the environment does not demonstrate the basic conservation point that people are a part of nature and should work in harmony with it.
Construction information for concrete and bamboo is available in the Village Technology Handbook, or Bamboo as a Building Material (see Chapter Sources).

The landscaping of the conservation education center (see Appendix C, Landscaping) should be a careful effort to develop methods and plant materials which visitors can adapt for their own uses. In a region of few plant materials, landscaping may mean that you will work with rocks and gravel to achieve an attractive visual effect. Pots or cans of flowering plants or vegetables may be an effective substitute for ground plantings.
Where there are abundant local plant materials, make a selection based on foliage shapes and textures, leaf and flower colors, height or density. Variety and contrast are important elements in any setting.
The quality of the soil you have to work with is important to your success in landscaping. The soil can need improvement for its texture or for its fertility. Generally speaking, you can tell yourself if it is too sandy, if it is all clay, or if it lacks topsoil. An addition of decomposed organic matter (which you can make in a compost pile) will benefit the soil quality. To check on the fertility of the soil, it is advisable to have a soil sample analyzed by a government agricultural agency, to see what minerals are lacking, and which fertilizers can be added to correct the lack.
The Nature Trail (See Appendix B. Nature Trails) of the conservation education center provides the most effective tool for teaching environmental relationships. Through direct contact with the natural setting, and with the help of carefully planned interpretive labels and guides, the visitor will be able to understand the living process which can be seen, touched and heard along the trail.
When there is enough space and the habitat is suitable, trails which specialize in the interpretation of one aspect of the environment (geology, wildlife, plant life) can be planned as side loops off the main trail. Other possible ideas for trails are discussed in Appendix B.
Remember that the signs which you provide for the nature trail are to give guidance and direction, and the labels are to do the interpretive work. Each label should be planned so as to stress the relationship of the interpreted feature with another aspect of the environment. (See Appendix D, Signs & Labels).

An alternative to the system of labeling trailside features is to provide a printed guide. Features along the trail are identified with a number; the corresponding number in the guide tells about this feature. Sample trail guides are provided in Appendix B and Appendix D.

A conservation education center is an ideal place to demonstrate techniques to improve environmental conditions in your region. If space and technical personnel are available, an area where visitors can see how to plant and improve crops, make compost piles, store crops, cultivate fish, etc., can be of great benefit. Peace Corps Manuals for a number of possible projects are listed in the Chapter Sources.
The planning and layout of such an area should be incorporated in the initial conservation education center planning, to assure the best land use both initially and for future development. Consult with regional technical specialists to identify special conservation problems of the area which would benefit from a demonstration project of this sort. Be flexible, innovative and responsive to cooperative efforts, because benefits to people from the total environment is the goal of any conservation program.
You can take advantage of an outdoor area to provide a number of outdoor exhibits which can be entirely separate from the nature trail. Exhibits of this sort will provide additional variety and interest to your conservation education program.
You may want to consider:
- A pool for fish, turtles, frogs or waterplants if there is a small stream which could be dammed;

- a medicinal plant garden featuring local herbs which are medicinally useful;
- a bird bath;
- a soil profile made by exposing the side of a bank, or digging a pit, to show the various layers of soil;
- a rock collection of large rocks labelled as to their type, or simply grouped for their color or shape;
- a tree-ring exhibit with two pieces of a large tree trunk:
1. a sectional slice, sanded and waterproofed with varnish or an oil sealer, can be labeled to tell about the growth rings. Each ring represents a year - the outer ring is the most recent. Dry years have narrower rings than wet ones. Please note that in tropical regions, rings are not an accurate measurement of age.
2. A split section lengthwise of the tree trunk, treated in the same way, can be placed next to the slice to show how the grain of the wood is caused by the yearly growth rings.
- A grass demonstration in which a plot of ground is seeded to show various grasses for erosion control.
(See Appendix A, Exhibits & Study Materials)
The purpose of the exhibits in a conservation education center is to explain, describe and interpret the natural world outside the center. No exhibit or series of exhibits has to be permanent. Just as the natural world is constantly changing, the exhibits which explain this world should change. This means that expensive and elaborate permanent exhibits are not needed. What is important is the appropriateness of the exhibit to the local conditions and the clarity with which each condition is explained.
Charts, posters, maps, collections, specimens, small animal exhibits and visitor participation exhibits can all be done in a simple, clear fashion and organized so that each one reinforces the relationships you are trying to demonstrate.
A method of changing exhibits which you might consider is that of providing progressively more detailed information as your visitors become more informed about exhibit subjects. For example, the initial food cycle concept to begin with in conservation education is that of the "food chain" (see Appendix A). As your visitors' understanding of this concept grows, you can present new exhibit material which will demonstrate that the food chain is actually a "food web" that there are generally several consumers at each stage of the cycle, and that there is a "web" of inter-relationships among the eater and the eaten.
Here are some suggested themes around which to organize your exhibits:
- a food chain
- the role of predators
- relation of plants and animals to their environment
- life in a pond
- life in a forest
- life in the desert
- importance of wetlands
- the make-up of soil
- important rocks and minerals
- geological history
- wind and water erosion
- how a plant grows
- seeds and seedlings
- parasitism (both plant and animal)
- water and air pollution
To provide guidance as you plan the center's exhibits, you will find suggestions for using some of these themes in exhibits, collections and study materials, in Appendix A. As you survey the situation in your own region, you will know what suggestions can be used, which need to be adapted, and which are not applicable.
It is essential that your conservation education program be directly related to the visitor's environment. Broad general themes or problems which exist in another part of the world are not part of the step-by-step development of a basic understanding which you are trying to achieve.
In Appendix F you will find suggestions for various ways to keep live animals that you might exhibit in your conservation education center. Although live animals can provide a good deal of variety and interest to your exhibits, remember that even the smallest insects need attentive care for effective presentation. You must have clean, well-fed and healthy specimens for visitor viewing, otherwise your conservation message is defeated.

Signs at the conservation education center (see Appendix D, Signs, Labels and Guides) will inform the visitor as to places, directions, distances, facilities and regulations. Interpretive needs are usually filled by labels, but a larger sign might identify an unusual tree or other unique feature.
The labels for your exhibits should do two things: (1) identify the object and (2) give the visitors information and an explanation about the object. Identification of an object is short and simple, but how much information and explanation you provide about an object should depend on the visitors' needs. You may feel that some labels should give a good deal of information. In that case, be sure that other labels give just a little information. You do not want to tire visitors by giving them more information than they can absorb. Their experience in the conservation education center should be not only educational, but pleasant.
A conservation education center which is given space in an already existing park (or other governmental) building will be basically an exhibits center. It may be possible, however, if park land is available, to develop some outdoor exhibits, or even a nature trail (Appendix B). Since the indoor exhibits should reflect what is seen outdoors, it would be ideal if the planning for both could be done at the same time. However, if there is resistance to using any land for conservation education purposes, plan your exhibit space to interpret the environmental conditions which are plainly visible outdoors for all to see.
Your exhibits could explain erosion problems, the status of area wildlife, water pollution, the area's plant life, etc. As your center develops and gains acceptance, it may be possible to proceed with a program of labelling interesting and related features found in the park land.
EXHIBITS
The space which you are provided for a conservation education center will determine the extent of your exhibits. Do not crowd your space by trying to demonstrate more ideas than there is room for. It is much better to announce changing exhibits and to feature only a few exhibits at a time. Since exhibits which feature living plants, insects or other animals may not last too long, they make excellent short-term exhibits. (For further discussion of exhibits, and Appendix A and F).
COOPERATION
If you are sharing space with a government agency which is itself involved in conservation, such as wildlife management, forest management, agriculture, fisheries, etc., you have a wonderful source of exhibit ideas, exhibit materials, and possibly of exhibits themselves. Try to develop joint programs in which you might interpret the work the agency is doing, for exhibit in the center. You may be able to develop a speakers' program to provide experts to discuss a specific problem or idea with a school or community group.
LANDSCAPING
If the building in which the conservation education center is located has no landscaping, you may be able, in cooperation with the building director, to develop a plan to demonstrate landscaping ideas. This might be an extensive long range planting of trees, shrubs and ground cover, or it might be only a seasonal placement of containers of flowering plants. (See Appendix C, Landscaping.) Remember that an improvement in our visual environment is one of the benefits of conservation.
SIGNS AND LABELS
In order to encourage visitors to come to the conservation education center which shares a building, you will want to put a sign directing visitors at the entrance to the building.
(For further discussion of signs, and for labelling, and Appendix D, Signs, Labels and Guides.)
Adobe construction methods
California Extension Service Manual 19
University of California
Agricultural Experiment Station & Extension Service
Berkeley, California, USA
Bamboo as a building material
Department of Housing & Urban Development
Office of International Affairs
Washington. D.C. 20410, USA
Building construction in warm climates, vol. 1
R.L. Fullerton
Oxford University Press
Ely House
London W. 1, England
Building with adobe and stabilized earth blocks
Leaflet No. 535
Agricultural Research Service
U.S. Department of Agriculture
Hyattsville, Md. 20782, USA
Excreta disposal for rural areas and small communities1
World Health Organization
Geneva, Switzerland
*Freshwater fish Pond culture and management2
** Peace Corps/VITA
Program & Training Journal
Manual series number 1B
VITA
3706 Rhode Island Avenue
Mt. Rainier, Md. 20822, USA
Handbook for building homes of earth
Department of Housing & Urban Development
Office of International Affairs
Washington, D.C. 20410, USA
Low cost windmills for developing nations
VITA publication 20E
3706 Rhode Island Avenue
Mt. Rainier, Md. 20822, USA
Manual of outdoor conservation education
Nature Center Planning Division
National Audubon Society
950 3rd Avenue
New York, New York, 10022, USA
Manual of outdoor interpretation
Nature Centers Division
National Audubon Society
950 3rd Avenue
New York, New York, 10022, USA
Para que criar abejas
(also available in English)
Vecinos mundiales
Volumen 5 - numero 4S
5116 North Portland Avenue
Oklahoma City, Oklahoma 73112, USA
Planning a nature center
Nature Center Planning Division
National Audubon Society
950 3rd Avenue
New York, New York 10022, USA
*Reforestation in arid lands2
** Peace Corps/VITA
Program & Training Journal
Manual series number 5
VITA
3706 Rhode Island Avenue
Mt. Rainier, Maryland 20822, USA
*Small farm grain storage2
** Peace Corps/VITA
Program & Training Journal
Manual series number 2
VITA
3706 Rhode island Avenue
Mt. Rainier, Maryland 20822, USA
Trail planning & layout
Nature Center Planning Division
National Audubon Society
950 3rd Avenue
New York, New York., 10022 USA
Why raise bees
(also available in Spanish)
World Neighbors
Volume 5 - number 4E
5116 North Portland Avenue
Oklahoma City, Oklahoma 73112, USA
Wood preservation
Forest Products Laboratory
Forest Service
U.S. Department of Agriculture
Washington, D. C. 20250, USA
*Village technology handbook
VITA
3706 Rhode island Avenue
Mt. Rainier, Maryland 20822, USA
1
WHO publications available from:Q Corporation
49 Sheridan Avenue
Albany, New York 12210, USA
2
Multiple copies available from:National Technical Information Service
5285 Port Royal Road
Springfield, Virginia 22161, USA
*Available to Peace Corps Volunteers from:
Peace Corps Information Collection & Exchange
Room M-1214
806 Connecticut Avenue, N.W.
Washington, D.C. 20525, USA
**Single copies available to individuals and non-profit organizations working in the Third World from the above address
Since the basic function of a conservation education center is to educate people about the close relationships among all living and non-living things in our ecosystem, a school is a natural center for this function.
Depending on the size and level of the school, a program of more or less detailed environmental and conservation education can be developed from materials in this section and in Appendix A, C & F. and from sources listed in the Chapter Sources.
As the students develop their understanding, they carry conservation concepts to the rest of the community, and the experiments they perform, the information they gather, the collections they make can become a community resource as a Conservation Science Fair.
Because the students are beginning to learn and understand conservation concepts at an early age, they will, as they grow older, be ready to accept more complex aspects of these concepts. The more completely a person understands the concepts, the better use he/she can make of his/ her resources.

The teacher who wishes to introduce environmental and conservation studies to his students does not have to be an ecologist, or even a science teacher. The teacher needs only guidance, a willingness to think about what he/she sees in the environment, and enthusiasm to discover how these things are related.
A school program of conservation education can be developed, starting with simple goals of observation and awareness in the first year Studies in each subsequent year will build more detailed understanding of what has gone before.
An outline for a school conservation program is included here.
Objectives
- To develop an awareness of the immediate natural environment; plants, animals, rocks, air, water and soil found at school or in the community;
- To develop an awareness of change in the natural world: how sizes, shapes, colors, sounds, smells, textures, and animal activities vary with the seasons;
- To understand some of the interrelationships among soil, plants, animals, people, water, and air;
- To learn how people depend on soil, water, plants, animals, people, water, and air;
- To learn how people can make their environment cleaner, more healthful, and more beautiful.
Things to Talk About
- What plants and animals are found at school, in the neighborhood, or in the community? Include weeds, rats, domestic animals, fish, birds, insects, earthworms, and ants. How do they affect people? How do people affect them? Begin to learn about classifying by grouping similar things.
- How do the changes in seasons affect plants in the area? Animals? Soil? Water? People? What are some of the different sounds you hear on your way to school? In the town? In the fields?
- What kinds of rocks and soils are found in your neighborhood? How do people use soil? How do plants and animals depend on soil? Do plants grow better in some soils than in others? How is the soil affected by plants, animals, and people?
- In what ways do plants and animals in your community depend on one another? What plants and animals do you depend on for food, shelter, and clothing? How do plants and animals depend on you?
- In what ways do plants, animals, and people depend on sunshine and rain? For what purposes do we use water at school? At home? In the town? On a farm? How are water and air affected by plants, animals, people, and soil? What happens to rain when it falls on the soil? On roads?
- Do we need to take care of soil, water, plants, animals and air? Why? What are some things you can do to make your community cleaner, more healthful, and more beautiful?
Things to Do
- Take a walk around the school site and neighborhood, or to a vacant lot or nearby park and make a list of things observed. Afterwards draw pictures or tell stories about some of the things seen on the walk.
- Collect samples of soil from three different locations and examine them for differences in color and texture.
- Build a balanced aquarium or terrarium to learn how plants and animals depend on each other, Make a windowsill garden to learn how plants grow and how to take care of them.
- Collect seeds or leaves for a classroom display; compare their sizes, shapes and textures. Show in the display how seeds might travel from one location to another.
- Take a walk in the rain to observe how rain strikes the soil, road, grass and trees; how soil moves with surface water; how raindrops cling to leaves; and how leaves slow the force of raindrops and help protect the soil.
- Plan and carry out cleanup and planting projects on the school site or in the community.
(See Appendix A, C & F for further suggestions and information)
Objectives
- To increase awareness of change, variety, similarities, and interrelationships within the natural environment
- To develop an awareness of people as a part of the natural world and their role in changing the environment.
- To learn how rocks are continually being changed into soil; how soils differ; how soil is moved; and how soil can be conserved.
- To understand how the life of a plant or animal is affected by its environment.
- To understand how animals depend directly or indirectly on food from green plants for energy and growth.
- To learn more about how people depend on each other and on soil, water, plants. animals and air.
Things to Talk About
- What kinds of food and clothing do we get from wildlife, domesticated animals, and plants?
- How do animals such as mammals, birds, fish and insects help people?
- What objects do you use everyday? Classify them as coming from animals, plants, or minerals.
- Discuss how your everyday activities affect natural resources. How do you make use of soil, trees, shrubs, flowers. water, domesticated animals, and wildlife?
- How is soil made? What are the effects of wind, water, and plants on rocks? Do animals live in the soil? Are air and water found in the soil?
- Discuss the differences and similarities in sand, clay, and silt. How do they compare with soil from a good garden? What makes plants grow better in good garden soil?
- What natural forces move soil? Why should we conserve soil? How do plants help hold the soil in place?
- Name places where soil is washing away in your area, and discuss some ways to prevent soil washing away.
- How does the appearance of trees, flowers, water, insects, birds, wildlife, and domesticated animals change with the seasons?
- How do wild animals store food? How do people store food?
- Compare plants and animals living in your community with those in the ocean, in a pond, in a desert and in a forest. How are they similar? How are they different?
- How do green plants make their own food from water, air, sunlight and minerals from the soil? Can animals and people make their own food from these raw materials? Trace some foods eaten by animals and people to green plants and the soil.
- How do people who live in cities and towns depend on farmers? How do farmers depend on people in cities and towns? Discuss some kinds of work done by people as they make use of natural resources to produce food, shelter, and clothing.
Things to Do
- Keep a weekly record during the school year of changes in a tree, a vacant lot, or an area of the school yard.
- Collect different kinds of leaves. What do they have in common? How are they different? Match the leaves with the trees they come from, and sketch the shape of different trees. What happens to the leaves left on-the ground?
- Make some "soil" by rubbing soft stones or bricks together. Compare this material with soil from the school yard and discuss what changes take place as the rock particles become soil.
- Demonstrate that soil contains water, air and living organisms.
- Find an area near the school where water or wind has moved the soil. Develop a project showing how to keep the soil in place.
- Take a walk on a windy day to observe how wind moves clouds, leaves, seeds and soil. Show how grass and shrubs keep soil from blowing.
- Show how plants depend on soil, water, air, and light.
- Make murals and sketches to show how items you use every day come from the soil.
- Visit someone in your community that uses natural resources in processing or making products.
- Measure the amount of sediment in a jar of water taken from a stream immediately after a rainstorm, and measure the amount of sediment in water taken from the same stream a week after the rainstorm. Allow the water to stand at least 24 hours before measuring and comparing the amounts of sediment found in each jar.
- List ways people protect their natural resources and ways people use them carelessly.
(See Appendix A, C & F for further suggestions and information).
Objectives
- To understand how one natural environment differs from another natural environment.
- To learn how living things adapt to different environments.
- To understand how available natural resources influence the way people live.
- To understand how people change the environment as they Use natural resources.
- To learn about different conservation practices and to understand the need for them in taking care of natural resources.
Things to Talk About
- What is an environment? What are some of the natural factors that limit plant and animal life in your community?
- How is your environment different from the environment in which a bird lives? a fish? a cactus?
- Name some of the physical characteristics of plants and animals that enable them to adapt to different environments. How have people learned to adapt to different environments? Why can some animals live in several different environments?
- Why are most towns and cities located along rivers or near lakes? Where does your community get its water supply?
- In what ways are farmland, grazing land, forests, wildlife and minerals important to your community?
- Discuss the different purposes for which soil is used in the city and in rural areas.
- In what forms have you seen water? What causes water to change form, and how do the different forms affect human activities?
- How are plants, animals, soil and water affected when people use large areas of land for houses or roads, or urban development?
- Where does soil go when water washes it off unprotected areas?
- What is sediment? How does sediment in rivers and lakes affect fish and wildlife? The water you use every day?
- What are some conservation practices used by farmers or others in your community to prevent soil from washing into rivers and lakes?
Things to Do
- Select a plant or an animal found on the school site; explain what it needs for survival and how the environment meets its needs.
- Visit a nearby park, wooded area, or pond. List the plants and animals that are the same as, and those that are different from, the ones found on the school grounds. Explain the physical characteristics of the plants and animals that enable them to live where they do. Examine the soils in each place. Describe how different soils affect the plants and animals living in each area.
- Build a balanced aquarium or terrarium and then change one element at a time to determine the effect on the environment.
- Draw the main characteristics of forest, grassland, and desert environments; describe how they differ from each other.
- Study a soil profile in a road cut or excavation site. Identify the surface soil, subsoil, and parent material. Describe the differences in color and texture of the three layers. (See page 118)
- Conduct an experiment to find out if soil particles are all the same size.
- Compare the water running off a bare slope with water flowing from a grass-covered slope during a gentle rain. Collect a jar of water from both areas and compare the amount of sediment in each.
- Visit a farm where conservation practices are used.
- Start a school garden with different kinds of plants. Learn how to manage soil and water resources to encourage the growth of these plants.
- Keep a daily weather chart for a month. Draw pictures of the cloud formations most likely to produce rain.
- List the products made from natural resources in your community and how and where they are used.
- Make a study of the school grounds and plan a conservation project to improve the environment for plants, animals, and people.
(See Appendix A, C & F for further suggestions and information).
Objectives
- To understand the inorganic and organic cycles within the natural environment.
- To learn more about the ways resources are changed through use.
- To understand the water cycle and how people in different environments manage water resources.
- To understand some of the relationships among natural resources within a watershed, and how the protection and management of watersheds affect the quality of the environment.
- To learn how conservation practices can help people improve their environment, and to understand some of the choices they must make in applying such practices.
Things to Talk About
- What is a food chain? A food pyramid? Why does it take 1000 kilos of plant plankton to produce 10 kilos of commercial fish that can produce a weight gain of 1 kilo in a person?
- How are producers, consumers, and decomposers related?
- Is soil a renewable natural resource? How does soil develop? How do decomposers help return organic matter to the soil? Name some materials that do not decompose readily. Explain some methods people might use to recycle these materials.
- What are the sources of oxygen on earth? In how many ways do people use oxygen?
- What is a watershed? Does the way the land is used in the watershed affect water in small streams? In rivers?
- What happens to water when it falls on the road? Rooftops? Soil? 'What determines how much water runs off and how much soaks into the soil? How do the different kinds and amounts of plant cover help water soak into the soil?
- What happens to water once it enters the soil? Why is ground water important to plants and to people?
- How does the amount of soil that washes off unprotected land into streams, rivers and lakes affect your water supply?
- Trace the history of natural resource use in your watershed and community. What plants and animals were once found there? What new plants and animals have been introduced?
- What things should be considered when deciding how the water resources in your watershed are managed? What choices must be made? What different kinds of conservation practices might be used? Which ones are needed in your community?
Things to Do
- Show in a diagram, beginning with the soil, several food pyramids having at least three levels. Draw a food chain with people in it.
- Study the plants and animals on and near the school site, in the outdoor classroom, in a vacant lot, in a nearby field, in the woods or in a pond. How do the plants and animals differ in one area from those in another? How are they similar? How have people changed these areas? Discuss how plants or animals have adapted to the environment in these areas.
- Write or tell stories about some of the ways people have either improved or harmed the environment for living things, or how your environment has changed because of people's influence.
- Make a mural of the water cycle and show what happens to rain when it falls to earth.
- Visit a cutover or burned-over forest, or a building site, where topsoil is being washed away. Determine how the sediment-filled water drains to a stream and what effect it may have on your water supply and on the people and towns farther downstream.
- Where does your water come from? Can you visit the source? Is the water filtered, chemically treated or boiled before it is used?
- Draw a map of your watershed showing where conservation practices are needed and where they have been applied.
- Show the different rates at which water soaks into three different kinds of soil.
- Demonstrate how slopes and hills affect the way water runs off the land. Show some of the ways the water can be slowed down as it runs off a slope. Show how a hard rain splashes soil.
(See Appendix A, C & F for further suggestions and information).
Objectives
- To become aware of the way decisions about use of resources and energy by people affect the natural environment.
- To understand how the environment influences our way of life and the kind of work we do.
- To understand some of the effects of natural and man-made changes in the environment.
- To understand how natural resources contribute to the industrial development of a nation.
- To understand how social and economic factors influence use and management of soil, water, air, plants, animals, and minerals.
- To learn how people plan and take action to conserve natural resources.
Things to Talk About
- How are living things changed as their environment changes? What are some examples of living things that could not adapt to their changing environment? In what ways did people bring about these changes?
- How do people use science and technology in adapting to the environment? Have scientific (including medical) discoveries changed your environment? How?
- What role has the environment played in influencing the way of life for a tribe of nomads? a fishing village? a farming community? your community?
- How do droughts, floods, fire, soil erosion, water and air pollution, the construction of roads and cities affect plants? animals? people?
- What is the relation of population growth to the quality of your environment?
- What is the effect on people, animals, and plants when natural resources are abused, exhausted, or improved? What happens to the economy? to society?
- Name as many sources of energy as you can.
- How is the price of grain affected by factors in the environment?
- What should people know about resource potentials and problems in their area? What are some of the laws that affect use and management of natural resources in your community? Why are these laws necessary?
- How can you help improve your environment?
Things to do
- Interview older people in your community to learn about changes in the local environment during their lifetime. Include such things as changes in number of people, land use changes, scientific and technological discoveries, and changes in transportation systems. What effect has each of these changes had on soil, water, animals and people?
- Locate an area in which natural resources have deteriorated. Form small student groups to prepare reports detailing conservation needs. Outline a plan of action for improving the area.
- Select a resource problem area on the school site or nearby, and carry out a project, including application of a specific conservation practice, to improve the area.
- Make a chart of the natural resources of your country, and what they are used for.
(See Appendix A, C & F for further suggestions and information).
Objectives
- To understand our responsibilities for use and management of our environment.
- To develop additional understandings of natural resources needed to apply conservation practices.
- To learn how the natural environment serves as inspiration for creative art: painting, music, storytelling, and poetry, and how natural resources contribute to the production of materials used in painting, sculpture, and other art forms
- To learn what your community is doing to the environment.
- To learn what government agencies are doing to help protect and conserve natural resources.
- To understand the need to use ecological principles as guides for conservation action.
Things to Talk About
- What characteristics do people share with other living things? How does our ability to plan and achieve objectives make us different from other living creatures?
- What changes caused by people's use of resources have had or continue to have a detrimental effect on your environment? What changes have a beneficial effect?
- What are people's responsibilities to other living things as we make use of resources?
- How do resources contribute to the social and economic development of your country? of the world?
- Do the decisions on resource use in your community affect your country? What conservation practices can be used in your community to improve the resources needed by your country?
- How might natural resources serve as themes in painting, music, dance, writing or other creative work? What natural resources are used in the creation of art? What art materials are made from natural resources?
- What are the conservation and environmental problems of your community? What treatments are needed? Why?
- What kinds of sewage and solid waste disposal are used in your community? What effects do these methods have on underground water supplies? on public health? on environmental quality? Do these methods contribute to water or air pollution?
Things to Do
- Locate an eroding area on the school site or nearby, and determine the probable cause or causes of the erosion. Design and carry out a plan to control the erosion and to prevent similar problems in the future.
- List how the family of each student in your class makes use of natural resources.
- Make a map of your community to show the boundaries of several watersheds, and to show how these watersheds form the drainage basin of a river.
- Visit artists in your community to learn how they use natural resources as inspiration for their works.
- Think of songs which show how music can interpret the environment. Write a song that describes some aspect of the natural environment.
- Compile a list of government agencies with conservation and resources management responsibilities. Contact a conservation office in government or a university to find out what conservation measures they are taking which might affect your community. Can you help in any way?
- Visit a state park, forest, wildlife refuge, or farm; report on the resource management objectives and procedures used to achieve them.
- Make a conservation inventory of your community. Determine alternative solutions for several of the problems observed. Make sketches when collecting information.
- Develop an outdoor classroom for your school. Select an area with many different learning opportunities. Inventory the existing vegetation, boulders, streams, and special areas that could be used for learning. What kinds of information on soil and water conservation are needed? Make a guidebook for younger classes to use,
- Design a conservation oriented science fair. Develop projects and estimate the time needed to prepare them so that all projects will be ready for the fair.
- Construct a simple, functioning habitat containing at least three different plants and two different animals. Make and record observations daily for a month.
(See Appendix A, C & F for further suggestions and information).
Adapted with permission from the U.S. Soil Conservation Service publication "An Outline for Teaching Conservation in Elementary Schools".
A science fair is a gathering together for public display of a school's scientific studies, presented on charts, graphs, posters, in exhibits, experiments and collections, for the purpose of communicating information. When the theme of the fair is Conservation, then those informational charts and graphs, experiments and collections all deal with the many aspects of conservation which the students have investigated. Since there are many ways conservation techniques can improve community life, a conservation science fair can be a valuable opportunity to demonstrate ideas which can be adapted for individual application.
You will find subjects for display at a conservation science fair in the outline for school study beginning in Appendix A, Exhibits and Study Materials; in Appendix C, Landscaping; and in Appendix C, Live Animals. See also Chapter Sources.
The subjects that you chose as projects for a conservation science fair should be those which are most directly related to the local conditions This will make the fair more interesting and understandable to its visitors.
Before beginning a project for the fair, you should know what you want to demonstrate; then plan the project for that purpose. When the project is ready for display, be sure it is carefully and effectively labelled to give all the information you want to communicate.
Conservation science fair projects
Soil Conservation Society of America
7515 N. E. Ankeny Road
Ankeny, Iowa 50021, USA
L'Enseignement de la nutrition à l'école1
(also available in English and Spanish)
Etudes de nutrition de la FAO #25
Food & Agricultural Organization of the United Nations
available from FAO agents world-wide; or Distribution & Sales Section FAO, Via delle Terme di Caracalla, 00100 Rome, Italy
Environmental education activities manuals
Environmental Education Program
School of Natural Resources
University of Michigan
Ann Arbor, Michigan 48104, USA
Environmental education, an annoted bibliography of selected materials and services
Smithsonian institution - Peace Corps Environmental Program
Washington, D.C. 20560, USA
*Glossary of environmental terms. Spanish-English, English-Spanish2
** Peace Corps information Collection & Exchange
Program & Training Journal, Reprint series #17
Room M-1214
806 Connecticut Avenue N.W.
Washington, D.C. 20525, USA
*Manual didactico: Huertos escolares y nutricion2
** Peace Corps information Collection & Exchange
Program & Training Journal, Reprint series #18
Room M-1214
806 Connecticut Avenue N.W.
Washington, D. C. 20525, USA
Nosotros y la naturaleza: Guia para professores, Guia para estudiantes
Servicio Nacional de Aprendizaje
Division Agropecuaria
Region de Neiva
Colombia
Outline for teaching conservation in elementary schools (PA-268)
Soil Conservation Service
U.S. Department of Agriculture
Washington, D.C, 20250, USA
People and their environment (8 guides)
Teachers Curriculum Guide to Conservation Education
J.G. Furguson Publishing Co.
6 N. Michigan Avenue
Chicago, Illinois 60602, USA
Soil & water conservation in Barbados
4-H Division Extension Services
Ministry of Agriculture
Barbados
Teacher's guide to minigardens
Science Study Aid #2
Agricultural Research Service
U.S. Department of Hyattsville,
Maryland, 20782, USA
The teaching of rural science in tropical primary schools1
UNESCO publication
Paris 7, France
Teaching soil & conservation: A classroom & field guide (PA-341)
Soil Conservation Service
U.S. Department of Agriculture
Washington, D.C. 20250, USA
Forest Service
Environmental Education Office
U.S. Department of Agriculture
Washington, D.C. 20250 USA
(materials related to environmental education)
Martin County Schools
Environmental Studies Center
2900 N.E. Indian River Drive
Jensen Beach, Florida 33457
(primary school manuals for ocean-related environmental studies)
National Audubon Society
950 3rd Avenue
New York, New York, 10022, USA
(many kinds of environmental materials available)
National Wildlife Federation
1412 16th Street N.W.
Washington, D.C. 20036 USA
(many kinds of environmental materials available including "Ranger Rick's Nature Magazine", "Environmental Discovery Units")
Soil Conservation Service
Education information Office
U.S. Department of Agriculture
Washington, D.C. 20240 USA
(materials related to conservation, including "Soil Conservation" monthly magazine)
1
English editions of UN and FAO publications available from:UNIPUB
P.O. Box 433
Murray Hills Station
New York, New York 10016, USA
2
Multiple copies available from: National Technical informationService
5285 Port Royal Road
Springfield, Virginia 22161, USA
*Available to Peace Corps Volunteers from:
Peace Corps information Collection & Exchange
Room M-1214
806 Connecticut Avenue N.W.
Washington, D.C. 20525, USA
**Single copies available to individuals and non-profit organizations working in the Third World from the above address
All living things, together with all non-living things, form our ecosystem. People are a part of the ecosystem; people are a natural resource; since conservation is concerned with the care of natural resources, people must take care of themselves as well as the rest of their environment. Health care is conservation too'
In many parts of the world the major problems of health are malnutrition and diseases carried by insects and parasites. These are environmental problems.
An environment in which there is improper or insufficient food is usually the result of poor agricultural production, poor soil, poor food storage methods, and lack of knowledge about nutrition. An environment which supports a disease-carrying insect cycle, such as the mosquito/malaria cycle, or the tsetse fly/sleeping sickness cycle, is a bad environment for people. An environment which supports the unchecked growth of bacteria is a bad one for people.
People can change the environment to improve the soil, agricultural production and nutrition, to break the cycle of disease carriers, or slow the growth and spread of bacteria, if they understand the problem and learn what steps to take.
A health center provides medical care for its community. It should also provide health education. Just as conservation education shows the relationship between all things in an environment, health education can show the relationship between health problems and the local environment.
To establish a health conservation education program in your community health center, you will need to identify those health problems which are most directly related to your own environment, and which are caused by such things as poor sanitation, erosion or crop destruction, or insect carriers. Choose one of these problems at a time, if your center is small, as a demonstration and education project.
The results of malnutrition on a nation's development cannot be ignored. When a large portion of the population is unable to realize its potential due to improper physical development or disease caused by poor diet, the loss to the nation is great. The periods of infancy and childhood require sizeable resources from both the family and the nation in terms of food and health care. When a child dies in adolescence, his/her use of those resources is totally lost. If he/she does not have a reasonably long or useful working life, again the food and health care used in his development will not be fully repaid, and the nation is losing a valuable natural resource.
The World Health Organization believes that protein calorie deficiency is the greatest public health problem in the world today. A health center conservation project that could be developed in cooperation with an agricultural agency would demonstrate how to develop better soil, how to choose an acceptable protein-rich plant food to grow, and how to prepare it for eating. (Protein-rich soybeans might be a possible crop to introduce). You will need a piece of land for a demonstration garden (see Appendix C for growing information and Chapter 5 for agricultural information).
If other kinds of diet deficiencies are an important problem in your area, a demonstration garden could grow those plant foods which would eliminate the deficiencies. You would have to work with the agricultural agent to identify which plants would grow well, and would also be culturally acceptable to these garden demonstrations. If the climate is suitable, papaya trees could be introduced to provide an easily grown source of vitamins A and C.
Another possibility might be the introduction of fish culture through a program following the Peace Corps/VITA manual, Freshwater Fish Pond Culture and Management Fish are an important protein-rich food and to grow fish in ponds is a more certain way of supplying fish for food than trying to catch fish from lakes, rivers or streams.
Nutrition education can be supported through the schools where children can learn the basic principles of good nutrition. They could grow fresh vegetables or fruits in a school demonstration garden, which they could take home to eat. A government-sponsored food program might be available to provide school children with a nutritionally balanced meal each day.
If floods or erosion are a frequent cause of crop loss in your area, you should encourage efforts in flood and erosion control by farmers, with help from agricultural agents, which would improve the local food supply. (See Chapter 5).
Where food supplies are threatened by loss during preservation and storage, improvement such as that detailed in the Peace Corps/VITA manual, Small Farm Grain Storage (see Chapter Sources), should be actively encouraged and supported by cooperative efforts with agricultural agents. Proper storage can reduce grain loss from 33% to 3% thus making an increased quantity of food available.
In urban areas, nutritional problems are intensified by the fact that consumer goods compete for whatever money is earned, and often the family diet loses out in this competition. An approach to this problem could be to illustrate, by using a flannelgraph story in the health center, that the balanced nutritious diet improves weight, muscular strength, endurance, and capacity to work as well as resistance to disease All of these qualities would tend to increase a person's ability to compete successfully in his/her environment.

Perhaps you could locate some land within the urban area which could be transformed into a community garden for supplementary food needs.
The health center should actively promote food cultivation as a health conservation measure. The health center must be the leader in suggesting and developing ideas to improve the community's nutrition. For an excellent book on the subject, see Learning Better Nutrition by Jean Ritchie/FAO (See Chapter Sources).
Sanitation is the planning and application of measures to maintain a healthy environment. These measures should apply to water supply, sewage and garbage disposal, and control of disease-carrying insects and animals.
WATER SUPPLY
A community's water supply may come from a ground water well, a spring, a stream, a river or a lake. Unless there is a community-wide water purification system, whatever water there is should be considered to be a potential source of infection and parasites, because human or animal feces or urine, or other untreated sewage, often infect the supply. Therefore, water should be disinfected by each user. The most effective method of preventing water-carried infection and parasites is to boil the water hard for at least ten minutes. This kills bacteria and parasite eggs in the water.
Water purification can be done on a community-wide basis by adding chlorine or iodine to a water storage area. These methods are discussed in the Village Technology Handbook by VITA (See Chapter Sources).
A health center should be concerned with educating a community to develop a clean water source. This would involve educating people to (1) build and use latrines, not the river or lake; (2) put their garbage in compost piles not in or near the water supply; (3) not bathe in the water supply; (4) keep domestic animals out of the water supply; (5) Use erosion control techniques to keep topsoil from washing into the water supply. Other local sources of water contamination should be studied and remedied.
SEWAGE
Sewage is the term used for human wastes. Sewage can be properly disposed of by use of latrines. Latrines can be built for each family, or one or several can be built for the community as a whole. A family is likely to keep its latrine clean, and is likely to use it; too often no one feels personal responsibility for keeping the community latrine clean or in good repair. Where possible, you should encourage people to build family rather than community latrines.
Pit Latrines
A pit latrine is basically a hand-dug hole in the ground, covered with a slab, preferably of concrete, either for squatting or with a seat. A shelter is built around it. Human wastes are isolated and stored in the pit latrine, so that no harmful bacteria or parasites can be passed on from the wastes to new hosts. In the pit, the wastes decompose, first into odorous ammonia products, then into nitrites and nitrates. This decomposition process generally kills the majority of harmful organisms. An exception is the hookworm's eggs which remain alive for up to five months in wet. sandy soil.

Hookworm larvae can climb up pit walls and survive on a cracked wooden or earth floor, and once there, they can be picked up by bare feet. It is highly recommended that a concrete slab provide the cover for the pit and that it be effectively and frequently flushed with water. Flies are common carriers of disease organisms found in feces. They crawl and feed on this material, which sticks to the flies' bodies, and which later to the flies' bodies, and which later may be deposited on human food, either directly or through the fly's feces. For this reason, it is important to try to discourage flies in a latrine. The best way to do this is to plan a well-ventilated, dark shelter, since flies do not like darkness, Use fine-mesh screening to cover openings if it is available. A 10% surface layer (2.5 cm) of borax has been found to discourage flies. Use of insecticides has been found to develop a fly population resistant to insecticide control. A cover for the nit opening in strongly suggested.
A health center should provide help and information about latrine building. The most complete source of information and directions is Excreta Disposal for Rural and Small Communities, published by WHO, portions of which appear in Village Technology Handbook by VITA.
You should build a pit latrine at an easy distance from the home so as not to discourage its use. It should be down-hill from any ground water supply, in a dry, well-drained area, above flood level. Around the latrine, clear an area 2 m wide of all vegetation and debris, to discourage shelter for animals and insects. This may be done gradually, to gain acceptance of a latrine in a spot where the surrounding vegetation was formerly used.
Since each geographical area will have certain taboos about the collection and disposal of human waste, you will have to identify these before developing an acceptable solution. Privacy and the separation of the sexes may be important considerations. (Also see Appendix E).
GARBAGE
Garbage is basically food waste, but can also include other unwanted materials such as paper, cans, bottles. The more a community consumes, the more garbage to be disposed of.
From a conservation standpoint, food wastes should be returned to the soil as a compost material. This adds both nutrients and organic materials to the soil which will increase its fertility. See Appendix C, for information on making a compost pile. A compost pile can be a family or a community project. If there is space available outside a health center, a demonstration compost pile can be built with organic wastes from the community members. When the compost is ready for garden use, it can form the basis for a demonstration garden, or can be divided among the community members for their own garden use.
Non-organic wastes such as metals or glass should be disposed of in a single community site, a large pit for example, to keep the community clean and free from litter. If possible, the disposal area should be visually separated from the community, either by distance or by a screen of plants.
A health center should also be concerned with the personal hygiene of its community members. It is hard to teach that there is danger from something which cannot be seen with one's own eyes. However, many of the health problems which affect people are invisible, either because the destructive organisms in the environment are too small to see without a microscope, or because the problems develop inside the body.
The health center should develop an education program which teaches the relationship of cleanliness to health. The washing of hands with soap and water before handling food; bathing to keep the body free from harmful bacteria; wearing sandals or shoes to prevent penetration of parasites through the soles of the feet; keeping the home swept and aired to discourage insect or bacteria breeding places; keeping farm animals out of the home, should all be part of a program to up-grade the health of the community.
An effective method of demonstrating insect or parasitic-carried health problems might be to illustrate the cycle on a flannelgraph or flipchart. Two suggestions follow:
Hookworm
The hookworm is one of a number of nematodes, which is found in tropical and subtropical climates, and which lives as a bloodsucking parasite in the intestines of man.
(1) the larvae of the hookworm live in moist soil which is contaminated by human feces. (2) They penetrate exposed skin, usually the soles of bare feet, and are carried by the blood stream (3) to the lungs, where they cause coughing, (4) are raised into the mouth with bloody mucous and are then swallowed (They can also be swallowed in polluted water.) (5) they then travel to the intestine where they attach themselves with "hooks" and feed on the body's blood supply. (6) A female hookworm can discharge 30,000 eggs a day into the human feces, (7) which will then further contaminate the soil and more people.
As a result of the loss of blood to an infestation of hookworm, a person will suffer anemia, abdominal pain, diarrhea and weakness which will make him/her susceptible to other diseases.
In explaining this cycle of the hookworm, you can show that if a latrine is used, the soil will not be contaminated with hookworm eggs; if shoes or sandals are worn, the larvae cannot enter the soles of the foot; if water is boiled, live hookworm larvae will not be swallowed. If a person has bloody mucous, he should go to the health center to be treated with drugs which will kill the hookworms. Each of these actions will break the hookworm's life cycle, and will help to destroy it.
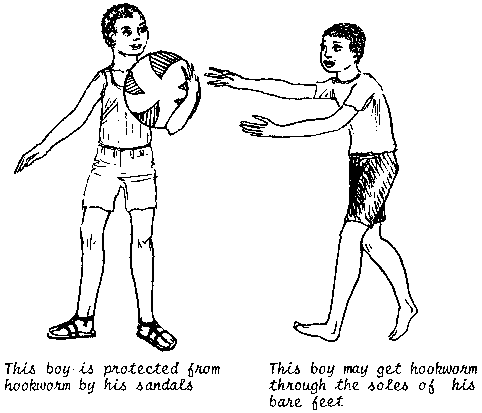
Schistosomiasis Cycle

Schistosomiasis
This is a parasitic disease caused by blood flukes, and is found in Asia, Africa, the West Indies, South America, and some Pacific islands.
(1) the eggs of the blood fluke are found in water, deposited there from urine and feces of infested humans. (2) The eggs hatch and penetrate the feet of snails where (3) they develop into a new form and are discharged into the water. (4) The larvae are then free-swimming until they come into contact with persons who work in, who bathe in, swim in, or otherwise come into contact with the infested water. (The larvae can also be swallowed in polluted water). (5) The larvae penetrate the person's skin and are carried through the blood stream to the bowel, bladder, liver, genitals, lungs, spinal chord and other tissues where they attach themselves. (6) The larvae develop into mature flukes which rob these tissues of the blood they need. (7) Eggs of the mature fluke are passed out in the feces and urine.
The disease results in general weakening and eventual death.
In explaining this cycle of the blood fluke, you can show that if a latrine is used, the water will not become contaminated with blood fluke eggs. If people do not bathe in infested waters, or do not do irrigation work without rubber boots, or do not drink untreated water, the fluke larvae will not enter their bodies. Each of these actions will break the blood fluke's life cycle, and will help to destroy it.
If the hookworm or the blood fluke are not health problems in your area, then perhaps you can identify another disease which is carried in a similar fashion, and whose cycle could be broken by improving the environmental conditions of the human population of your area.
Rodents not only destroy food crops and stored grain, they also carry fleas which in turn carry diseases. Certain rat fleas carry typhus and bubonic plague, and fleas also transmit several species of tapeworm. There are chemical methods to control such rodents as rats and mice. You can also alter their environment, which will discourage or reduce their population. Keep your community free from trash, litter and debris where rodents can hide and nest. Make your grain storage rodent-proof as illustrated in the Peace Corps manual, Small Farm Grain Storage. Most especially, encourage the protection of the predators of rats and mice. These may be birds such as hawks and owls, or they may be any of a large number of harmless snakes. You should learn to identify which snakes are beneficial and not harmful to people. The health center might display pictures of those birds and snakes which help eliminate rodents, or you might be able to keep a harmless, helpful snake as an education aid (see Appendix F. Live Animals). Encourage people to see the snake as a friend by explaining what he eats, by showing with pictures how he is different from harmful snakes, and by generally developing an atmosphere of trust toward the animal.
The health center's decision to develop or support a program to educate the community in some aspect of environmental health, should be based on what the specific problems of your area are. Perhaps instead of disease or nutrition, it is the mental health of the community which is suffering from the stress of a crowded and competitive urban environment. Perhaps air pollution is severe enough to cause lung or skin damage, and needs to be explained. The community should be alerted to those aspects of its environment which can cause harm to its members, and should be shown how to improve their health by making beneficial changes in the environment.
Almanac of rural living1
Harvey C. Neese
N & N Resources
Box 332
Troy, Idaho 83871, USA
*Conseils de santé à la famille africaine2
** Peace Corps information Collection & Exchange
Program & Graining Journal, Reprint series #21
Room M-1214
806 Connecticut Avenue N.W.
Washington, D.C. 20525, USA
Developpons la consomation de proteins3
(also available in English & Spanish)
FAO Nutritional Studies series Food and Agricultural Organization of the United Nations available from FAO agents world-wide; or Distribution & Sales Section, FAO, Via delle Terme di Caracalla, 00100 Rome, Italy
Donde no hay doctor
David Werner
Editorial Pax-Mexico
Libreria Carlos Cesarman, S.A.
Calle Rep. Argentine #9
Educacion alimentaria en la escuela primaria3
(also available in French & English)
FAO Nutrition Studies series #25
Food and Agriculture Organization of the United Nations available from FAO agents world-wide; or Distribution & Sales Section, FAO, Via delle Terme di Caracalla, 00100 Rome, Italy
Eliminemos la rata
(also available in English)
Vecinos mundiales
Volumen 6 - numero 35
5116 North Portland Avenue
Oklahoma City, Oklahoma 73112, USA
Engineering measures for control of schistosomiasis
Office of Health
Bureau of Technical Assistance
Agency for international Development
Washington, D.C. 20523, USA
Excreta disposal for rural areas & small communities4
World Health Organization
Geneva, Switzerland
*Freshwater fish pond culture & management5
** Peace Corps/VITA
Program & Training Journal
Manual series number 1B
VITA
3706 Rhode island Avenue
Mt. Rainier, Md. 20822, USA
Handbook of tropical & subtropical horticulture1
(also available in French & Spanish)
Agriculture Technical Services Desk
Agency for international Development available from the AID office of U.S. Embassies
*Health education: A study unit on fecal-borne diseases and parasites
** Peace Corps Information Collection & Exchange
Program & Training Journal Reprint series #1
Room M-1214
806 Connecticut Avenue N.W.
Washington, D.C. 20525, USA
*Health training resource material for Peace Corps Volunteers2
** Peace Corps Information Collection & Exchange
Program & Training Journal Reprint series #3
Room M-1214
804 Connecticut Avenue N.W
Washington, D. C. 20525, USA
Human nutrition in tropical Africa3
(also available in French and Spanish)
FAO Nutritional Studies series
Food and Agriculture Organization of the United Nations available from FAO agents world-wide; or Distribution & Sales Section, FAO, Via delle Terme di Caracalla, 00100 Rome, Italy
Infant nutrition in tropics & sub-tropics4
Derrick Jelliffe
WHO publication
Geneva, Switzerland
Le lait et les produits laitiers dans la nutrition humaine3
(also available in Spanish and English)
FAO Nutrition Studies series #
Food and Agriculture Organization of the United Nations available from FAO agents world-wide; or Distribution & Sales Section, FAO, Via delle Terme di Caracalla, 00100 Rome, Italy
Learning better nutrition3
(also available in French and Spanish)
FAO Nutritional studies series #20
Jean Ritchie/Food & Agriculture Organization of the United Nations available from FAO agents world-wide; or Distribution & Sales Section FAO, Via delle Term di Caracalla, 00100 Rome, Italy
La leche y los productos lacteos en la nutricion3
(also available in French and English)
FAO Nutrition Studies series #27
Food and Agriculture Organization of the United Nations available from FAO agents world-wide; or Distribution & Sales Section, FAO, Via delle Terme di Caracalla, 00100 Rome, Italy
Let's get rid of rats
(also available in Spanish)
World Neighbors
Volume 6 - Number 3E
5116 North Portland Avenue
Oklahoma City, Oklahoma 73112, USA
*Manual didactico: Huertos escolares y nutricion2
** Peace Corps Information Collection & Exchange
Program & Training Journal Reprint series #18
Room M-1214
806 Connecticut Avenue N.W.
Washington, D. C. 20525, USA
Mejor salud mediante esfuerzo comunal
(also available in English)
Vecinos mundiales
Volumen 8 - numero 1S
5116 North Portland Avenue
Oklahoma City, Oklahoma 73112, USA
Nutricion infantil en los paises en desarrollo
Derrick Jelliffe
Editorial Limusa
Arcos de Belen 75
Mexico 1, D. F., Mexico
Sewage lagoons for developing countries
Ideas & Methods Exchange #62
AID/HUD
Office of International Affairs Department of Housing and Urban Development
Washington, D. C. 2041 0, USA
*Small farm grain storage2
** Peace Corps/VITA
Program & Graining Journal
Manual Series number 2
VITA 3706
Rhode Island Avenue
Mt. Rainier, Md. 20822, USA
Solar cooker construction manual
(also available in French & Spanish)
VITA
3706 Rhode Island Avenue
Mt. Rainier, Md. 20822, USA
Village technology handbook1
3706 Rhode island Avenue
Mt. Rainier, Md. 20822,
USA
Water supply for rural areas and small communities
World Health Organization
Geneva, Switzerland
(See also Source Materials for Chapter 4)
1
Up to five copies available to Peace Corps libraries from:Peace Corps Information Collection & Exchange
Room M-1214
806 Connecticut Avenue N.W.
Washington, D. C, 20535, USA
2
Multiple copies available from:National Technical Information Service
5285 Port Royal Road
Springfield, Va. 22161, USA
3
English editions of UN and FAO publications available from:UNIPUB
P. O. Box 433
Murray Hills Station
New York, New York, 10016, USA
4
WHO publications available from:Q Corporation
49 Sheridan Avenue
Albany, New York 12210, USA
* Available to Peace Corps Volunteers from:
Peace Corps Information Collection & Exchange
Room M-1214
806 Connecticut Avenue N.W.
Washington, D.C. 20525, USA
** Single copies available to individuals and non-profit organizations working in the Third World, from the above address.
Conservation education began, historically, as soil conservation to improve agricultural techniques and crops. Although now, as we know, conservation deals with all things in our environment, the conservation of soil is more essential than ever to produce healthy, nutritious crops for a rapidly growing world population, and to produce timber and other cash crops for economic benefits.
A government agricultural service is established, often together with a forestry service, to identify, analyze and solve the problems of agricultural development of a region. Besides dealing with the raising of livestock, many of these problems deal with identifying the chemical properties of the soil such as its pH factor (is the soil acid, neutral or alkaline) and the nutrients the soil has or lacks, the kinds of crops best suited for the soil and climate, and how to irrigate, grow, store and market crops.
If a community does not have an agricultural center, conservation education concepts can be brought to the community by visiting agricultural extension workers. Either alone or in cooperation with the school or the health center (or visiting health worker), the agricultural worker can develop a program to improve the community's diet and its food-producing environment. (See also Chapters 2,3 and 5).
The purpose of soil conservation is to slow the loss of topsoil by wind and water erosion, and to prevent the loss of nutrients by erosion and crop-growing practices These two problems together are called soil deterioration. At the agricultural extension center you should make a major effort not only to advise the community how to improve its agricultural techniques, but to explain why there are problems of soil deterioration, how they developed and how they affect all things living in that environment.
Water erosion always removes soil downward from its original site, perhaps all the way to the ocean floor, while wind erosion may move soil in any direction. These are both natural processes, but they can be accelerated when people disturb the surface of the earth by such things as crop cultivation, forest cutting, overgrazing, road construction, etc. Nearly every semi-arid area in the world with cultivation or long established grazing patterns, and every tropical and subtropical hilly region with established human settlements feels the effects of accelerated erosion.
TYPES OF WATER EROSION
Sheet erosion is the removal of a thin, even layer of topsoil from the entire surface of an area which has been prepared for seeding or was recently seeded.
Rill erosion occurs during heavy rains when the flowing water cuts small channels into the soil and the water runoff is concentrated in them, carrying away large quantities of soil and nutrients. This will often happen between down-hill rows of cultivation.
Gully erosion occurs when the water runoff is great enough and the soil soft enough to cut large V or U-shaped trenches which are repeatedly enlarged and deepened by water action. Because of the great physical changes this produces on the land, this is the most serious kind of water erosion.


WIND EROSION
This kind of erosion is particularly common in arid areas of the world where there is little vegetation to break the wind or hold the soil in place. The wind picks up the surface of the soil and moves it from place to place. Large quantities of soil can be moved in this way. Sandy soils are more likely to be blown, as in sand storms, but if a silt or clay soil has been broken up, the fine particles can be carried by the wind for hundreds of miles.
1. Prepare the soil and plant the crops on the contours of the land, not at angles to it.
2. Keep the land covered with a crop or ground cover at all times, if possible, to hold the soil against wind and water erosion, and to increase the water absorbed into the soil.
3. If possible, keep the remains of the old crop on the surface of the soil to hold the soil in place and break the wind.
4. To slow the downhill force of water, build terraces with gentle grades around the hill contours.

5. Sand dunes which are moved by wind action can be stopped by plantings of grasses on the windward side. When the grasses are established, further Plantings can be tried.
6. Rows of wind resistant trees can be planted in an area of strong winds, between or at the edge of fields, to reduce the wind's force on the soil surface.
7. Timber cutting should be done selectively so as to leave a large number of trees standing to hold the soil in place. Cut trees should be replaced with seedling trees.
An area of high erosion with little vegetation to absorb and hold water will drain water off; communities downstream will receive a high volume of water all at once - perhaps a flood - followed by a low volume of water or none at all. If the area upstream were able to absorb and hold the water for more gradual release into the streams and rivers, communities downstream would receive a more uniform volume of water over a longer period of time.
Other results from erosion can be seen in the rivers downstream from eroding watersheds: surface soil is deposited in increasing amounts on river beds, causing navigation channels to fill and eventually changing the course of the rivers.
Serious social consequences result from soil erosion. As a result of the loss of the most productive soil layers, income and nutritive value of crops decline and the community fails to reach its full potential for productivity and vitality. Falling income as a result of soil deterioration means that a farmer has less money to spend on his farm problems, and his family's nutrition - and thus its health - will suffer. In communities where this has happened, short life expectancy and nutritional and other diseases are common. This type of community represents a drain on a nation's resources, whereas if it were able to improve its nutritional and agricultural deficiencies, it could be contributing to the nation's resources.
Where people and nature cause erosion to change the environment by cutting a forest, filling a stream with silt, overgrazing of open lands or cultivating crops in an inappropriate manner - all the wildlife of the region will suffer. If their habitat can no longer provide them with the necessary food and shelter, they will have to find a new habitat, or die. Each animal has a special position in the area's food chain, and if it leaves the region or dies out, all other animals which depend on it will suffer. Often wildlife (mammal, reptile, bird or fish) is a source of food for a human community; this food source will disappear as its habitat disappears.
The loss of nutrients occurs both when nutrient-rich soil is lost through erosion, and when crops use up the nutrients as they grow. If nutrients are not returned to the soil by rotation of the types of crops, or by the addition of organic or chemical fertilizer, the crops which are grown will become increasingly small and less nutritious.
Erosion control is the first step to take to avoid the loss of such nutrients as nitrogen, phosphorus and potassium, the primary or macronutrients, and calcium, magnesium and sulfur, the secondary nutrients, which are found in the nutrient-rich topsoil. The ideal way to provide erosion control is to keep the land completely covered with a crop, as in pasture fields, so that no soil is exposed. Where wind erosion is a problem, it will help to lay a straw mulch over the cultivated soil surface. Where water erosion is a problem, farmers should plow fields on the contour of the land. Alternating rows of different crops on the contour are helpful in water erosion control.
Crops rotation, in which a succession of different crops is planted on the same land, is a good way to reduce or replace nutrient loss. Plant roots absorb nutrients from the soil, aided by water and root extension. Each plant crop has different nutritional requirements and when a single crop, such as corn, is planted year after year, it eventually uses up all the supply of its required nutrient which the soil held.
The farmer can replace lost nitrogen by including a legume crop such as beans, peanuts, alfalfa or clover in his rotation, The extensive root system of these legumes contains nodules of nitrogen which enters the soil. Additional organic benefits occur when the top growth (green manure) is plowed back into the soil. If the farmer follows a legume crop with such good cash crops as corn, potatoes, cotton or sugar beets, they will do well, because they need nitrogen for good growth.
Fertilizing will also improve the yield of a farmer's crop and the nutrition of his food. Fertilizer can be organic (from decaying living matter) or chemical. Decomposing organic matter has the added benefit of holding soil particles together during the decomposing process to make a soil which resists water erosion. Organic fertilizers can be animal manures, compost green manures (the un-needed green part of a crop), and other left-over crop materials.
Chemical fertilizers such as ammonium Phosphate, ammonium nitrate, ammonium sulfate and potash can be added, based on the crop, the soil analysis, the climate and the available equipment.
Methods of fertilizing include spreading fertilizer over the soil surface, placing it with each seed, placing it along the length of a seed row, and plowing it into the soil. In arid areas, plowing the fertilizer deeply into the soil is recommended because fertilizers need moisture to be effective. If the fertilizer is on the dry surface of the soil the plant roots cannot absorb its nutrients.
The farmer should provide, through the use of fertilizer, additional nutrients to the crop-growing soil to improve the quality of the nutrition of his crops, because as we have seen in the Health Center Chapter (Chapter 3), nutritional deficiencies are a serious problem everywhere in the world. By helping to improve the agricultural process, an agricultural extension center is improving the health of the community.
Soil improvements are not the only ways in which a community's nutrition can be improved. An agricultural extension center can develop a program to introduce such small and easily raised animals as chickens or rabbits to provide animal protein in the local diet.
If the community has a health center, a cooperative effort should be made with it to develop these and other methods to improve nutrition.
An education program in cooperation with the local school could teach the children the basic principles of soil conservation and habitat.
They could be shown how to make soil and habitat studies (see Appendix A) which could then be displayed in the agricultural extension center. They could help to landscape the community with plant materials provided by the center, or grown under its direction. They could undertake a small reforestation project (see Chapter Sources) or they could make a model garden using principles of soil conservation, as a community demonstration project (see Appendix C and Chapter Sources).

Aprendiendo a criar conejos
(also available in English)
Vecinos Mundiales
Volumen 8 - numero 2S
5116 North Portland Ave.
Oklahoma City, Okla. 73112, USA
Better Farming Series1 (8 titles dealing with plants and soil)
Food and Agriculture Organization of the United Nations available from FAO agents world-wide; or Distribution 5 Sales Section, FAO, Via delle Terme de Caracalla, 00100 Rome, Italy
Commercial rabbit raising
Agriculture Handbook No. 309
Agricultural Research Service
U.S. Department of Agriculture
Hyattsville, Md. 20782, USA
Contour ditches help conserve our soil
(also available in Spanish)
World Neighbors
Volume 6 - number 2E
5116 North Portland Ave.
Oklahoma City, Okla. 73112, USA
Cria de ganado en granjas pequenas
Agricultural Bulletin #2224
Agency for International Development available from the AID office of U.S. Embassies
Cria y explotacion del guajolote
Circular DAGEM #35
Departamento de Divulgacion
Direccion de Agricultura 7 Ganaderia
Independencia 401 Pte
Toluca, Mexico
La crianza de peces en estangues
(also available in English)
Vecinos Mundiales
Volumen 5 - numero 2S
5116 North Portland Ave.
Oklahoma City, Okla. 73112, USA
Farm implements for arid & tropical regions1
(also available in French and Spanish)
FAO Agricultural Development Paper #91
available from FAO agents world-wide; or Distribution & Sales Section, FAO, Via delle Terme de Caracalla, 00100 Rome, Italy
*Freshwater fish pond culture & management
** Peace Corps/VITA
Program 5 Training Journal
Manual series number 1B
VITA 3806
Rhode island Ave
Mt. Rainier, Md. 20822, USA
*Guide for field crops in tropics and sub-tropics2
** Peace Corps information Collection & Exchange
Program & Training Journal Reprint series #10
Room M- 1214
806 Connecticut Ave. N.W.
Washington, D.C. 20525, USA
*Improved practices in corn production - A guide for Peace Corps Volunteers2
** Peace Corps Information Collection & Exchange
Program & Training Journal Reprint series #7
Room M-1214
806 Connecticut Ave. N.W.
Washington, D.C. 20525, USA
*Irrigation principles & practices2
** Peace Corps Information Collection & Exchange
Program & Training Journal Reprint series #5
Room M-1214
806 Connecticut Ave. N.W.
Washington, D. C.
Learn to raise rabbits
(also available in Spanish)
World Neighbors
Volume 3 - number 2E
5116 North Portland Ave.
Oklahoma City, Okla. 73112, USA
Marketing eggs & poultry1
(also available in French & Spanish)
Marketing Guide #4
Food and Agriculture Organization of the United Nations available from FAO agents world-wide; or Distribution & Sales Section, FAO, Via delle Terme di Caracalla, 00100 Rome, Italy
*Pesticides
** Resource Packet #3
Peace Corps information Collection & Exchange
Room M-1214
806 Connecticut Ave. N.W.
Washington, D. C. 20525, USA
Plantacion de arboles frutales
Circular DAGEM #34
Departamento de Divulgacion
Direccion de Agricultura 7 Ganaderia
Independencia 401 Pte
Toluca, Mexico
Plantas necesitan tierra fertil
(also available in English)
Vecinos mundiales
Volumen 6 - numero 15
5116 North Portland Ave.
Oklahoma City, Okla. 73112, USA
Produzca su propia fruta
(also available in English)
Vecinos mundiales
Volumen 7 - numero 15
5116 North Portland Ave.
Oklahoma City, Okla. 73112, USA
*Reforestation in arid lands
** Peace Corps/VITA
Program & Training Journal
Manual series number 5
VITA
3706 Rhode Island Ave.
Mt. Rainier, Md. 20822, USA
Smaller farmlands can yield more1
(also available in French & Spanish)
World Food Problems #6
Food and Agriculture Organization of the United Nations available from FAO agents world-wide; or Distribution & Sales section, FAO, Via delle Terme de Caracalla, 00100 Rome, Italy
*Soil. crops & fertilizer use
** Peace Corps information Collection & Exchange
Program & Training Journal, Reprint Series #8
Room M-1214
806 Connecticut Ave. N.W.
Washington, D.C. 20525, USA
Soil & water conservation in Barbados
4-H Division Extension Services
Ministry of Agriculture
Barbados
Sols argileux foncés des régions tropicales1
(also available in English & Spanish)
FAO Agricultural Development Paper #83
Food and Agriculture Organization of the United Nations available from FAO agents world-wide; or Distribution & Sales Section, FAO, Via delle Terme di Caracalla, 00100, Rome, Italy
U.S. Department of Agriculture
Soil Conservation Service
Washington, D.C. 20250
Publications :
Conservation & the water cycle, A1B-326
Controlling erosion on construction sites, A1B-347
Facts about wind erosion & dust storms on the Great Plains, L-394
Grass makes its own food, A1B-223
Know your soil, A1B-267
More wildlife through soil & water conservation, AB-175
Sediment: it's filling harbors, lakes & roadside ditches, A1B-325
Teaching soil & water conservation: A classroom & field guide, PA-341
Soil erosion: The work of uncontrolled water, A1B-260
What is a farm conservation plan? PA-629
What is a watershed? PA-420
Windbreaks for conservation, A1B-339
1
English editions of UN & FAO publications available from:UNIPUB
P.O. Box 433
Murray Hills Station
New York, N.Y. 10016, USA
2
Multiple copies available from:National Technical Information Service
5285 Port Royal Road
Springfield, Va. 22161, USA
*Available to Peace Corps Volunteers from:
Peace Corps Information Collection & Exchange
Room M-1214
806 Connecticut Age, N.W.
Washington, D.C. 20525, USA
**Single copies available to individuals and non-profit organizations working in the Third World, from the above address
A community center is an excellent place to provide conservation education. The specific problems of the area which your community center may be trying to deal with. such as improvements in health, nutrition, agricultural production, sanitation and marketable resources, can frequently be treated from an environmental point of view. When you identify the relationships between the problem and the environment, you can begin to solve the problem.
If your community center provides the only public service in the community, perhaps you and your community members could decide together on an environmental program which would be of community-wide interest and benefit. You should then invite government extension teachers and workers in conservation areas such as sanitation, nutrition, health, forestry, agriculture or wildlife conservation to visit your community and to suggest ways of developing your chosen program,
If government extension workers are not available, then you may find appropriate ideas for programs in this manual. For suggestions about health and agriculture programs see Chapters 3 and 4, and Appendix C. If your community center is working with the local school, or is in fact the adult education school, the school conservation program in Chapter 2 can be used, or adapted for use in either situation.
If you feel that the community is not aware enough of the value of wildlife to the region, Chapter 1 and Appendix A & F may give you ideas on how to introduce ideas related to this subject. Perhaps the community is unaware of the variety of its plant or animal life, or the rareness of some of these living things. Your community center could undertake an identification or protection program (Appendix G) which would involve community members,
If there are other public service centers in your community, the community center might plan and coordinate programs which are environmentally related. You might bring the nutritional health worker and the agricultural extension worker together on a program to develop a community garden or a small animal raising project. You might bring the sanitation worker and the health worker together to provide water purification education, or to develop a latrine-building program. You could plan a program of cooperation between the school and any of the following:
- forestry worker
- wildlife ranger
- health worker
- agricultural extension agent
- sanitation worker
- home economics extension worker
Suggest that the school children develop exhibits (see Appendix A and Chapter 2) based on their studies and investigations, and provide display space for them in the community center. Use the community center for a conservation science fair which will be a school project.
An important aspect of any community effort which you undertake, either alone, or in cooperation with an extension worker or other public service center, is the development of local leadership among men, women, and young people, since leadership is necessary for effective community action. You should select people to work with you in planning and developing your programs. who have concern for their community and its members, and who have hope and interest in their future. These people should then be given the responsibility to carry out a part or all of a program, with guidance and direction available when necessary from you or the specialists.
Your community center can start a project to make the community a more attractive environment. Plants and flowers can be grown and placed around the center building, or elsewhere in the community as a demonstration project. Members of the community can be encouraged to grow similar plants or flowers for their homes. Try to obtain native plant or flower seeds from a government agriculture service or collect them from wild plants and flowers.
Suggestions in Appendix C may help you to make or improve an existing garden or park where space is available. You might provide space in a community garden for adult games, as well as climbing materials for children such as rocks or logs. A feature such as a bird bath (Appendix F) might also be considered to add interest to a garden space.
- A community tree-planting project could be planned if you can get seedling tree donations and instructions for care from the government agricultural agent.
- You can encourage the community to look at the beauty of its environment by providing for a rest stop in an attractive place (Appendix E).
- You might propose a community or school project to provide a number of litter cans to be placed around the community. Empty oil or kerosene cans can be cleaned, painted, decorated, or lettered with a message Part of the project must be the continued collection of litter from the cans, and its dumping in a planned disposal place.
Projects which visibly improve the quality of your community's environment will encourage those same qualities which are necessary for conservation action at any level: awareness, understanding, respect and responsibility.

Audio-visual aids for cooperative education & training
(also available in French & Spanish)
FAO Agricultural Development Paper #86
Food and Agriculture Organization of the United Nations available from FAO agents world-wide; or Distribution & Sales Section FAO, Via delle Terme di Caracalla, 00100 Rome, Italy
Better health through community effort
(also available in Spanish)
World Neighbors
Volume 8 - number 1E
5116 North Portland Ave.
Oklahoma City, Okla. 75112, USA
Guide for extension training
(also available in French & Spanish)
Food and Agriculture Organization of the United Nations available from FAO agents world-wide; or Distribution & Sales Section, FAO, Via delle Terme de Caracalla, 00100 Rome, Italy
Mejor salud mediante esfuerzo comunal
(also available in English)
Vecinos Mundiales
Volumen 8- numero 15
5116 North Portland Ave.
Oklahoma City, Okla. 73112, USA
Neighbors around the world work to improve home & community
(also available in Spanish)
World Neighbors
Volume 8 - number 4E
5116 North Portland Ave.
Oklahoma City, Okla. 73112, USA
Podemos proveer mas aqua
(also available in English)
Vecinos Mundiales
Volumen 5 - numero 15
5116 North Portland Ave.
Oklahoma City, Okla 73112, USA
The exhibits of a conservation center are chiefly devoted to explaining and interpreting what is taking place outdoors in your particular region. The exhibits should be specific, interpretive and built around a concept or theme. Such devices as charts, posters, maps, collections, specimens and models can be used to provide instruction and guidance to the visitors who come to the center.
In this Appendix you will find a number of suggestions for exhibit models, collections, visual aids, conservation concepts, and conservation studies.
You may pick and choose among these things according to your needs, and materials available to you and your budget, but bear in mind that substitution and adaptation of these suggestions should always be considered and is encouraged
Exhibit: Relationships in Nature
This revolving-wheel display directly involves the visitor in the discovery of natural relationships. By turning the wheel he/she can point an arrow at one of seven illustrations. At the base of the arrow a reading window will reveal a card which tells about the illustration. For example, when a visitor turns the arrow to the illustration of the sun, he/she will read that "the sun provides the heat and light needed by all living things". As he/she moves the arrow to other illustrations, more relationships will be described through the reading window.

Illustrations:
1. the sun
2. grain
3. insect
4. frog
5. snake
6. hawk
7. dead bird
8. insect
9. people
Text for cards:
1. The sun provides the heat and light needed by all living things.
2. Plants use sunlight, water and soil to grow. plant leaves give oxygen and water to the air.
3 Most insects are plant eaters. Some of them help to return dead plant material to the soil.
4. Frogs and toads are insect eaters. There would be many more insects without insect eaters.
5. Snakes eat frogs and toads. Snakes will live where there are frogs to eat.
6. Hawks hunt for snakes and other small animals. Since hawks can fly, their hunting area is very large.
7. When an animal like this bird dies, its body is used by other animals, or it returns to the soil to enrich it.
8. Grain grows better and stronger in soil rich in nutrients.
9. People need good plentiful grain to be strong and healthy.
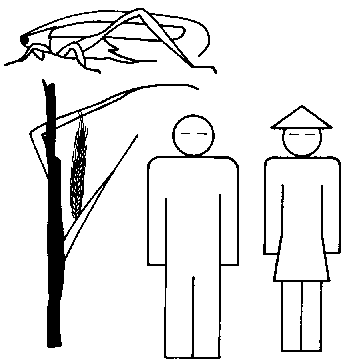


Figure 6


Materials needed:
- 1 board of medium plywood 100 cm x 100 cm OR heavy cardboard 100 cm x 100 cm
- 1 board of medium plywood 100 cm x 125 cm OR heavy cardboard 100 cm x 125 cm
- 1 strong bolt 5.5 cm with nut
- 6 washers
- 1 arched door handle OR 1 wooden knob
- 1 or 2 screws
- small nails
- assorted enamel paints
- 9 white cards 5 cm x 10 cm
Procedure:
1. Take board 100 cm x 100 cm and cut out a 70 cm circle from the corner.
2. Cut arrow 5 cm x 50 cm from extra wood from 100 cm x 100 cm board.
3. Cut display title strip 80 cm x 5 cm from extra wood from 100 cm x 100 cm board. (Title can also be lettered directly on base after base is painted.)
4. Paint the various parts: the base board, 100 cm x 125 cm might be dark green, the circle a lighter green, the arrow red.
5. Transfer outline drawings to the base board as shown in Fig. S. Use black ink outline, or paint in natural colors.
6. Type or print text on cards. Nail or glue cards on base, directly opposite the corresponding illustration.
7. Cut a 5 cm x 10 cm reading window in the circle.
8. Drill a hole for the bolt through the center of the arrow, the center of the circle and the center of the board.
9. Attach the handle or knob to the arrow with screws.
10. Nail the arrow with small-nails to the circle so that the base of the arrow is directly above the reading window.
11. Pass the bolt through the arrow and circle, place washer(s) between the circle and the base; pass the bolt through the base; add washer(s) and the nut. Test the turning of the circle. Add washers till it turns easily.
Exhibit: What Makes Soil
This exhibit is a peep-hole box. By looking in the various peepholes, the visitor will see a series of pictures of the animals which work to make soil on and beneath the surface. The exhibit tries to reproduce a cross-section of the soil by this technique. The box has descriptive "wings" which contain information about the three levels of soil.
Illustrations :
Top level: Millipede, Fungi, Beetle
Middle level: Earthworm, Mole
Bottom level: Water

Figure 7


Figure 8
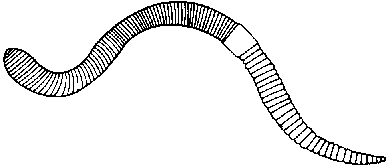

Materials needed:
- 2 plywood boards 100 cm x 150 cm OR 2 heavy cardboard sheets 100 cm x 150 cm
- 4 plywood boards 50 cm x 100 cm OR 4 heavy cardboard sheets 50 cm x 100 cm
-1 plywood board 50 cm x 150 cm OR 1 heavy cardboard sheet 50 cm x 150 cm
- 6 bamboo tubes 25 cm long, 2.5
-3 cm diameter
- 12 wood blocks 5 cm x 5 cm x 10 cm
- 6 panes of glass*, frosted or covered with a thin coat of white paint, 20 cm x 20 cm
- 24 corner braces to hold glass
- 4 medium hinges
- 2 hooks and eyes
- enamel paint (optional): small amounts of grey, reddish brown, brown; tan for entire box
* Alternatives to the glass panes, especially if you are using cardboard could be:
- Translucent polyethelene sheet, cut to size
- Transparent polyethelene sheet made translucent by rubbing with fine sandpaper
- Thin white paper
- White cloth
The illustrations could be transferred and inked directly onto these materials, which could be taped over the openings.
Procedure:
1. Measure and cut square holes 19.5 cm x 19.5 cm in one board 100 cm x 150 cm as in Figure 9. This will be the back panel.
2. Place the other 100 cm x 150 cm board under the back panel, and mark the position for the viewing holes on the front panel so that they will be in the middle of each rear square.
3. Cut or drill the holes for the viewing tubes in the front panel; attach the wooden blocks at top and bottom of holes to support tubes; place tubes in position so that they point directly at each corresponding glass.
4. Assemble the box and paint tan (optional).
5. Letter the information on Figure 10 onto the fold-out wings and attach them to the box with hinges. Attach hooks & eyes to keep wings in position.

Figure 10
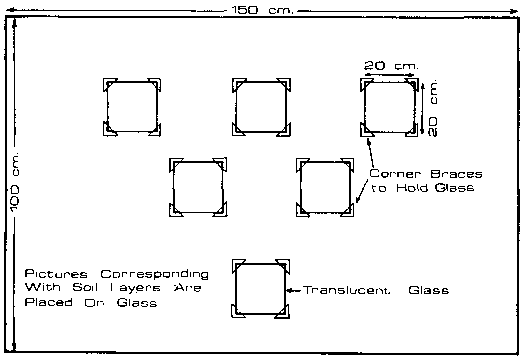


6. Glue paper drawings of illustrations with their names, to the panes of glass; attach panes to rear panel with corner braces: top level: Millipede, Fungi, Beetle middle level: Earthworm, Mole bottom level: Water (use illustration of raindrops).
7. Place box at a window where light will shine through rear panel openings.
Exhibit: Hidden Uses of a Forest
The purpose of this exhibit is to show the varied environmental benefits from a forest. This exhibit consists of a large picture of forest trees on a board. Hidden under lift-up panels are written a number of benefits the environment receives from a forest.
Materials needed:
- 1 medium plywood board 75 cm x 100 cm OR heavy cardboard 75 cm x 100 cm
- 7 medium plywood covers 5 cm x 10 cm OR 7 cardboard covers 5 cm x 10 cm
- 1 sign strip 5 cm x 60 cm, plywood OR sign lettered onto cardboard
- 1 sign strip 10 cm x 30 cm, plywood OR sign lettered onto cardboard
- 14 lengths of leather lacing, 15 cm each OR 14 lengths of string, 15 cm each
- paint: green (leaves), brown (trunks and ground), blue (water) light blue (sky) black (roots, signs), yellow (sun), white
- 7 white cards, 5 cm x 10 cm for text under covers
Note: 1 plywood board 90 cm x 100 cm is sufficient for all parts
Procedure:
1. Using a grid enlarge Fig. 11 onto the 75 cm x 100 cm board.
2. Drill 3 mm holes in the 7 covers and the main board as shown in Figure 11 and below.


3. Paint the board picture as indicated under "paint" above.
4. Type or print text on cards.
5. Paint the covers:
A = White
B = Brown/Blue
C = Yellow
D =
Brown/White
E = Brown
F = Yellow
G = Brown
6. Paint text on signs (black paint).
7. Paint black question mark (?) and letter on covers as in Figure 11.
8. Glue or nail signs to main board as in Figure 11.
9. Attach covers to main board by weaving the lacing or string through the drilled holes and tying a knot at the back as shown above.
10. Glue text cards under covers.
Text:
A = MAKES OXYGEN
B = HOLDS MOISTURE
C = MAKES ANIMAL FOOD
D = SHADES THE GROUND
E = MAKES NEW SOIL
F = MAKES ANIMAL HOMES
G = HOLDS THE SOIL
5 cm x 60 cm sign strip = HIDDEN USES OF A FOREST
10 cm x 30 cm sign strip = FORESTS GIVE MORE THAN JUST LUMBER
Exhibit: Why Do We Need Trees on Hillsides?
This exhibit shows how trees hold rainwater by using a tilt-board on which nails suggest trees and marbles suggest rain water. When the board is tipped the visitor sees that where there are many nails (trees) the flow of rainwater (marbles) is slowed.
Materials Needed:
- 1 plywood board 65 cm x 109 cm
- 2 pieces of wood 2 cm x 2 cm x 5 cm (part D)
- 1 triangular block of wood 15 cm x 15 cm x 40 cm long
- 100 nails 5 cm long OR 100 slender sticks of wood or bamboo 6 cm
- 12-15 marbles OR cowrie shells, round stones, round beans
- green enamel paint
(Optional: brown paint sheet of glass or plastic to cover top)
Procedure:
1. Cut a piece of plywood 50 cm x 75 cm for the main board.
2. From the remaining piece of plywood cut:
part A - 3 strips 5 cm x 75 cm
part B - 2 strips 5 cm x 50 cm
part C - 2 strips 2 cm x 42 cm
part E - 1 piece 20 cm x 50 cm
3. Attach A and B at the board's sides with nails to form an edge around the board, and to divide it up the middle. See Figure 12.
4. Attach the two strip C on the bottom of the board to form parallel strips, then nail part D, the 2 cm x 2 cm x 5 cm wood pieces at each end so the board will stay on the triangle.
5. Label end board (part E) with text and nail into place, as in Fig. 12.
6. Hammer many nails approximately 1 cm into one side of the divider and only a few nails on the other side.
Figure 12
WHY DO WE NEED TREE ON HILLSIDES?


7. Paint the board green.
(Optional: Add streaks of brown paint to the side with few nails to look like rain washing soil away. Glue balls of cotton colored green to the nails to look more like trees; Cover the top of the board with glass or plastic to protect marbles and keep out dust.)
8. Place the tilt-board on the triangle, on a surface approximately 75 cm high.
Text for end board:
TREES HOLD WATER ON HILLSIDES
Marbles = Water
Nails = Trees
Text for questions to be placed (on cards) next to exhibit:
- IF THE WATER RUNS OFF QUICKLY DOES IT CARRY AWAY TOPSOIL AND LEAVE DEEP GULLIES?
- IF THE WATER SINKS INTO THE GROUND DOES IT HELP KEEP THE SPRINGS RUNNING AND THE WELLS FULL?
- TREES ON SLOPES ACT AS SMALL DAMS. HAVE YOU EVER NOTICED THE WAY SOIL WASHING DOWNHILL IS CAUGHT BY TREE TRUNKS?
Other ways to make the board tilt:
1. Use two v-notched blocks, 10 cm high, in each of which pivots a section of bamboo nailed to a piece of wood secured to the bottom of the main board.


2. Nail 4 cm x 4 cm angle brackets, with the corners facing up, to an 8 cm x 10 cm wood block 40 cm long. Place tilt-board groove (part C) over angle.

3. Onto an 8 cm x 10 cm x 40 cm block of wood, nail off-center a piece 2 cm x 2 cm x 40 cm. Against this piece lean a length 2 cm x 4 cm x 40 cm and nail also to the block. Place tilt board groove (Part C) over angle.

Exhibit: Animal Skin Guessing Game
This is a battery-powered game board in which the visitor tries to match an animal skin sample (which he can touch) to a picture of the appropriate animal. This is done by touching battery charged wires to the metal bolt placed next to the skin sample and the metal bolt placed next to the correct picture of the animal. When the wires touch the correctly matched bolts, a small light bulb will turn on.
You can use these directions to develop any kind of matching game.


Materials needed:
- 1 wooden board 60 cm x 80 cm (painted, whitewashed if desired) OR 1 heavy cardboard 60 cm x 80 cm
- 8 wooden squares 15 cm x 15 cm OR 8 heavy cardboard squares 15 cm x 15 cm
- 4 animal skin samples
- 4 pictures of animals corresponding to skins (sketches, photographs)
- 8 heavy metal bolts and nuts
- 24 metal washers
- 6 meters (approx.) electrical wiring
- flashlight with batteries, light bulb
- 2 screw hooks
- paint, varnish, whitewash (optional)
- screws (optional)
- glue or wire
- a drill
Procedure:
1. Prepare wood or cardboard as necessary
2. Glue or wire prepared skin samples to 4 of the 15 cm x 15 cm squares.
3. Glue pictures of animals to 4 of the 15 cm x 15 cm squares.
4. Screw (wood) or glue (cardboard) the four skin samples down one side of the board as illustrated.
5. Screw (wood) or glue (cardboard) the four animal pictures down the other side of the board. Be sure the pictures are not in the same order as the skins.
6. Drill holes for bolts next to each skin sample and picture, as illustrated.
7. Place a bolt and washer through each hole on the front of the board.
8, Place 2 washers, then a nut on each bolt at the back of the board.
9. Draw a line on the back of the board from the bolt of each skin sample to the bolt of its matching animal picture. Measure the length of each line.
10. Cut a length of electrical wire, plus 5 cm for each of these four measurements.
11. Peel back 2.5 cm of the rubber coating on each end of each of the four lengths of electrical wire, to leave metal wire bare.
12. Following the drawn lines on the back of the board, wrap the exposed end of the wire between the washers of each corresponding bolt (see back view illustration).
13. Take approximately 90 cm of electrical wire and wrap 2.5 cm of bare wire on the metal spring at the base of the flashlight.
14. Take approximately 90 cm of electrical wire and wrap 2.5 cm of bare wire on the metal sheath of the light bulb.
15. Hang the flashlight with wire on 2 screw hooks at the bottom of the board.
16. Take the free ends of the 2 flashlight wires and touch one to each of a wired pair of bolts The light bulb will go on.
Note: You can assemble flashlight parts batteries, lightbulb wire spring -tightly in a wooden box to give the same result.
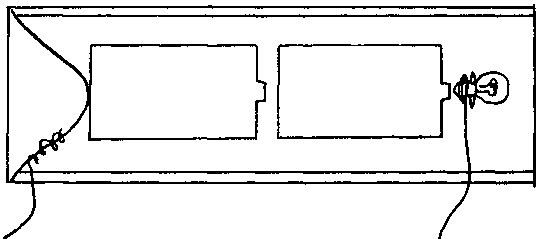

Exhibit: Bird Beaks
This exhibit is designed to show the relationship between a bird's beak and the food that he eats.

This exhibit can also be displayed horizontally on the board.
|
Suggested types of beaks: |
Adaptation for: |
|
1. Hooked |
tearing prey |
|
2. Short, thick, strong |
cracking seeds |
|
3 Broad, shovel-like |
scooping and straining |
|
4. Awl-like |
boring in wood |
|
5. Crossed |
extracting cone seeds |
|
6. Slender, fine |
extracting nectar |
|
7 Long, stout |
Catching marine life |
|
8. Slender, sensitive |
probing in mud or water |
|
9. Short, wide, weak |
catching insects |
|
10. Pointed, bristly |
catching insects |
Materials needed:
- Plywood board 75 cm x 150 cm (painted, varnished, if desired) OR 1 cardboard 75 cm x 150 cm OR 1 flannelboard 75 cm x 150 cm
Note: For horizontal use, two boards 75 cm x 75 cm can be used and hinged together with hinges, leather or cloth
- 16 wooden squares 10 cm x 10 cm (painted or varnished, if desired) OR 16 cardboard squares 10 cm x 10 cm OR 16 paper squares 10 cm x 10 cm
- 8 pictures of bird beaks (sketches or photographs)
- 8 samples of food eaten by the 8 birds OR pictures of food eaten by the 8 birds
- glue or paste
- screws (optional)
- wire (optional)
- paint/varnish (optional)
Procedure:
1. Prepare wood, cardboard or flannel board as necessary.
2. Glue bird beak pictures to 8 of the 10 cm x 10 cm squares. (Varnish if desired)
3. Glue pictures of wire samples of the birds' food to 8 of the 10 cm x 10 cm squares.
4. Label 8 of the 5 cm x 10 cm rectangles with the use adaptation of the beaks.
5. Label 8 of the 5 cm x 10 cm rectangles with the beak descriptions.
6. Attach squares and rectangles to board, as illustrated, with screws for wood, with glue for cardboard or paper.
Notes:
This kind of exhibit can be adapted for kinds of teeth and food, skin coverings and camouflage, etc.
This kind of information can be adapted to a batter-powered electric game

Exhibit: Live Animal Exhibits
See Appendix F for suggestions for housing and displaying live animals.
Exhibit: Plant Exhibit - A Terrarium
A terrarium for plants is generally a small closed habitat in which a number of moisture-loving plants have been planted in a glass container with a close-fitting cover. The moisture which the plants get from their soil and give off through their leaves, is captured in the closed container and falls back onto the soil. Watering, therefore, is not needed often. If the terrarium becomes too moist and fungus begins to grow, the cover is removed for a day or two until the excess moisture evaporates.
(See also Appendix F. Terrariums).
Materials Needed:
- A glass container with a close-fitting cover (Large jar, glass bowl with sheet of glass for cover, glass box
- A soil mixture of fine gravel and rich soil or fine leaf mold. Some crushed charcoal can be added to the mixture (optional).
- A selection of moisture-loving plants such as ferns, mosses, venus flytrap, or others from your area. (The number and size of your plants will depend on the size of the container.)
Procedure:
1. Put 5 cm or more of soil on the container bottom.
2. If the container is large, push the soil into hills and valleys.
3. Plant the plants you have selected. First plant those with long roots, then ferns, and last the mosses on the surface.
4. Sprinkle everything with water until the terrarium is moist but not soggy.
5. Cover tightly.
6. Place away from direct sunlight.

Collections of living and non-living things from your area can be a very effective way to show the variety of your environment. They can be used as exhibits or as school study projects.
Visitors who look at the collection and read its interpretive labels receive a lot of specialized information assembled in one place. For example, they may see the many kinds of insects that share the environment; they learn what these insects eat, and what eats them.
The students who do the assembling of a collection learn even more. They learn the exact habitat of the specimen, how to preserve it, and how to label it with the information that is important about it.
Remember that collections made in a region should always remain there for the benefit and education of others.
Suggestions for a number of collections are included here.
Insect Collections
Insect collections can be the most successful because of the great variety and distribution that exists in the insect and arachnid (spider and scorpion) world. They are relatively easy to catch, kill and display. To make an insect collection you will need:
- a collecting net
- a jar with a screw top
- absorbent cotton
- carbon tetrachloride (cleaning fluid)
- long (non-rusting) straight pins
- paper strips
- box, cardboard sheets, heavy cards
- mothballs or crystals of paradichloride of benzene
Materials needed for a collecting net:
- 75-85 cm sturdy wire (for ring) OR 2 wire coat hangers OR 75-85 cm flexible bamboo
- 75 cm stick (for handle) OR 7 5 cm bamboo pole
- mosquito netting 60 cm x 70 cm approx. (for bag) OR nylon neeting OR light cloth
- needle and thread (to sew bag) fine wire (to attach ring to pole) OR raffia OR string
Procedure:
1. Make a ring of the wire, coat hangers or bamboo, and wire or tie the ring closed. (If you are using coat hangers, wire or tie them together. If you are using bamboo, wrap another strip of flexible bamboo around it to make it stronger.)

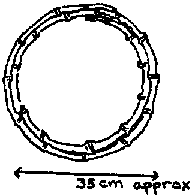
2. Attach stick or pole to the ring by tying it with wire, raffia, string or flexible bamboo, (This is easier if you have notched the stick 3 cm from the end you are attaching to the ring.)
3. Cut the cloth as shown and sew it along the cut side, into a bag.


4. Sew the bag top over the ring very securely. Check for any place not sewn tightly and sew again.


5. Practice swinging the net and twisting your wrist to close off the top of the net until you can do it quickly.
Materials needed for an Insect-killing Jar:
- 1 wide-mouthed jar with a tight cover
- a large piece of absorbent cotton
- a circle of cardboard 2 cm larger than the diameter of the jar
- carbon tetrachloride (cleaning fluid)
Procedure:
1. Place cotton on bottom of jar.
2. Cut into the cardboard about 2.5 cm toward the center at intervals around the circle of cardboard. Punch several holes in the cardboard.
3. Fold down the cut edges of the cardboard.
4. Place the cardboard in the jar over the cotton.
5. When you are ready to collect insects soak the cotton with carbon tetrachloride.


When you have caught an insect in your net, shake him to the tip of the bag and quickly close the insect and the tip of the net in the jar. When the insect is stunned, remove him from the net and drop him in the jar and cover it tightly. The insect should be dead in about 15 minutes.
Materials needed to dry insects:
- long, non-rusting pins
- strips of paper 1 cm wide (for winged insects)
- 3 pieces of cardboard approx. 10 cm x 15 cm
Procedure:
1. Make a drying board by gluing the three pieces of cardboard as illustrated.

2. Place insect so its body lies in the slot.
3. Push a pin through the insect's thorax (top section of the body).
4. If it is a winged insect, lay a strip of paper over each set of wings and pin the strips to the cardboard, so that the wings will dry flat.
5. If it is a non-winged insect, arrange the legs and pincers neatly in an appropriate position.
6. When the insect is dry (the length of time depends on the climate) use the pin in the thorax to lift the insect off the drying board.
7. It can now be mounted on a mounting card, or in a box (such as a cigar box, biscuit tin) lined with cardboard to push the insects' pins into.
8. Make a label identifying each of your insects (also the date and place of capture if you like).
You may have a problem with live insects eating your specimens. To prevent this, place mothballs or crystals of paradichloride of benzene in your display box. You may also keep all display boxes on a table whose legs stand on small cans in larger cans of oil, disinfectant, or water with a layer of oil on top. This will prevent ants and other insects from climbing the table legs.

Suggestions for insect collections:
1. A general collection of insects found in the area.
2. A collection of all butterflies (or all spiders, or all beetles) found in the area.
3. A collection of different stages in the life of an insect: egg, caterpillar, cocoon, butterfly.
4. A collection of insects with what they eat.
Plant Collections
Plants offer the opportunity to study the close relationship of sun to the soil and to plant growth. Even in the dryest regions this can be shown by observing the water storage capabilities of the relatively few plants. Where plant growth is heavy and varied, collections can be most successful.
1. Make a collection of all tree leaves in your area and label them. Do the same for low-growing shrubs, climbing vines. (Labels can give the name and the kind of growing condition each plant prefers).
2. Make a collection of the wild flowers in your area.
3. Make a collection of the flower, seed, fruit and leaf of some trees in your area.
4. Make a collection of seeds from various plants (grasses, fruits) that you eat.
5. Make a collection of the epiphytes and/or parasites (see Glossary) in your area.
6. Make a collection of plants used for medicine in your area, and label them with their uses. Consult with local medical personnel for suggestions.
Suggestions:
- To press leaves or flowers flat, place them in layers in many thicknesses of newspaper (or blotters, or other soft absorbent material) and weight them down with boards and stones, or some other flat weight, until completely dry.
- Mount them with a drop of glue on cards or card board. Label them with their name and special information.
- Group similar plant types together as you mount them.
Bird Collections
Collections about birds should be done carefully so as not to endanger your local bird population. Nests should not be collected until you see that birds are no longer using it. Eggs should not be removed from nests.
1. Make a nest collection. Study the nests closely to see what they are made of. Do insects live in the nests? Identify the bird builder, and label the nests with the name of the bird and where it was built.
2. Make a feather collection from dropped feathers. Identify the birds they come from.
3. Although egg collections are always interesting, they mean that birds were prevented from hatching. However, sometimes you can find broken egg shells which have been pushed out of the nest.
4. Draw pictures of birds in your area with a picture of the food each eats.
5. Study the bird beak types and list the birds in your area with each type of beak, and what it eats.
6. Have several people "collect" bird calls. Each one can learn one different bird call.
Rock Collections
You may collect rocks for their color or interesting patterns, or you may try to identify what kind they are. Crack stones open to see a fresh surface, or to see if there are crystals inside.
There are three main groups of rocks, based on how they were formed:
1. Igneous, formed by heat:
granite - grey or red speckled
basalt - greenish black, solidified lava
obsidian - black, green or brown volcanic glass
scoria - black, red, grey,
cinder-like
pumice - white, grey, porous
2. Sedimentary, formed by great pressure of water-deposited sediment:
limestone - whitish, may contain fossils; is often cave material
sandstone - red or grey, contains sand particles
shale- grey, black, red, soft layered and
clay-like
conglomerate - pebbles bound together
3. Metamorphic, formed by pressure and heat:
gneiss - granite changed by pressure
marble - limestone changed by heat
quartzite - sandstone changed by heat
slate - shale changed by heat
Small rocks can be glued to cards, cardboard, or into boxes for display. Make labels which tell something about them. Larger rocks can be labeled and used on a nature trail, in a garden, or for individual exhibit.
Animal Collections
Collections for animal study (mammals, reptiles, amphibians) are more difficult than other kinds because of the size and perishability of animals. Useful collections, however, can be made.
You should also be aware that in your area, a collection of this sort may present problems of a culturally sensitive nature. This is something which you will have to verify before beginning this kind of collection.
1. Collect bones, antlers or skulls which you find in wild areas. Bones can be cleaned with an old toothbrush, bleach and hydrogen peroxide. Try to identify the animal the bones come from. Try to identify the part of the body the bones come from. Try to feel the same bone in your own body.
2. The sea shore may provide you with a good shellfish collection. You can easily remove the animal if it is still inside, by boiling the shell. Soft bodied sea animals can be preserved in a 10% formalin solution.
3. You may be able to find the skins which snakes have shed as they grow larger, for a collection.
4. Roadsides may provide dead animals which have been hit by vehicles. You can use these specimens to stuff, for skeletal study, or for fur/skin samples. Skins which have been scraped clean of all tissue can be rubbed with salt, or salt and lemon juice as preservatives. In the tropics, a skeleton can be cleaned by ants and beetles. Place it away from human habitation where it can be discovered by an ant colony. It will soon be perfectly clean.
If specimen bottles are available, mammals can be preserved in 70% alcohol or a 4% formalin solution (one part formalin to 25 parts water).
Frogs, toads, salamanders and smooth-skinned lizards can be preserved in jars full of a 6% formalin solution (one part formalin to 16 parts water). Other lizards can be preserved in a 10% formalin solution (one part formalin to 10 parts water).
A visual aid is any of a variety of graphic materials used to help communicate an idea visually. Visual aids can be used anywhere to present information of use and interest to many people in a simple and attractive manner.
A number of visual aids are described here. They can be used to help present any ideas you may want to adapt from this manual.
Another kind of visual aid is drama. Presentation by live players, or by shadow, hand, or finger puppets, are often immensely successful in communicating new ideas to both children and adults, You may wish to consider drama as an educational tool.
Enlarging
To enlarge graphic material such as a picture or map for visual aid purposes, follow the steps outlined here, and study the illustration on P. 105).
1. With a pencil and ruler, draw a measured grid (2 cm for example) over the picture or map you want to enarge.
OR
Make a transparent grid which can be used again and again, by drawing a measured grid with a dark marking pen on a sheet of clear plastic. Lay this over the picture to be enlarged.
OR
Make a transparent grid by marking off a measured grid with a stylus or knife on a sheet of wax paper. Lay this over the picture to be enlarged.
2. Number the squares across the top and down one side of the picture to be enlarged, or on your transparent grid.
3. Take a sheet of paper the size you want the enlarged picture to be.
4. If you want the enlarged picture three times larger than the original, draw, with a pencil, a measured grid three times larger than the grid on the original. For example, a 2 cm grid on the original would be increased to 6 cm (2 cm x 3 cm) on the larger paper.
5. Number the squares across and down as before.
6. Place the grid paper next to the grid picture.
7. Starting with any square on the grid paper, draw into that square what is in the corresponding square on the grid picture. (Use pencil so you can erase mistakes).
8. Work around the whole picture until you return to the starting point.
9. Check to see that you have included all details you wish to reproduce.
10. Retrace your enlarged drawing with ink, crayon, paint, as desired.
11. Erase the grid lines, if desired.

Paste
A simple paste can be made by using one part flour to 3/4 part water. Dissolve some salt or boric acid in the water before adding the flour, to discourage insects from eating the glued materials (optional). Mix until smooth, with no lumps. Keep in a tightly covered jar. (You can also use one part flour to one part water for a more liquid paste).
Cooked Paste
Use 1/2 part flour to 2 parts water. Add water slowly to flour, mixing till smooth with no lumps. Cook over gentle fire until it becomes clear and thick. Keep in a tightly covered jar. Cooked paste will keep longer than uncooked paste.
Pocked Charts
This visual aid is good for any activity where you need to classify, match or put items in sequence. The students or visitors can manipulate the drawings, numbers, or words written on the cards. Pocket charts can be made in either of the two ways described below:
A.1. Take a large piece of poster board or
cardboard.
2. Cut strips of paper (thinner than cardboard) at least 5 cm wide and the same width as the board.
3. Fold these strips in half lengthwise, into a v-shape.
4. With the folded edge toward the bottom of the board, tape, staple or paste (see above) half of the strip to the board 10 cm from the top, (The fold should be at the bottom of the strip.)
5. Tape, staple or paste the open ends of the v-shaped strip to the edges of the board, forming a long pocket.
6. Repeat strips at 15 cm intervals down the board.
7. Cut cards from paper, approximately 10 cm x 13 cm. Remember when you are planning the card that about 2.5 cm at the bottom of the card will be in the pocket.

B. 1. Take a large sheet of poster board (or heavy paper) which can be folded.
2. Draw a solid line across the board 15 cm from the top.
3. Five centimeters 5 cm below the solid line draw a dotted line across the board.
4. Continue marking in the same way down the length of the paper.

5. Fold the paper along the dotted lines, and place the dotted edge against the solid line directly above it.
6. Fold it tightly and secure the fold at the edges with staples or glue. These folds form the pockets.
7. Cut cards from paper, approximately 10 cm x 13 cm. Remember when you are planning the card that about 2.5 cm at the bottom of the card will be in the pocket.

Flannel Board
A flannel board is a visual aid which utilizes a stiff board covered with a piece of flannel (or other material with a rough surface) and a number of paper figures which have had sand or sandpaper pasted to one side. The sand or sandpaper will stick lightly to the rough surface of the flannel, so that you can place your figures anywhere on the board just by pressing them against the surface. The figures can be pulled off and rearranged equally easily.
Materials needed for board:
- 1 stiff board (wood, cardboard, etc.) any size desired
- 1 piece of flannel (or other rough-surfaced material) large enough to cover the board plus 5 extra centimeters on each side.
- staples, tacks or paste.
Procedure:
1. Cover the board with the material and turn it over.
2. Fold the extra material onto the back and staple, tack or paste it tightly to the back of the board,
Materials needed for figures:
- figures cut from white or colored paper OR photographs or drawings pasted onto paper
- paste
- sand or small pieces of sandpaper (2 per figure)
Procedure:
1. Spread paste on back of figures
2. While paste is wet, sprinkle sand over the paste. OR
3. Paste a piece of sandpaper at the top and at the bottom of each figure.

Flip Chart
A flip chart is basically a series of stiff boards with simple pictures, arranged in sequential order so that they tell a story. In a conservation center a flip chart might illustrate a food chain, the stages of development of a butterfly or a tadpole, or it might tell the story of the cycle of a disease which is prevalent in the region.
Materials needed:
- 4 or more stiff boards (posterboard, cardboard, etc) approximately 50 cm x 70 cm
- illustrations cut from magazines (optional)
- wire or string or raffia
- 4 or more thin transparent plastic sheets (optional)
Procedure:
1. Arrange illustrations to tell your story and paste them on boards.
OR
Draw your story illustrations directly on the boards.
2. Cover each board with a plastic sheet (optional)
3. Punch a hole in the top left and top right corner of each board, 3 cm from each edge.
4. Tie a wire, string or raffia through all the holes on the left side. Do the same on the right side. Make the loop large enough so that each board can be turned (flipped) over and behind the following board.

The Life Pyramid illustrated here can be used as a poster to explain how a food chain works.
At the base of the pyramid are the plants which need only sun and soil to grow. Plants are the "producers."
Many kinds of insects are plant-eaters. The grasshoppers shown here are called "first order consumers" because they feed directly on the "producers."
Higher up the pyramid are frogs ("second order consumers") who eat the grasshoppers. Notice that there are more grasshoppers than frogs, This is because one frog will eat many insects.
Frogs, which eat the grasshoppers, are in turn eaten by snakes, who are the "third order consumers". Again, one snake will eat (consume) several frogs.
At the top of this pyramid is the hawk. He represents the "fourth order consumer", a meat eater (of snakes, in this illustration) who generally is not eaten by another animal,
Think of other food chains, Think of food chains which overlap each other. Overlapping food chains are food webs. Think about what would happen if there is an increase or decrease in one of the levels of the food chain.

The world we live in is a world of interdependence. Animals and plants live together because they need each other. People are part of this system because we depend on plants and animals to live. We depend on non-living things like the sun and soil and water to grow our plants. We depend on the animals that eat plants to give us meat.
People must take care of all the things that we depend on so that they can continue to give us what we need. This care is called conservation. We must conserve our ecosystem. All living and nonliving things acting together make our ecosystem.
If we understand what makes our ecosystem work, we will be able to conserve it better.

1. The amount of air, water and land on earth is fixed. There will never be any more.
2. The sun is the basic source (of energy) of all life.
3. Plants capture sunlight and use it to make the food and oxygen that animals/people need to live.
4. Some animals eat plants. Some animals eat plant-eating animals. Some animals eat both plants and animals.
5. Any group of individuals of the same species in a certain place at a given moment is a population; there can be a mouse population, a banana tree population, a human population.
6. All plant populations, animal populations and non-living things, interacting with each other in a given area form an ecosystem.
7. There are cycles in an ecosystem such as the food cycle (food chain), water cycle, the soil cycle.
8. Natural disaster, such as flood, drought and fire can damage the ecosystem. People can damage the ecosystem by pollution, fire, land stripping, over-hunting.

A pair of field mice can produce 6 baby mice 17 times a year. The young are soon ready to raise their own families. In just a few months, two mice could become millions. So why aren't we overrun with mice? The answer to that question comes from biologists who study POPULATIONS of living things, What does the word "population" mean? It usually means the number of people living in a certain place at a certain time. For example, in 1970, there were about 3.5 billion people living on the earth. That was the world's human population. But the term "population" can also be applied to other living things - the number of mice in a meadow, of ducks on a pond, of trees in a forest, or fish in a lake.
Each kind of living thing, or species, has a natural ability to increase its numbers. This ability is called its biotic potential. You can think of this as its "power to multiply." Large animals, such as elephants, condors and humans, have a low biotic potential. They produce just a few young during a lifetime.
Many smaller animals and most plants have a high biotic potential. A tree may produce thousands of seeds a year. Insects and frogs lay hundreds of eggs. An oyster may release 100 million eggs. Any species of animal with a high biotic potential could cover the earth in a short time. But we are not overrun with mice, frogs or flies. Something keeps these animals from overrunning the earth. This something is the environment - the things that make up the animals' surroundings. Many animals are eaten by other animals. Others die of disease. Some die because of bad weather. Many die from lack of food.
When food, space or mates are scarce, there is often competition among animals. You may have seen animals fighting over food or mates. Over a period of time, those who are not successful either die or do not reproduce. You may see tree seedlings on the forest floor competing with each other for sunlight, minerals and water. Only a few will survive to become adult trees.
Some animal populations stop growing even when the animals have plenty of food and are safe from enemies. In populations of mammals such as mice, their numbers may stop increasing when the animals feel crowded. Scientists have observed laboratory mice crowded in small cages. The crowding seems to produce a nervous conditions called stress. The stress causes changes within the mammals' bodies. The mammals produce fewer young. Their behavior also changes. They may kill or neglect the young. They may attack one another...The big difference between people and mice or oysters is that people discovered ways of avoiding some of these natural controls. People have killed or chased away large predators that once preyed on them. Today they have discovered medicines that cure deadly diseases. Most important, they have learned to greatly increase their food supply through farming.
By controlling their environment, people have caused a population explosion that is now helping to create new problems. People are polluting the environment in which they and all animals and plants must live. They are now finding it hard to produce enough food to keep up with population growth. People are beginning to see that the earth's resources are limited...
Reprinted from RANGER RICK'S NATURE MAGAZINE, April 1973
by permission of the National Wildlife Federation,
© 1973


1. Water on earth evaporates into the air, collects into clouds, and returns as rain.
Clouds form and rain falls most often where there are lakes, oceans and rivers whose water evaporates. Plants also provide evaporation. They take moisture from the soil with their roots. The moisture rises through the plant and evaporates through the leaves into the air. Rain returns it to the soil. There is more rain where many plants grow, and many plants can grow where there is rain.

2. SOIL is made up of three main layers. The deepest layer is the "parent" layer of rock. Above that is a layer of rock which is in the process of breaking up by water and mineral action. Rain water seeps into cracks carrying minerals from the surface of the water, freezes and expands, which breaks the rocks. Above this is a thinner layer of soil and fine gravel which is the topsoil. The surface of the topsoil is often covered with a layer of humus. Humus is the mixture of decaying organic matter (dead leaves, trees, insects, animals) which enriches the topsoil with nutrients. Rain water, earthworms, insects and burrowing animals help to mix the humus into the topsoil. If the thin topsoil is not held in place with plant roots, it can be washed away by water, or blown away by wind. This is called erosion. Surface rocks are broken down by slow stages. Lichens start to grow on the face of the rocks, then mosses. Their roots begin to push tiny bits of rock loose from the surface and to make cracks where wind-blown soil can accumulate. As small plants begin to grow in these cracks, their roots widen the cracks. At each stage the rock is pushed, and blown, and worn by water into smaller and smaller pieces.

3. Our AIR is a special combination of gases which all living things need to live. About 78% of the air in our atmosphere is nitrogen gas and about 21% is oxygen gas. The remaining one percent is made up of small amounts of other gases, of which carbon dioxide is the most important. When our air contains smoke, chemicals like pesticides, and car exhaust fumes, it is harmful for us to breathe it. A wind may blow these harmful things away from us, but they stay in the air. Plants give off a continuous supply of oxygen for our air.
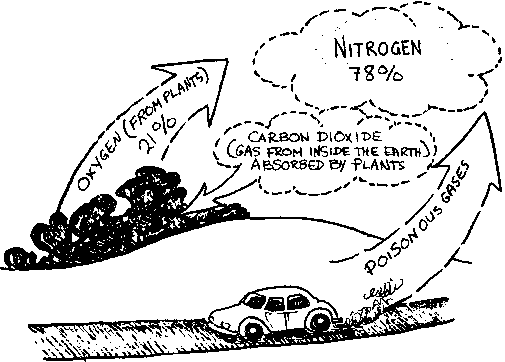
1. Collect samples of soil from different places in your area and put them in separate containers. Try to get samples of soil containing sand, clay, gravel, loam, humus, etc. Examine the soil closely; feel it; see what it is made of.
2. Remove both ends of as many tin cans (or hollow lengths of wide bamboo) as you have soil samples for. Tie cloth over one end and fill each to within 8 cm of the top with a different soil. Place a dish under each can. Pour measured amounts of water into each can until the water begins to run through. See which kind of soil holds the most water.
3. Plant a bean or other fast-growing seed in each type of soil sample. Water each the same amount and give the same amount of light. See in which soil the seed sprouts first. Then see in which soil the seed continues to grow best.
4. Soil contains air. Put some soil in a jar (or other glass container) and slowly pour water over it. Air bubbles will rise from the soil.

5. Soil usually contains some water. Place some freshly dug soil in a screw-top jar upside down in the sun. You should see water condensation forming if the soil has any water in it.
6. To see how soil is formed by broken and disintegrating rocks:
a. Heat some rocks in a fire till very hot. Pour cold water over them. The rocks should crack or break as they do naturally with changes of temperature.
b. Find soft rocks such as limestone, sandstone or shale. Using a hard stone or hammer, crush them into small particles. (Wrap them in a piece of cloth to prevent flying rock particles.) These rocks would eventually break up through natural action, but much more slowly than by hammering.
c. Take a field trip to search for rocks on which lichen is growing (the first step of decomposition), moss is growing (the second step), plants or small trees are growing (the next step). Feel how the lichen makes the rock surface sandy. See where the moss roots have taken hold. See how plant roots can make a crack larger.

SOIL EROSION STUDIES
Materials needed for two soil study boxes:
- 6 pieces of wood 12 cm x 40 cm
- 2 pieces of wood 13 cm x 13 cm
- 2 piece of fine screen 14 cm x 14 cm
OR
- 1 piece of bamboo 40 cm long by 15 cm diameter with a node at one end
- 2 pieces of fine screen 18 cm x 18 cm
Procedure:
1. Take 3 pieces of wood 12 cm x 40 cm and nail them together lengthwise.
2. Add one piece 13 cm x 13 cm to one open end.
3. Attach one piece of screening to the other end,
OR
1. Split the bamboo in half lengthwise.
2. Clean out any center nodes,
3. Attach wire screening to the open ends.
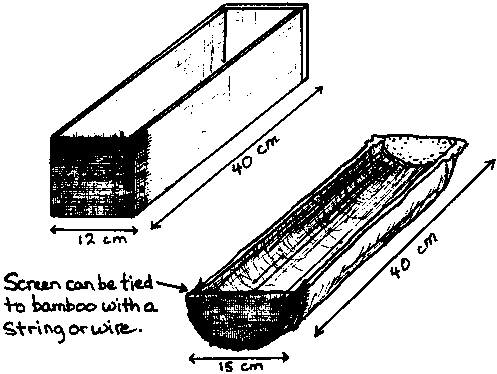
Make a sprinkling can by punching holes in the bottom of a large can with a hammer and small nail.

4. Fill one box with loose soil, the other with tightly packed soil. Tilt the boxes so the screened ends are lower, and place containers under the lower ends to catch run-off water.

Sprinkle with water from the sprinkling can and watch to see which soil washes away most, and what the water that is collected looks like.
5. Smooth loosely-packed soil in each box and in one box make three or four grooves in the surface with a stick, running the length of the box; in the other, make grooves across the box every 6-8 cm, Tilt the boxes before;

Sprinkle each box heavily with the sprinkling can. Note how water flowing downhill follows the grooves and makes them deeper. Note how grooves cut against the flow of water helps keep the soil from washing away. Note how much soil was washed from each box into the catch containers.
6. Sprinkle loosely-packed soil in each tilted box with water until the water washes its own grooves into the soil. With little sticks and stones, block the grooves at intervals and sprinkle again. How do obstacles help prevent erosion?
7. In one box, seed the surface generously with some grass or other ground-cover seed. Give the box water and light for the seeds to grow. When the grass is thick and about 2.6 cm high, tilt the box it is in, and the second box which has just soil, as before.

Sprinkle heavily with the sprinkling can. Note how the grass prevents the water from moving the soil down and into the catch container. (A piece of sod placed on the soil in one box could demonstrate this also.)
A class project could be to locate a place in the community where water erosion has taken place. Plan and carry out ways which could prevent further erosion; plan ways to up-grade or restore the soil (such as filling with gravel or stones, channeling the water in another direction, planting ground cover).
1. Water evaporation - how water gets into the air
a. Place some water over a fire in a container, preferably with a spout. Otherwise, cover a pot with a glazed or metal cover. When the water is boiling, note the condensed water coming from the spout in a cloud. Place a lighted candle in the steam. What happens? Why? If you are using covered pot, move the cover a little bit to the side. See the cloud of condensed water rush out. Rub your fingers together in the cloud (but not too close to the pot or you will be burned). What do you feel? What is happening to the water? Where does it go?
b. Take a piece of cloth and wet it. Hang it up. Where does the water go?
c. Place a clear plastic bag (with no holes) over a leaf of a house or garden plant and tie the bag around the stem. Observe it a few hours later. There should be condensation on the bag. Where does it come from? How does water get in the air from plants?
2. Water condensation - how water comes out of the air: Moisture condenses on cool surfaces.
a. If you heated water for evaporation in a container with a glazed or metal cover, lift the lid and turn it over. What do you see? The hot water evaporates and rises till it touches the cooler surface of the lid and changes into drops of water.
b. Take two glasses, the mouth of one smaller than the base of the other. Heat water almost to boiling. Fill 1/2 of the glass with the small mouth. Rotate the glass so as to wet the sides up to the rim. Put very cold water in the other glass and place it on top of the glass with hot water. Water will evaporate from the hot water, condense against the cool bottom of the upper glass, and fall as drops back into the evaporating water. This is a miniature water cycle. On the earth, warmer air rises when it meets colder air, condenses and falls back to earth as rain.

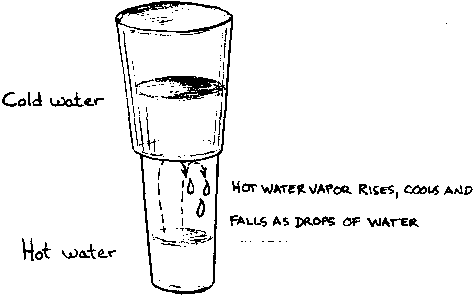
c. Observe a cold beverage can or glass of liquid with ice in it. The moisture on the sides is caused by condensation when the air meets a cold surface. Water is all around us in the air.
3. Filtered water
Water is often clouded with dirt, algae and other foreign matter. While it is necessary to boil water to remove the invisible impurities in it, filtering will remove the visible impurities. To make a demonstration filter, take an unpainted clay pot with a 1 cm hole in the bottom. Plug the hole with some absorbent cotton. Add a few inches of sand or sand alternated with a layer of powdered charcoal. Fill the rest of the pot with muddy water (made by mixing water with a little soil). Or take cloudy water from a pond or lake. Place the pot over a glass or jar to catch the filtered water that drips out. Why is it no longer cloudy?

4. A Solar Still
Materials needed:
- 1 plastic sheet 1.8 meters x 1.8 meters
- a bucket (or other container)
- a stone (approximately 10 cm in diameter)
- a plastic tube 1.5 meters long (optional)
- a shovel
Procedure:
1. Pick a sunny spot and dig a cone-shaped hole 50 cm deep and 90 cm across the top.
2. Put the collecting container in the center of the hole.
3. Place the tube in the container and along the side of the hole and out the top.
4. Stretch the plastic sheet over the hole and weight the edges down with the dirt you dug from the hole.
5. Place the stone in the middle of the sheet so that the sheet hangs down to within 15 cm of the container.
6. Be sure the sheet does not touch the sides of the hole at any point.
7. Secure the edges of the sheet with more dirt. Wait several hours (preferably overnight).
8. Suck on the tube. You should get water through it.

The solar still works on sun power. The heat of the sun evaporates moisture from the soil. The moisture condenses on the plastic sheet and runs down the sheet to the lowest point under the rock and drips into the container. All but the driest soil contains some water which can be collected this way. Try this experiment on a beach near the ocean. You will collect fresh water.
1. Make drainage holes in two small containers and fill with soil. Plant two bean seeds in each. Give the two containers equal water and light. If two seeds sprout in each container, carefully pull out the smaller one so that there is a single strong seedling in each container. When the seedlings are 8-10 cm tall, move one container into a completely dark place, and continue to water it as the other. What happens after a few days? What does the seedling need to be healthy? Can the seedling recover if given sunlight again? Do all plants need direct sun? (NO) Do all plants need light? (YES)
2. List the foods that people usually eat in your region. Identify the foods that come from plants. Identify the foods that come from animals which eat plants. Identify the foods that come from animals which eat other animals, or both plants and animals, Why do we need the sun for our food?
3. Identify the food that various animals eat. Examples:
|
worms |
plants (leaves, decaying matter) |
|
crickets |
plants |
|
spiders |
animals (insects) |
|
frogs |
animals (insects) |
|
fish |
plants (algae) eaten by some, animals (insects or other fish) eaten by others |
|
turtles |
plants and animals (insects) |
|
chickens |
plants (seeds), animals (insects) |
|
parakeets |
plants (seeds, fruit) |
|
rabbits |
plants |
|
cows |
plants (grass, leaves) |
|
vultures |
animals (carrion) |
|
tigers |
animals |
4. Make a food chain on the animals in your region. Show how the sun's energy is at the beginning of the chain (cycle).
1. Grow roots from different parts of plants:
Put a layer of sand 5 cm deep in a box about 40 cm long. Water it thoroughly and put it out of direct sunlight. Plant some of the following in the sand:
- different bulbs buried with the root end down
- an onion with the root end in the sand
- a section of potato with the "eye"
- a cut from a geranium stem
- a section of sugar cane stem with its joint buried in the sand
- a section of bamboo with its joint buried in the sand
- a large bean seed
After a period of root-growing, pull up the plant and examine the roots. Can you see how roots hold soil in place as a protection against erosion?

2. Grow leaves from different parts of plants:
a. Take a carrot, beet, turnip, radish or other root plant with top leaves. Cut away all but a small portion of the top of the root and remove old leaves. Put the top in a shallow dish with water and some pebbles for support. New leaves will begin to form and grow.
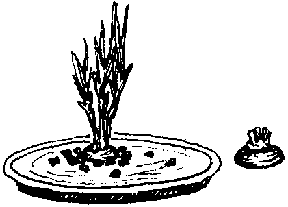
b. Remove the top of a pineapple with all the leaves and put it in a dish of shallow water. The leaves will continue to grow.
3. Grow a plant from a seed:
Push three toothpicks or matches into an avocado pit around the middle and place the flat (less pointed) end in a jar or glass of water. Be very patient. After a long while roots will begin to grow, then a stem and leaves. When the plant is well formed it can be potted.

4. Study a fruit-bearing plant:
Identify a plant whose flowers turn to fruit. Follow the process through the whole cycle. Watch the buds and see which insects or animals eat them. How many buds will live to flower? When the flowers open see which insects come for nectar; watch how the pollen is collected on the insect as it goes from flower to flower, This is the pollinating process which will give mature seeds. As the flower dies, watch the development of the fruit as it grows. See which animals come to eat the fruit. How many ripe fruits will be left from all the buds which were once growing?
5. Study a plants parasite:
See if you can identify a plant parasite. A parasite is a plant that attaches itself to another plant and then takes its food from the other plant. Parasites are most frequently fungi.
6. Study an epiphyte:
Epiphytes are often confused with parasites because they grow on other plants. An epiphyte is a plant which finds a perch on a tree in order to be closer to the source of light. They are often rooted in moss or debris on another plant surface. Orchids, air plants and ferns are often found living high up on another plant.
Directions for preserving mammals for museum study, information Leaflet #380
Smithsonian Institution
Natural History Building 398
Washington, D.C. 20560, USA
Manual of outdoor conservation education
National Audubon Society
Nature Center Planning Division
950 3rd Ave.
New York, N. Y. 10022, USA
Nosotros y la naturaleza: Guia para profesores, Guia para estudiantes
Servicio Nacional de Aprendizaje
Division Agropecuaria
Region de Neiva
Columbia
One hundred science experiments for everyone
UNESCO
Doubleday & Co., Inc.
Garden City, N.Y., USA
Outline for teaching conservation in elementary school, PA-268
U.S. Department of Agriculture
Soil Conservation Service
Washington, D.C. 20250, USA
Planning a nature center
National Audubon Society
Nature Center Planning Division
950 3rd Ave.
New York, N.Y., 10022, USA
Teacher's guide to minigardens
Science Study Aid #2
Agricultural Research Service
U.S. Department of Agriculture
Hyattsville, Md. 20782, USA
A nature trail is a short planned walkway through a natural area in which interesting and important natural or historic features are pointed out to the visitor and explained by a guide or by interpretive signs.
The planning of a trail must include:
- an inventory of the land to find the most interesting features;
- concern for the public it is to serve, to give both beauty and safety;
- an understanding of the education it is to provide; what to label and why.
A conservation center can start with only one trail: a general conservation trail, which may include shorter specialized connected loop trails for soil study, forest study, wildlife study, etc. (see Fig. 16).
The self-guiding trail is one where the visitor is helped by labels which point out features of environmental interest, and which together cover the broad characteristics of the area.
Later, if it is possible, a second, informal trail for walking and hiking can be added (while future trails might be planned for special uses such as horses, bicycles, handicapped persons). The longer walking and hiking trail is for the visitor who wishes to go a longer distance without specific interpretive guidance.
A nature trail is the basic teaching tool in outdoor education. Its purpose is to provide a controlled natural experience for visitors to enjoy, where they will be shown, by simple signs, the trees, smaller plants, geology, natural communities, the native animals that live in the area, and how these are related to people, to each other, and to other resources. The trail allows visitors to move through the natural area without disrupting the environment.
The trail objectives are:
- education - In an exciting setting the visitors can see, feel, smell and hear living examples of the natural history of their region.
- interpretation - Signs and labels help visitors to see interdependence between living things and their environment.
- conservation - The trail can show how conservation techniques and solutions to local problems.
1. A nature trail is short (700m to 1.3 km). it should take from 30 minutes to one hour to walk. Visitors will be walking slowly, reading the interpretive materials at each stop.
2. A nature trail is constructed in the general shape of a loop; that is, it begins and ends at the same place, usually at the conservation center building. It should have a one-way direction which follows the interpretive plan.
3. A nature trail has signs or labels that explain something about features of the trail. Sometimes these labels have all the information written directly on them; sometimes the information is printed in a guide with numbers that correspond to numbered posts along the trail.
4. A nature trail is inviting. There must be a clear beginning with a wide section of smooth trail and a large identifying sign which points the way. It should be wide enough for two people to walk side-by-side, and dense vegetation should not form a wall at the sides of the trail. A rest stop is desirable.
5. A nature trail is easy to walk. There should not be any steep climbs, muddy places, rocks to climb over, or other obstacles. Visitors in street clothes should be able to walk the trail.
6. A nature trail is clean. A litter can with a sign ("Place Litter Here") should be placed at the entrance of the trail and at rest stops, and the trail should be kept free from litter.
7. A nature trail is well-maintained. Signs of wear must be corrected immediately to avoid major repairs later. Vegetation may have to be cut back from the trail regularly, and the trail should be inspected frequently for damage.

Where to Put a Nature Trail
1. Study what the land is like for about one square kilometer or more around the conservation center. Walk through all the land and follow any paths or trails which may exist. Make a list of all the interesting natural or historic features. (See the list of suggested items to feature at the end of this section). Mark these features on a simple hand-drawn map and arrange the trail contour to coincide roughly with them.
2. Mark all features that might be included on the trail with strips of bright ribbon, yarn, cloth or plastic. Connect the items with string to create a rough trail design.
3. Walk this rough trail to see approximately how long it will take. Remember that the visitors will walk slowly and will spend time reading the labels at each stop. Re-arrange the way the string runs in order to get the best trail layout.
Note that nature trails are different from usual trails in that they go to places not normally visited by local residents. For this reason, it is generally best to cut an entirely new trail rather than to put together pieces of old trails. Having a separate nature trail eliminates confusion with old or unmarked trails.
How to Build the Nature Trail
1. Clear the walking area of all obstacles on the trail (roots, stumps, rocks, etc.) and cut back over-hanging branches to a height of 2.5m. Leave any cleared items which could have interpretive use alongside the trail.

2. Cut the trail wide enough for two people to walk side-by-side. (This should be about 1.3m). Be sure visitors will have safe footing. Where clearing exposes erosion problems, control measures should be taken such as planting a ground cover, or filling a depression with gravel.
3. Make the trail with curves. The purpose is not to reach the next stop as quickly as possible, but to learn about the area. A winding trail gives visitors a sense of discovery. A straight stretch in the trail should not be more than 25 meters.
4. Plan each stop so it is out of sight of the others. If visitors see the next stop, they tend to hurry to it rather than observing their surroundings.
5. Clear an area around each label or numbered marker so that visitors can gather around if a teacher or guide has comments to make.
6. Avoid trails that double back. While curves are good, do not make them so sharp that they double back on themselves in a sharp "5" pattern. Visitors will cut new paths that destroy natural vegetation and contribute to erosion.
7. Avoid steep and tiring trails in hilly or mountainous areas; careful planning is necessary so as not to discourage walkers. If there are short sections of steep trails, a series of steps can make walking easier.

8. The trail must drain well. In places where the ground is hilly, the trail should slope a little to the downhill side so that water will run off, rather than down, the trail.

Place drains across the trails where water collects or crosses the trail during a rain. (Dig a shallow trench and line it with small stones, or use small logs a few inches apart to make a water channel, and fasten them down with wooden pegs).
9. In damp areas such as near a marsh, or stream bed, raise the trail with additional soil or build a raised walkway. A split log or bamboo crossing may be used for a small wet spot. Stepping stones are not good because they become slippery. Building a raised trail is extra work, but a wet, muddy trail will probably not be used at all.
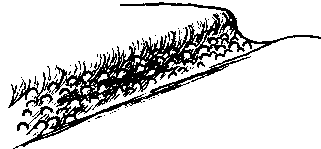
10. In sandy or marshy situations, to avoid disturbing the area, a raised wooden or bamboo walkway should be provided.

11. Where the trail may erode, or where walking would be difficult, you can cover the trail surface with any of the following, if available: pine needles, wood chips, sawdust, shredded bark, sand. These make good walking surfaces and will not cut shoes.
12. Where there is a nice view, a beautiful tree, or other special feature, clear a rest spot for a simple bench.
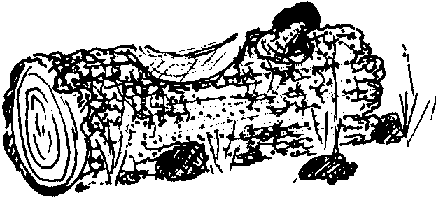
Public Facilities (See Appendix E for instructions)
The public facilities you provide at a Nature Trail depend on your budget, the numbers of visitors you expect, and the facilities that exist near-by. You may only need one or two rest stops, or you may need to provide a picnic area or a public toilet near the nature trail.
To give visitors a place to enjoy the beauties of the trail, try to provide a rest stop where there is a view, an ancient tree, or an interesting rock formation, for example. A bench of native stone or wood, or a seat cut into a rock, can provide a place to admire these things and rest for a tired walker.
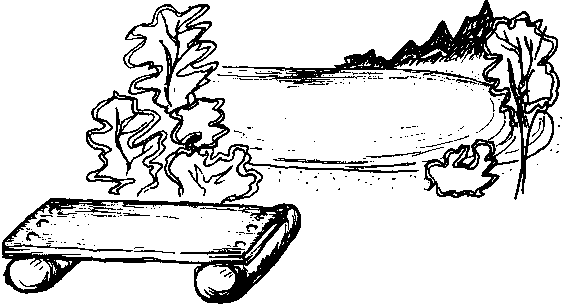
If you are going to provide picnic facilities at a nature trail, it is a good idea to place them in an attractive area near the entrance to the trail. This way food and waste can be kept in one easy-to-clean place. The picnic area can be very simple: just cleared ground, shaded by trees or woven branches; it can include logs or rocks to sit on; or it can have tables with benches. This depends on the natural materials available and the cultural habits of the visitors. If they are likely to make a fire, provide a safe place for one. In every case, provide enough garbage cans, each one with a sign ("Please put garbage here"), and empty them frequently to avoid odors and animal and insect scavengers.

Allow 8 picas
Margin to bind
When there are no other near-by latrine facilities and visitor use is heavy, a latrine should be provided so that pollution of the site does not occur. It should be located near, but not at, the trail entrance. Building materials for the latrine shelter should blend with the surroundings. (See Appendix E, Public Facilities).
Trail Signs, Labels and Guides (See Appendix D for instructions)
1. The trail will need a trail entrance sign to give the visitor an idea of what is ahead. It could indicate:
- a map of the trail with its length in meters or kilometers;
- the location of special attractions on the trail;
- regulations ("please stay on the trail`', "do not disturb plants or animals").


You will also need signs where two trails meet, to give distances or the direction to follow.
2. Features on the trail need labels to tell names, characteristics, relationships, habitat, or historical background. Labels must be:
- accurate
- interesting
- short
- easy to read and understand
The lettered label should be mounted on simple stakes at the trailside. A label could also be tied to a branch, with raffia or string, of a tree, shrub, or vine being identified. Care must be taken not to damage the surroundings with labels, Nailing a label directly to a tree, for example, would allow insects or bacteria to enter the tree through the nail holes.
Visitors can immediately spot the feature which is being identified if you mark both the feature and its label with a dot of colored paint.
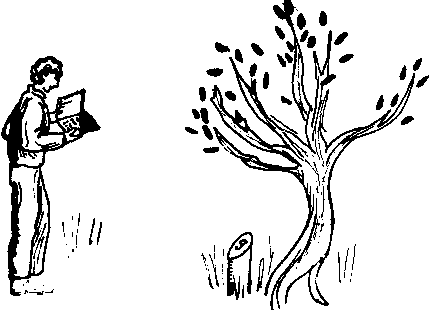
3. You may choose a printed guide to interpret the trail rather than labels. Make these guides available at the start of the trail in a covered box, to be returned to the box when visitors have finished walking the trail. The items described in the guide would be numbered to correspond in sequence with numbered markers on the trail. Pictures, drawings or diagrams can accompany the text, to help the visitor. About 15 to 20 items are enough for interpretation.
One or more sheets of letter paper can be mimeographed, folded or stapled to make booklets.

Sample guides are included in this Appendix and in Appendix D.
4. Trails may include some of the following features for identification and labelling:
- historic features such as an abandoned mill or farm building, a bridge, dam, mine or site of earlier civilization;
- a grassy area - the way plants are adapted to sun;
- a brush area - new plants moving into area that was open;
- a sandy area - how poor soil has few plants, how plants hold sand in place;
- deep forest - layers of vegetation, young and old trees;
- a rotting log - making new soil, home for insects, animals and fungi;
- a rock with lichens - breaking rock down into new soil;
- leaves rotting on forest floor -making new soil, homes for insects and animals;
- the favorite plant of one insect -eating plant's leaves, laying eggs on plant;
- vines - how they climb, how animals use them;
- a cave - how it was formed, home for animal, earlier humans;
- a salt lick - value to animals, use to poachers;
- a rock outcrop - animal homes, kind of rock, how it was formed;
- stream bed - water life: plants, insects, fish, erosion;
- bee, wasp, ant or termite nest - how it is made, community work;
- desert plants - who lives on them, who eats them;
- feeding areas - do footprints tell which animals come?
- a road or trail cut - the soil profile can be seen;
- nests in trees - animal or bird?
- a hole in the ground - is it a home?
- roots around an exposed rock - how the plant seed grew there;
- roots in loose soil - how they hold the soil together;
- spring - how water collects underground;
- a bump on a tree (burl) - why did it form? its effect on the tree;
- a bent tree trunk - how sunlight forms growth;
- a hollow tree - what happened? Who uses it?
- leaf size - adaptation to light;
- a parasite plant - how it kills;
- buttress roots - how tree adapts to shallow soil;
- thorns on bushes and seeds- protection, transportation;
- ferns and mosses - where they grow and why;
- air plants/orchids - where they grow and why;
- cacti - where they grow and why.
Main Trail
(open field) In sun-filled areas like this, the plants have to deal with special problems: too much light, periods with too little water and, often, poor soil. Pick a blade of grass. Examine it. The size of the leaf is small so moisture will evaporate out slowly. The roots are a thick mass of fibers that can grip the hard soil, but they don't go very deep. They get their moisture mostly from rain and dew.
(beginning of forest) Bigger plants like trees will slowly invade a field of bushes. They grow taller and make shade. This means that plants which love sunlight must slowly die and new plants that like more shade move in.
(any place with good view of different layer in forest) Look around you and up in the air. Notice how the forest is made of several different layers. High above, the branches of the big trees weave together to form a canopy. Beneath these, we see a sparse layer of trees trying to grow up through the canopy. Lower down there is a layer of shrubs and small trees. Below that is a layer of small plants like ferns and seedlings.
(strangler fig thee) This is a fig tree. It grows around another tree. its leaves shade out the sun until finally the other tree dies. Sometimes the original tree will rot away and the "trunk" of the fig tree will then be hollow.
(rest stop) (Any pretty place about halfway through the trail, especially good on top of a hill where people will want to stop anyway. Provide a log or a bench to sit on.) This is a good place to rest a minute. Sit and be absolutely quiet. Can you hear nature around you? The birds singing? The insects buzzing? The wind blowing?
(a bent tree) As the tree grows, it twists and turns to reach as much light as possible. This tree may have started growing toward a hole in the forest canopy. At some point a new hole with more light opened up and the tree changed directions. Why might a hole in the canopy occur?
(a bump on a tree) The lump on this tree is called a burl. It is caused by a virus infection. It does not kill the tree but it results in a malformation. The growth rings of the tree take on interesting shapes and the wood is used in tables, bowls and pipes.
(treetops) High above your head, the branches of the tallest trees lace together to form another world. Trees bloom and fruit there, and animals live out their lives without touching the earth. Can you catch a glimpse of the happenings in that other world?
(thee stump) This tree stump is decaying. It is becoming soil again. This process returns the energy that it used as a growing tree. Mosses and fungi are breaking it down on the outside. Ants, beetles and other insects are doing the same thing on the inside.
(young trees in a clearing) As the old trees die, holes develop in the forest canopy and new spots of sunlight reach the forest floor. Here seeds sprout and new trees begin to take the old ones' places. The forest will regenerate itself, but if people destroy it, a tropical forest like this takes hundreds of years to grow again. The forestry department is protecting this land for your children.
(shady area with big-leaved plants) Plants are adapted to where they live. Usually big, thin or lacy leaves are for shady places because they allow the plant to catch as much sun as possible. They will not dry out because their environment is cool and moist. A fern is an example.
(patch of abandoned farmland) The soil was too thin for good farming here and the land was abandoned. The forest is returning in stages. First grasses, then thick brush, third low, thin jungle, and after many years, there will be tall, thick jungle.
(buttress roots) Wide roots like these help to balance the tree. The roots cannot go deeply into the ground because it is hard clay just under the surface and all the nutrients are in the top two inches. The wide flanges give the trunk a wider base of support. Otherwise the weight of the trunk would tip and the roots would be pulled out of the ground.
(cave) This cave may have been formed many years ago when water slowly dissolved away some of the limestone in the earth. Some time later the surface of the earth changed, causing the cave to dry out and be revealed. Now it is a home for bats, snakes and other creatures.
(a very tangled, dense area of vegetation) More kinds of plants and animals live in a tropical jungle than any place else in the world. Notice how dense the plant life is. A mixture of many things living together makes a stable environment, because of the natural control all the species have on one another.
(rattan palm) This rattan palm sends out long runners covered with thorns. They hook on to passing animals. They pull the runner to a new place where it can touch the earth and start another plant far away from the competition of the first.
Soil Loop:
(clump of pretty bushes) Good soil allows plants to grow plentifully. It is a thin layer, however, and easily destroyed. Plants like these would soon die in a hot dry soil without water.
(rotting log) As this tree trunk rots, it builds up a soft, spongy layer of soil, called humus. This holds rainwater and provides food for other plants and insects. How does the rotting log feel? How does the ground nearby feel?
(rock with lichens) What looks like drops of paint on this rock is actually a combination of plants called lichens. They can live under very severe conditions, like on bare rock. They help to make soil by dissolving some of the rock into fine sand. Feel the rock around the lichen. Car you feel a sandy texture?
(place with many leaves on the forest floor) Leaves collect and rot, making new soil, just as the tree trunk did. Animal droppings and dead animals also add to the soil.
(a water spring) Rain soaks into the ground until it reaches a layer of rock which holds it. That water slowly moves underground until it comes out at springs or into rivers. If the soft topsoil is missing, the rain is not soaked up, but runs off. The water table underground is not replenished if the rain doesn't soak through the soil. The springs will then dry up.
(erosion site on a trail or hillside) Water is a powerful force. Can you see what it has done to the soil here? Compare this place to a protected place with plants. In a place with forest cover, the grid of roots holds the soft topsoil while the leaves slow the speed of the raindrops' fall. Shade keeps the ground from getting dry and hard.
(deep cut into a hillside where a trail or road was built, where soil levels are visible) Soil is found in layers. The top one is rich with plant food, the others are not. In the tropics the hot, wet weather makes things decay quickly, but topsoil does not build up because the food is utilized again by plants almost immediately.
Forest Loop:
(very large tree) Trees are the oldest living things on earth. Some can be over 4000 years old. They give many good things besides lumber - like good soil, clean air, and homes for wildlife.
(a clearing oh break in the forest where the sky is visible) Look at the leaves of the trees above. Each one is helping you. Leaves produce oxygen which you breathe. They also take away carbon dioxide (which you breathe out) and other poisonous gases. Where does it smell the best -in the middle of the city or here? The leaves release moisture into the air, helping to form new clouds; they shade the ground and air, keeping them cool and comfortable. Think for a moment. Where is it cooler? Here or in the city?
(roots on a rock) Just as the roots of this tree have encircled this rock, so they are holding the soil below it. Small roots weave a mat that traps the soil in tiny pockets. This protects the topsoil which is light, from the force of rainwater. If the forest is cut or burned, the roots no longer hold the soil, and in a short time the rich topsoil is washed away by rain.
(tiny stream) Forests help with the water supply. The leaves release moisture into the air, helping to form new rain clouds, while water in the spongy ground moves downhill slowly to emerge in springs and streams.
(leaves on the ground) Leaves fall all the time, but especially in the dry season when the trees don't want to lose moisture through their leaves. These leaves rot quickly in the rainy season, and help make new soil.
(tree with hole in trunk) Trees provide a nesting place for animals to raise their young, to store their food, and to escape from their enemies.
Wildlife Loop:
(rock ledge with animal hole) Under the large rock in front of you is a former animal home. The occupant may have moved away because so many people looked into it. See what a dry place he chose.
(tangled mass of bushes on edge of large clearing) The edges of forests often produce as much or more food and shelter for wildlife as the deep forest itself.
(dead tree on ground) A dead tree is a home for a great variety of things as it decomposes. Under the bark there are beetles and termites. Millipedes eat the decaying wood; centipedes hunt for other insects to eat. inside, perhaps a mouse, a weasel or a porcupine has dug out a den. The home territory of a wild animal is usually a place where it can easily find food and shelter - perhaps a patch of grass, a whole pond, or a fallen tree like this.
(a salt lick) Just as you like salt on your food, so animals like and need certain minerals in their diet. Water deep in the ground rises to the surface carrying dissolved minerals which are deposited there. Look in the mud around you and see how many kinds of animal tracks you can identify.
(clear streamside) The water here is cool and clear. You may see some fish. Compare this to any of the streams outside the park. Is the color the same? Just as some animals need a forest where the canopy is complete, so certain fish, snails and insects need streams where the water is clean. The forest and its soil filter the water and keep it clean.
(large tree that has food for animals in month when most visitors come) In the month of _______ this tree has much fruit which is eaten by (name some animals, birds). This also attracts animals which eat the fruit-eaters. All these animals help the tree in return by spreading the seeds and fertilizing the soil.
The fox path: nature trail guide
National Wildlife Federation
Laurel Ridge Conservation Education Center
8925 Leesburg Pike
Vienna, Virginia 22180, USA
Manual of outdoor interpretation
National Audubon Society
Nature Center Planning Division
950 3rd Ave.
New York, N.Y. 10022, USA
Quail quarters: self-guiding trail booklet
National Wildlife Federation
Laurel Ridge Conservation Education Center
8925 Leesburg Pike
Vienna, Virginia 22180, USA
*Rapidos del Chanleufu: Sendero de historia natural (Chilean trail guide)
ACTION AF/AS, M-401
Washington, D.C. 20525, USA
Trail planning & layout
National Audubon Society
Nature Center Planning Division
950 3rd Ave.
New York, N.Y. 10022, USA
*Single copies available to Peace Corps volunteers
Landscaping means working with LAND, PLANTS, WATER, and SPACE to improve your outdoor surroundings.
The improvement will show in the quality of the soil and the air, as well as in the pleasure the landscaped area gives.
Landscaping even the smallest plot of ground will give you the chance to demonstrate conservation practices because you will be protecting and restoring the land and preventing its neglect and destruction.
In addition, since you will be working only with materials available in the area, you will provide an example for local residents to follow.
The results of landscaping are often not seen for several years. Remember that trees and shrubs take time to grow.
Landscaping requires advance planning:
1. Draw an outline plan of the land to be landscaped. Include natural features such as trees, shrubs, rocks, paths, walls, water, etc.
2. Examine the soil to determine fertility, water content, texture and type (clay, sand, silt).
3. If the soil needs organic matter to make it more fertile, or to loosen its texture, start a compost pile so you can add compost to the soil.
4. Consult with the local agricultural agent for help in making a list of plants (grasses, flowers, shrubs, trees) which are native and grow well in the area.
5. Using the outline plan (#1), work out a detailed landscape plan to locate where and what kind of trees, shrubs and flowers will be planted, and where benches, walks, or play equipment will be placed.
6. Find out if there are plants or seeds available from a local nursery or agriculture station. Collect-seeds of identified plants, and locate small shrubs and trees which might be transplanted.
Only when you have done this planning should you begin the actual work.
- Keep your plan simple and reasonable, both in design and plant material.
- If grass is impossible to grow, sand, small gravel, or a vine-like ground cover might be substituted.
- If flowers don't grow well in the soil, try growing them in pots or tin cans in composted soil.
- If trees won't grow, or while you wait for them to grow enough to give shade, build some sun shelters over a bench.

- Try to choose plants which will provide food and shelter for birds.
- Try to include a bird bath (basin of water) or pond for wildlife.
- Use an arrangement of rocks or logs for children's play.
- If you have no land at all, try growing flowers and vegetables in cans, pots, planter boxes as a demonstration project. These can be grouped attractively at doors, on stairs, window ledges and porches.
- Any or all of these things can be school conservation projects.
- See related publications and information sources in the Source sections.
Compost is a kind of fertilizer made from a variety of organic materials which have fermented or decomposed in a compost pile. The reason for making a compost pile is to make good use of all garbage, manures, vegetable waste and ashes, returning them to the soil to enrich it, and to help plants grow better.
A small compost pile should be cone-shaped so that rain will run off rather than into the pile.
A large compost pile should be long and narrow to make mixing easy.
A large compost pile can also be made in a pit. A pit bottom needs a drainage channel for water to escape.
How to Make a Compost Pile
1. Choose a permanent spot to build the pile away from homes.
2. Start the pile with a mixed layer of organic material such as:
soft leaves
garbage (no plastic, metal or glass)
grass cuttings
rice husks
straw
seed pods
paper
banana skins
3. Build up this layer approximately 30 cm high.
4. Put a layer of animal manure (pig, chicken, cow, horse or goat) on top of the first layer.
5. Sprinkle ashes and lime on the manure, and water if the pile is dry.
6. Add a thin layer of sand, fine soil or mud.
7. Repeat these layers of plant material, manure, ashes and lime, and soil, until the pile is about 1.5m high and 1.5m wide.
8. The pile should never become dry or the decomposition process stops.
9. Turn the pile every three weeks with a shovel for about three months.
10. If odor is a problem, a small amount of acid phosphate can be sprinkled on the pile.
11. Use the pile in three months. It will have decayed and shrunk to about 1/10 of its original size.
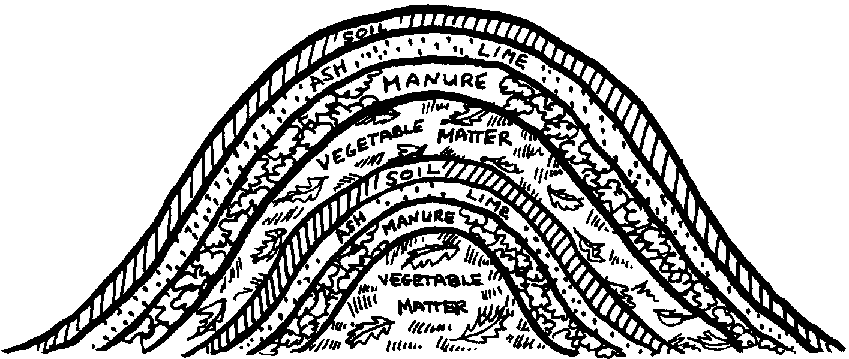
There is now a faster way to make the compost ready to use as fertilizer.
- Make the same 1.5m x 1.5m pile of plant material, manure, and lime. This time, however, use more household garbage and animal manure. (Animal manure supplies nitrogen, an element used by plants during the decay process. A good compost mixture is about 1 shovelful of manure to 30 shovelsful of the other organic materials).
- Mix the material well. Then cut all of it into small pieces, using a shovel, machete, scythe, etc. The pieces should be about 3 to 5 cm long. Cutting the material speeds the rotting process. (If animal manure is hard to get, add some inorganic fertilizer containing nitrogen to the compost pile).
- Turn the pile every few days. Use a shovel to keep it well-mixed. Compost piles can get too hot in the middle if they are not turned and mixed. Put a stick into the middle of the pile. Leave the stick in the pile for 3 minutes, and then pull it out. If the stick is hot, dry, or smelly, the pile must be turned so that the inside of the pile is now on the outside.
- Keep the pile moist, but not wet. Protect it from the rain. Pig urine can be used to keep the pile moist, and helps add nitrogen to the pile. A compost pile made in this way will be ready for use in only three weeks.

The transplanting of wild plants is generally unsuccessful. It is usually too hard for the plants to adjust to new soil and light conditions, and they die. However, if you decide to try to transplant wild plants, follow these steps.
- Plants should be transplanted when they are dormant, such as just before the cold season, in spring before new growth, or before the rainy season.
- When digging up plant specimens, have a piece of burlap or plastic sheet ready to receive the roots and attached soil, and water, to keep the root ball moist. Dig the plant up with a spading fork so as not to cut the roots. The small feeding roots are more important than the large ones, which should be cut back to encourage new root growth.

- Replant the plant immediately in a hole l/3 deeper and l/3 wider than the root spread. A cool, cloudy day is best for transplanting.

1. Put topsoil or topsoil mixed with compost at the bottom of the hole before putting in the plant. If the soil does not have good drainage, a layer of gravel should be placed on the bottom, then topsoil or the mixture.
2. The old soil line on the plant should determine how much topsoil goes in the hole bottom.
3. Place the root ball of the plant in the hole, gently spreading the roots out.
4. Fill in the hole with more of the same soil or mixture. It should be very firmly packed so that there are no air holes.
5. Do not fill the hole quite to the ground level; leave a depression to catch and hold water.
6. Pile compost around the base of the plant.
7. Water the plant daily for a week while it adjusts to the change.
8. If the area is windy or the plant delicate, place a stick which is taller than the plant in the hole before planting the plant. Tie the plant to the stick with a piece of plant material such as raffia.
Whether you are going to collect flower, shrub, or tree seeds, the basic methods apply to each.
1. Select adult plants which are healthy, strong, free from disease or insect infestation, from which to collect seeds.
2. Collect the seeds during the time of seed production.
3. Select species which grow in the same kind of environment as that in which the seedlings will be planted.
4. Select mature seeds.
5. Select seeds which are of the same color, size and shape.
6. Be certain that the seeds are free from disease.
7. Dry the seeds well before storing them. Those seeds which are naturally moist or sticky should be washed well before drying.
8. Do not mix seed of different plants. Put them in jars or envelopes, labeling each by name, date and plant location.
9. If needed, a dust insecticide such as Malathion can be mixed with the seeds to control insect pests.
10. Keep the seeds in a cool, dry place.
Seeds planted directly in the earth
Fine, small seeds should be covered with just a thin layer of soil which has first been turned over, mixed with compost, if needed, and raked to a fine texture. Lightly press the seeded earth with a board to make it firm. So that the seeds don't dry out, they should be gently watered in the late afternoons. (Use a can with small holes punched in the bottom with a hammer and small nail).

For larger seeds, plant them two or three times as deep as they are wide, pushing them into the soil, or placing them in an open row, then covering them over with the soil. Keep the earth moist. When seedlings are several centimeters high, pull out the weaker ones to leave the stronger ones more room to grow.

Ground Cover
Ground cover of the variety recommended by the local agriculture agent should be sprinkled generously over soil which has been turned over, mixed with compost if needed, and raked firm. Press seed into the soil with a board. The seeds should then be gently watered and protected from birds with a thin layer of straw or similar material. Seeded ground should not be walked on until the ground cover is growing well. Bare spots can be re-seeded.
Seeds for Transplanting:
Seeds of flowers, vegetables, shrubs and trees can be germinated for planting later in a permanent location. All these seeds can be started in pans, pots, and boxes, to give them special care, because they may not be strong enough after germination to survive open conditions in the earth. Seeds may germinate in a few weeks, or take as long as several months. Be patient.
Prepare a soil of 1/2 sand, 1/2 soft rich soil (or compost). Place the soil in a container which has good drainage at the bottom, provided by gravel or pieces of broken pots. Plant the seeds as described above. Screen the top of the container with lattice, bamboo matting, a sheet of plastic or paper, so that the soil does not receive direct sun and dry out.
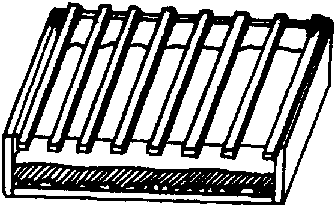
You need to keep seeds warm, moist and shaded, but not so moist or shaded that the seeds rot.
After the seeds have germinated and seedlings are several centimeters tall (4-6 cm), you can transplant them into individual containers whose soil is 3/4 of the former soil and 1/4 soil from where it will be permanently planted.
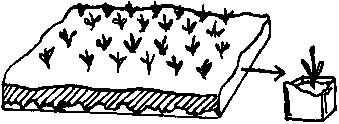
When the seedlings are tall, strong and healthy (10 cm or more), they can be placed in their planned location.

Composting1
World Health Organization
Geneva, Switzerland
Home propagation of ornamental trees and shrubs
Home & Garden Bulletin #80
U.S. Department of Agriculture
Office of Information
Washington, D.C. 20250, USA
Nosotros y la naturaleza: Guia para profesores; Guia para estudiantes
Servicio Nacional de Aprendizaje
Division Agropecuaria
Region de Neiva
Columbia
Planning a nature center
National Audubon Society
Nature Center Planning Division
950 3rd Ave.
New York, N.Y. 10022, USA
*Reforestation in arid lands
Peace Corps/VITA
Program & Training Journal
Manual series number 5
VITA 3706
Rhode Island
Ave. Mt. Rainier, Md. 20822, USA
Suburban & farm vegetable gardens
Home & Garden Bulletin #9
U.S. Department of Agriculture
Office of information
Washington, D.C. 20250, USA
1
WHO publications available from:Q Corporation
49 Sheridan Avenue
Albany, New York 12210, USA
* Available to Peace Corps Volunteers from: Peace Corps information Collection & Exchange Room M- 1214 806 Connecticut Ave. N.W. Washington, D.C. 20525, USA
Signs, labels and guides are your most important means of communication with conservation center visitors. They carry the information you want to share with visitors about the environment and their part in it. To communicate well, your information must be accurate, simple, clear and attractive.
To be accurate, simple and clear, you have to know your area well, understand what the environmental problems are, and most important, you must decide what the purpose of your conservation center is. Perhaps it is for general education only, or perhaps it is to encourage a change in farming or health habits. When you understand your purpose, you can plan signs, labels and guides to help you achieve it.
To be attractive, your signs, labels, and guides should be neat, similar in design and in the materials used.
SIGNS have three purposes:
- to inform (direction, distance, facilities)
- to interpret (explanation, names of natural features)
- to notify (regulations, warnings)
The use of information and interpretation signs may seem to be similar, but there is an important difference. An information sign direct the visitor while an interpretive sign explain what the visitor is seeing or hearing.
Signs are used at the conservation center to direct the visitor to it, to identify it and to give information about it.

On a nature trail, signs give direction, distances and regulations or warnings.


Signs and their supports should be of natural materials of the region, such as wood, bamboo or stone, to blend with the environment. The style of lettering should be the same for each sign. Signs should be varnished to protect them from rain, humidity, sun, etc.
The following suggestions for making trail signs can be adapted to your needs and to local supplies.
1. Select good quality dry wood (or other suitable material).
2. Cut wood into desired sizes, depending on the amount of lettering or art work planned.
3. Sand the flat sides and edges until smooth, if you are using wood.
4. Apply undercoat enamel (or varnish) to sides and edges. Dry and apply another coat of enamel or varnish. Smooth with fine steel wool or sandpaper.
5. Trace letter pattern. Ink or paint the letters.
6. When letters are dry, apply two coats of waterproof varnish.
7. Prepare your sign posts by soaking them at least 48 hours, completely, or that part which will be in the ground plus 15 cm above ground, with 100% creosote, or 50% creosote and 50% used crankcase oil, or 100% used crankcase oil, as a general preservative. (Used crankcase oil may contain chemicals which are harmful to cattle). Pentachlorophenol is used as a water repellant solution, and can be mixed (5%) with used crankcase oil.
8. Place your sign posts in well-drained holes by digging the holes an additional 25 cm deeper than post bottoms will be. Fill with 25 cm of gravel, then bury posts at the desired depth and apply the treatment preservative around the base.
9. Mount the sign with screws on posts. A center post mount 5 cm x 5 cm is good for small signs; a hanging post is good for larger signs (use screw hooks in a 10 cm x 10 cm post).
An alternate method of lettering is to trace a letter pattern on cut, sanded wood, then cut out the letters with gouging tools to a shallow depth (.3 cm). The cut-out letters can then be painted a contrasting color (white paint on dark wood). A good way is to put the paint into a plastic bottle with a screw-top spout and squeeze the paint into the letters. When the paint is dry, apply two coats of waterproof varnish.


Labels are usually smaller than signs. They do most of the interpretive work in exhibits and displays, and on the nature trail. The main reason for a label is to identify an object. The label should also tell the visitor something about the nature of the object, or how it affects the visitor's life. A label is best when it is short and simple. Too much information on the labels will discourage the visitor so that he or she may not read them at all.
Planning the labels is part of the exhibit or trail planning, and should not come after the exhibit or trail is finished. This way you will be thinking of what you want to say and how to show it at the same time. If you have a great deal to say and show, it is better to plan more than one short alternating exhibit or trail program.
A good label will be:
- accurate
- interesting
- short
- easy to read and understand

Labels can be made of paper, plastic, masonite, wood, plywood, sheet metal, cardboard, paper baggage tags. Labels can be backed by wood, metal or plastic to be mounted or be seen better. Materials which could be torn, bent or broken can be glued to wooden blocks.
Lettering on the labels can be inked or painted by hand or stencil, or press-on letters, or a typewriter can be used. The writing should be neat, clear printing.
Paper labels should be waterproofed after they are lettered. To do this, melt some white wax or paraffin in a large can (coffee can, dry milk can); dip the label in the wax to cover it completely; dry. (Be careful: melted wax can cause bad burns).

Nature trail labels can be mounted on simple stakes at the trailside.
For indoor use, in special cases where a newspaper clipping, magazine article or photograph needs special protection, a picture frame or plastic lamination, if available, might be considered.
Guides are printed sheets used to provide detailed information about specific points along a self-guided nature trail. (See Appendix B). A guide should be considered only if you have access to a duplicating machine. It can be a useful means to give additional or seasonal information about your conservation center. Drawings or charts can be included, as well as suggestions for further study or action.
The easiest form for a guide is to print both sides of one or more sheets of letter paper, two columns to a side, then fold or staple them to make a simple booklet.

A printed guide can be loaned for use while the visitor is using the conservation center; it can be sold for a small fee to help cover expenses, or it can be given away, if your budget permits.
A nature trail guide, planned for Venezuela, is included here. It was intended that appropriate sketches accompany the guide. (See Appendix B for proposed features for a nature trail in Southeast Asia).
Welcome to Guatopo National Park. Soon you will find and be introduced to some of the beauties of the forest and discover the parts they play in the rain forest community.
Your discoveries along the 700 meter trail will be aided by this guide. The numbers on the stakes along the trail correspond to the numbers in the leaflet. The trail will return you to this place in about 40 minutes.
So that your experience on the trail will be as pleasant and interesting as possible - for you and those who follow - please observe the following regulations:
1. Stay on the established trails.
2. Use the proper receptacles for garbage.
3. Do not disturb, molest, kill or remove any plant or animal. All plant and animal life is protected by law.
1. These trees represent a whole community of plants. They are involved in a struggle for survival. Many different kinds of trees evolved in the competition for minerals, water, sunlight and space. How many do you see?
How is the Matapalo making a place for itself? Note its white, trunk-like roots to the left and look up to see how it is growing over and strangling the Puin tree.
Air plants sit on the trunks and branches of trees. They collect nourishment that falls from the air, and so they are not parasites. How does the shape of their leaves help them catch water and falling debris like dead leaves and insects? Who might visit their water pools? Insects? Tree frogs? Hummingbirds? and who else?
What other plants are growing on the trunk of the Puin tree?
2. The stream creates an opening that breaks the dense vegetative cover of the forest, allowing the sunlight to penetrate, Sun-loving plants found here may be different from the shade-tolerant species in the forest. Why?
Do you see the skirt of vegetation that seems to flow from the treetops to the ground, covering the edge of the wood? Why do you think this happens?
A few of the common plants that can be seen here are:
Trees:
Yagrumo - a favorite meal of the sloth
Mulato - with its delicate leaves
Urape - the butterfly leaf
Ground Plants:
Cariaquito - a member of the mint family with its square stem
Platanillo - a bird of paradise flower
3. This tree fern is a living fossil - a living record of the earliest evolved form of tree. Various types of giant ferns were widespread over the earth during one geologic period. Then, with climatic changes through time, their success became limited to specific geographic areas. What is special about the climate in Guatopo that allows us to find the tree fern growing here?
The climatic changes also encouraged some tree forms to evolve and specialize. This continuing process of evolution results in the infinite variety of plant sizes, shapes, textures, and colors. Look around for some plants that look similar. Find some that are very different.
Some plants developed special aids for seed dispersal, protection and getting along in extreme climatic conditions. Consider, for instance, different seed shapes and how they travel away from the mother plant. Carried by the wind? Stuck to the fur of a passing animal? Deposited in excrement? Or dropped from the beak of a bird, perhaps?
Are the two thorny palm trees to your immediate right the same species?
Thorns may serve as protection. What kinds of animals might eat the berries of the Macanilla palm tree if it did not have thorns? The animals which eat the fruits determine how far the seeds may be carried. How does this affect the tree's pattern of distribution?
4. We have noticed a variety of plants. Some, like air plants, ferns, lichens, and mosses can live on the trunks of trees and on rocks. But what makes up a whole forest?
Trees? shrubs? ground plants? vines? Of course, all of these. Look at these as different levels in a cross-section. How does each layer benefit from its position? Which layer seems to prefer shade? Why do lower leaves seem to be larger? What do vines and lianas do to satisfy their need for water and full sunlight?
Guatopo has yet another group of plants. Here in the rain forest there is enough humidity to support an abundance of air plants and orchids.
5. The homes of these two insects are commonly seen in the forest, They play different but equally important parts in the breakdown and recycling of minerals. Who are they? Ants and Termites,
Both live in societies organized for efficient harvesting and reproduction. Do you know how to identify the worker ants from the guards?
Leafcutter ants gather a variety of green leaves. The leaves are used to prepare a recipe in which a fungus is cultivated. This fungus is their only food.
The termites are organized into groups of reproducers, workers and soldiers. What do they eat?
In what ways are their homes different? What animals may eat them? What animals may move into their abandoned homes?
6. Root shapes, too, can be found in variety. They serve to support the tree and to absorb water and minerals. As a growing part of the tree, they also need to breathe.
Roots have different shapes depending on the kind of tree, and wind, soil, and growing conditions.
What conditions may have contributed to the elevated roots of the Yagrumo tree?
7. We can learn curious, delightful and useful things about our environment. How good a detective you are depends on how well you use your senses - sight. smell, hearing, and touch. Forest plants can be good clues. Some like wet places -others grow only in dry areas. We call these indicators. What might the Casupo plants on your right indicate about their micro-environment?
Plants can also be clues to history. If they are seen in areas where they are not native, we can suspect that the plant was introduced by people, often for decorative or agricultural purposes. Can you find an introduced plant nearby?
8. The forest is a hive of activity. Everything living, breathing, growing. But the dead and dying things play an equally important role.
Minerals are the money of the forest, They are concentrated in the growing vegetation as money is in the bank. But how then are the minerals in one plant recycled -that is, made available to new plants? What breaks them down into simpler parts?
Many helpers speed the decomposition of fallen leaves, and dead plants and animals. Which animals help break down these materials into the simpler parts? Vultures? Termites? Worms?
Mushrooms, bacteria and other soil organisms complete the process of reducing the leaf litter, wood, and animal matter to humus. The thin, dark, top layer of the ground is the mineral-rich humus. This enriches the soil. Like the bank teller, it holds some of the mineral-money ready for exchange.
Water carries the minerals from one place to another. With rain, the humus minerals dissolve and filter into the soil. In this way, borrowed minerals are released again into the forest community. Again available to the growing plants and the animals that eat them.
Leaf litter and humus also help the soil to absorb and hold rainfall, and protect it from erosion.
Examine the humus. Feel and smell its richness.
9. Stop and listen a moment. There are many different sounds. Why are some pleasing and others annoying?
How do animals communicate in a dense forest where it may be difficult to see one another?
10. The soil has structure. How many layers can you see? We have seen the leaf litter covering, and the humus or organic matter. Beneath this lies what is called the A layer, occupied by most of the living roots. Therefore, water and minerals for plants are provided by this top layer.
If water is not absorbed by plants, it, along with some of the dissolved minerals it carries, will leach out and be deposited in the B layer. Therefore, the soil of this zone will be more colorful.
The C layer is defined as the non-living parent material from which new soil base will be made.
How would you define soil? What is it a mixture of? It is a mixture of decomposing organic matter, parent inorganic material, air, water and living organisms.
The process of soil building is slow. It takes about 500 years to produce 2.5 cm of topsoil.
Erosion washes away in hours what took centuries to build. The roots of forest plants help hold the soil in place. And this soil can then hold more water for steady release into the streams. What happens to the soil and the waterflow in deforested areas?
11. Where do the animals of the forest live? Some sleep in nests on branches or in the hollows of trees. Others in dense ground vegetation, or even in the cracks in rocks. What do we have here? These burrows in the cliff to the left and also along the descending bank on your right are of many shapes and sizes. Which animals could live here? Armadillo? Rodents? Lizards? Snakes? Jacamars? Crabs? Whip scorpions?
If the stream is approached quietly, especially in the early morning or evening, you may see some wildlife. Many animal tracks have been seen here, including deer. Look around a bit.
12. Why do animals come to the stream? Because water, like food and shelter, is one of the basic necessities of life for them as well as for people.
In and around streams lives a special community. Feel the rocks in the stream. Slippery rocks are an indication of microscopic plant life, phytoplankton. This is food for snails and some insects that spend their early life in the water, like the dragon fly, caddis fly and black fly larvae.
Food is fuel. Fuel is energy. Each hungry animal is a link in the food chain - both the eater and the eaten. Some eat only plants; others eat only other animals; while some eat both plants and animals.
Who lives around the stream to eat the insect larvae and adults? And who, then, may we expect nearby to prey on the crabs, frogs, fish, and birds? Which insects are flying around now? How do they fit into the food chain? Dragon flies, for example, eat other insects, including mosquitos !
Like the wild animals, we too are dependent on the stream flow. Where does the city water come from? What kind of land holds water best and releases it in an even flow?
13. What are some of the forest interactions that can be noticed from this point? What story could you tell about this tree and the vines around it?
14. These roots of the Jobo tree are very different from others we have seen. How do they help the tree and the soil at the same time? What could be a cause for their shape and length? Feel their texture.
15. Both plants and animals have defenses against being eaten. One of these is a chemical toxin in the yellow and orange milkweed flowers often seen blooming in open fields. The Monarch butterflies incorporate this distasteful toxin into their bodies when they feed on the nectar of the milkweed flower. Their would-be predators soon learn that they are NOT a tasty meal.
The grassy state of this open field is maintained by the intervention of people. If left undisturbed for a few years, which plants might occupy the field? After these sun-loving species have colonized the area, imagine how this space might look.
The place where two habitats meet is called the edge. More animals may be found in this zone because they benefit from what both habitats offer - often food from one area and cover from the one next door. We are on an edge. What are the two habitats? Where else have we seen an edge today?
Why is this an open field? Are there any clues of historical information?
16. This log of Cuji may be called a Mother Log because it hosts a plant nursery. Notice how there are many different plants, including tree seedlings, growing on it.
In the moist, dense rain forest, plants need a space to start growing. A log or fallen tree such as this provided the opportunity by creating an opening of light in addition to space. How does this process both encourage growth and speed up decomposition?
17. Did you guess that this field was once the site of a sugar mill? Marker 15 is beside the ruins of the aquaduct which brought water from the stream to power the trapiche.
Concentrations of people now live in cities and towns: away from the sources of running water to power small machinery, and for washing and drinking; away from the source of wood for fuel and building materials; away from the source of wild animals and plants for food; away from an intimate daily dependence on nature for our survival. How do we meet these needs today? What are some of the complicated problems of our lifestyle today?
Measures can be taken to ensure the wise management and use of our resources.
How can you Help:- Prevent forest fires and encourage reforestation projects.
- Follow hunting laws; hunt only when and where permitted.
- Remember that litter is a sign of waste. Waste and litter are signs of negative use of natural resources.
- Insist on moderate and appropriate use of wood, water, fuel and minerals.
Can you think of some other ways in which we can apply our technology to preserve our environment?
Text prepared by Basha Goldstein. Peace Corps Volunteer, Venezuela.
Durable rustic wooden signboards
Forest Service Res. Paper
U.S. Department of Agriculture
Washington, D.C. 20250
Planning a nature center
National Audubon Society
Nature Center Planning Division
950 3rd Ave.
New York, N.Y. 10022, USA
*Reforestation in arid lands
** Peace Corps/VITA
Program & Training Journal
Manual series number 5 (wood preservatives, pages 49-50)
3706 Rhode island Ave.,
Mt. Rainier, Md. 20822, USA
Trail planning & layout
National Audubon Society
Nature Center Planning Division
950 3rd Ave.
New York, N.Y. 10022, USA
Wood preservation
Forestry Products Laboratory
Forest Service
U.S. Department of Agriculture
Washington, D.C. 20250
*Available to Peace Corps Volunteers from:
Peace Corps Information Collection & Exchange
Room M-1214
806 Connecticut Avenue
N.W. Washington, D.C. 20525, USA
**Single copies available to individuals and non-profit organizations working in the Third World, from the above address.
To provide public facilities at a conservation center is a courtesy for visitors. The facilities help them to enjoy the natural setting more fully. Facilities show your concern for the proper use of the center.
A public facility can be as simple as a litter can placed in a spot where visitors might need it, to a complete picnic area. In each case, your aim should be to make the community environment more pleasant.
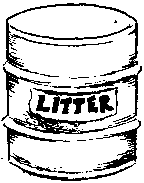
A rest stop with a bench at places of special attraction invites the visitor to pause and notice the attraction. This could be on a nature trail, in the garden of a community center, or a playground. Appreciation of the beauty of our surroundings is a major step in understanding the need for conserving them.
A rest stop would consist of a cleared area of smooth ground where there is an attractive feature for the visitor to enjoy. On this clearing you can provide a place for one to three visitor to sit. Possible seats might be large smooth rocks, logs either on their side or on end, or a simple bench, built from local materials: a board screwed to two support logs, a board placed across two supports made from stones cemented together or cinvaram blocks.

For visitor safety, the bench must be sturdy.
You may want to add a litter can if littering is a problem.
You may want to make a descriptive sign to tell why the feature there is special.
You may need a railing if there is a drop, and danger of a visitor falling.
A picnic area shows that you are interested in the visitors' needs, and it politely tells the visitor that it is the place he or she should use. This way other natural areas will be protected from heavy use and litter.
A picnic area should be near the entrance to a conservation center, a nature trail or a park, where visitors can see it and get to it easily from their transportation. A picnic area should be inviting:
- well planned, in an attractive location;
- sheltered from sun, frequent rains or wind;
- always clean.
If the number of visitors is few, one or two tables and seats will be enough. When there are more visitors you will need more tables; you may also need a rain shelter with table and seats. You should plan picnic facilities which reflect the way visitors are likely to sit and arrange their meal.
Clear the ground of obstacles, but leave large shrubs and trees to give privacy and shelter. Place tables and seats at spots where the view is most attractive. The table and seats can be very simple: large flat rocks arranged carefully could be both table and seats; you could sink sections of log upright into the ground for table and seats:

Or a table could be built of split logs or plans:

If visitors would be likely to build a cooking fire, provide a safe place for a fire such as the following:
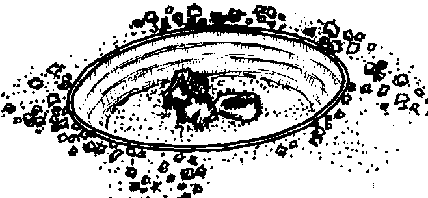
Materials needed:
- cross section of large metal drum (25 cm wide) OR length of sheet metal 25 cm x 150-180 cm
- sand
- gravel
- stones
Procedure:
1. In a cleared area dig a smooth shallow pit 15 cm deep and the same diameter as the metal ring.
2. Place the ring in the pit with the rim 10 cm above the ground.
3. Fill in the outside edge with dirt to make a tight fit and to slope the earth outward from the ring to the ground level.
4. Cover the bottom of the pit with 5 cm of sand and put a few large stones in it to hold a cooking pot.
5. Place gravel or stones around the outside edge for a distance of 30 cm to reduce the danger of spreading fire.
6. Gather and pile dry firewood near the fire pit so that visitors will not cut or break living plants and trees for this purpose.

When there are no other near-by latrine facilities, and visitor use is heavy, a latrine and wash stand should be provided so that pollution of the area does not occur. It should be located near, but not at the building, trail or picnic area entrance. Building materials should blend with the surroundings. (See also Chapter 3)
Pit Latrine Construction Procedures:
1. Choose a site: The pit latrine should be located at least thirty meters away from the building. It should be at least thirty meters away from any well, spring, or water source. It should be downhill from any water sources. Clear an area of 2m around the site.
2. Dig the pit: The pit should be rectangular in shape. It should be 60 cm x 140 cm by 2.5m deep. It is suggested that the pit be lined with stone, brick, or other hard material to prevent caving in of the pit. At least the top 1 meter should be lined in this way.
3. Construct a base: Around the edge of the pit build a base of brick, cement, clay, or other hard durable material, on which the floor slab will rest.
4. Construct a floor slab: the floor slab may be built of tightly fitting wooden boards, with any holes or cracks filled with clay or cement. However, for heavy use, a cement slab floor is longer lasting and easier to keep clean. The slab should have raised foot rests approximately 11 cm x 18 cm, and an opening approximately 38 cm long and 18 cm wide. The distance between the rear edge of the opening and the wall of the shelter should be between 10 cm and 18 cm.

5. Build a cover for the opening: The cover may be built of wood, of a rectangular shape to completely cover the opening between the foot rests. Attach a pole of approximately 50 cm in length for easy handling. (Place a sign or picture poster on the latrine door encouraging use of the cover).

6. Build a foundation mound: A mound is built with earth excavated from the pit from the ground level to the level of the slab flooring to protect the pit and its base from surface run-off water. It should extend 50 cm beyond the slab in all directions. It should be very tightly packed down to make it sturdy.
7. Construct a shelter: For privacy and protection for the latrine, construct a shelter of materials most readily available in the community: wood, bamboo, palm or grass thatch, brick or adobe, mud, or sheet metal. It should fit the dimensions of the floor. The roof should have a large overhang to protect the mound from rain, and the roof should slope down from a height of 2 meters at the door. Openings of 10-15 cm at the top of the walls will provide ventilation. These can be screened to discourage flies.
8. The latrine should be kept clean and in good repair at all times. If it is not kept clean it will not be used. Daily or more frequent maintenance may be required.
(If this latrine will have more than one hole, each extra hole will add 140 cm to the length dimension).
Figure 17
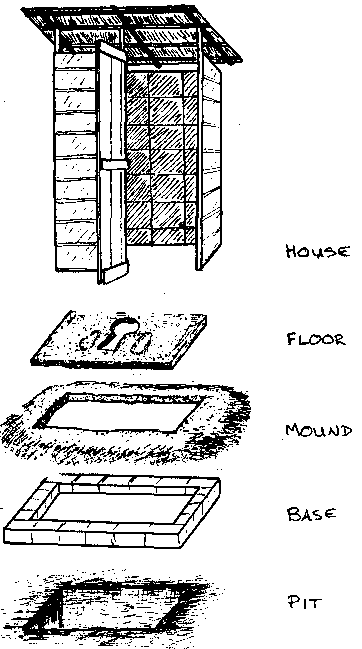
Since visitors to the conservation center will be handling many of the exhibits and displays, you will want them to have clean hands. You should provide water outside the latrine shelter for washing hands.
If your conservation center is part of another facility, such as an agricultural or health center, you should encourage clean hands by providing a washstand.
To hold your water supply, provide a large covered container such as a metal or plastic drum or clay pot. Provide a small can or pot for dipping out the water, and a bowl to wash in. A suggested washstand follows.
Materials needed:
- 1 large calabash bowl 25-30 cm diameter 10- l 5 cm deep OR 1 similar size enamel, plastic or metal bowl
- 1 small calabash bowl 10-15 cm diameter
- 3 strong sticks of equal thickness 1m to 1.15m long OR 3 similar size bamboo stakes
- 3 meters (approx.) raffia OR 3 meters string or tie vine


Tools Needed:
- awl OR drill
- knife


Procedure:
1. Hold the sticks crossed together in a tripod position.
2. Have a second person put the bowl on the tripod.
3. The higher the cross-point of the sticks, the higher the bowl will sit.
4. When the bowl is at the height you want, mark the sticks at-the place where they cross.
5. Hold the sticks together upright and wrap raffia or string several times around the place where you marked them, and tie securely.
6. Spread the sticks apart at their cross-point and tie over, under and around to hold them firmly apart.
7. Make three drain holes in the bottom of the small calabash.
8. Make three holes near the edge of the small calabash, 1/3 of the diameter apart, for raffia ties.
9. Tie the small bowl to the tripod legs beneath the cross-point, with raffia ties. This will be a soap holder.
10. Push the ends of the sticks into the ground where the washstand will be located and place the bowl on the tripod.

The need for visitor parking space at a conservation center building, or nature trail, should be based on how visitors will be traveling: by foot, bicycle, bus or private car. When parking for private transportation will be provided, you can plan a space which is near the building, the nature trail and the picnic area (maximum distance 90 meters, minimum 30 meters). The parking area should provide approximately 5m x 2m for each car and 3.5m x 10.5 cm for each bus you plan for. Set aside a corner of the area especially for bicycle parking: a rack or hanging hooks could be considered. The area should have a good entrance and exit so that traffic moves freely. The area should be cleared of small obstacles such as stones, shrubs, logs and branches. Large rocks should be left, as well as trees which will provide shade and hold the soil. Cut low branches which would interfere with traffic. The surface can be just smoothed and packed earth, or for heavy use it could be crushed stone.
As in any case where there will be disruption of the earth's surface, the layout for a parking area should be done first on paper, on which special features of the land are noted, and which you will consider in your planning. Avoid the causes of erosion by working against a slope rather than with it. Leave as much plant material as you can to hold the soil in place, and to keep down dust,
Excreta disposal for rural areas and small communities1
World Hearth Organization
Geneva, Switzerland
Planning a nature center
National Audubon Society
Nature Center Planning Division
950 3rd Ave.
New York, N.Y. 10022, USA
*Village technology handbook
VITA
3706 Rhode Island Ave.
Mt. Rainier, Md. 20822, USA
*Up to 5 copies available to Peace Corps Libraries from: Peace Corps information Collection & Exchange Room M-1214 806 Connecticut Avenue N.W. Washington, D.C. 2O525, USA
1
WHO publications available from:Q Corporation
49 Sheridan Avenue
Albany, New York 12210, USA
A conservation center can be the home of a number of small, local animals. It is a rewarding experience for visitors to realize that the fish, spider or frog that they see everyday, leads an interesting and busy life in which food, air, sun and water are as important as in the visitors' own lives.
In a school setting, over a period of time, children can learn about life cycles by watching the development of a butterfly from its beginning as a tiny egg.
Collecting specimens for observation can be a good lesson in understanding habitats. The animal life of the seashore, for example, is rich and interesting in its adaptation to changing water levels.
Wild mammals and birds require more care and food than reptiles or insects, are subject to disease, and do not adapt well to captivity. If you feel it is important to keep a mammal, try one like a mouse or other small local mammal.
You can begin a live animal collection with only a small bottle terrarium with a few insects. As your interest and knowledge grows, you can add more species. Your animals should be given clean, comfortable homes such as in a terrarium, acquarium or cage, and you must be able to provide the right kind of habitat and food for each animal. You will be able to do this by careful observation of the animal in its own habitat.
The first thing to do in making a collection is to make a survey of the easy-to-care-for animal inhabitants of your area; insects, amphibians, reptiles, water dwellers, and then decide which you would like to collect. Make a container to reproduce the environment the animal lives in, including sticks, rocks, leaves, gravel, sand, and plants. When the animal's home is ready, you can go collecting.
Allow 11 picas
Margin to bind
- plastic containers, such as a bucket, for sea watch collecting


- a piece of screen for screening small water animals (optional)

- a box (wooden Oh cardboard) with cover
What you will need:
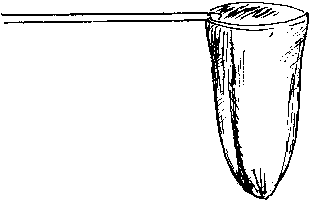
- glass containers with covers which have holes for air
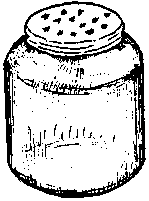


Materials needed to make a NET
Note: An all-purpose net can be made with the same construction method as an insect net. (See pages 97 & 98 for illustrations).
- 75-85 cm sturdy wire (for ring) OR 2 wire coat hangers OR 75-85 flexible bamboo
- 75 cm stick (for handle) OR 75 cm bamboo pole
- mosquito netting 60 cm x 70 cm approximately (for bag) OR nylon netting OR light cloth
- needle and thread (to sew bag)
- fine wire (to attach ring to pole) OR raffia OR string
Procedure:
1. Make a ring of the wire, coathangers or bamboo and wire or tie it closed. (If you are using coat hangers, wire or tie them together. If you are using bamboo, wrap another strip of flexible bamboo around it to make it stronger).
2. Attach stick or pole to the ring by tying it with wire, raffia, string or flexible bamboo. (this is easier if you have notched the stick 3 cm from the end you are attaching to the ring).
3. Cut the cloth as shown for the net you are making, and sew it along the cut side, into a bag. (60 cm long for an insect net, 35 cm long for an all-purpose net).
4. Sew the bag top over the ring very securely. Check for any places not sewn tightly and sew again.
An aquarium is a container for the water habitat for fresh or sea water animals.
To make this water habitat you will need a glass container. If you cannot obtain a ready-made aquarium, perhaps you can find a large glass jar or bottle, a glass battery jar, or a pyrex pan.

The size of your collection will depend on the size of the container.
Your aquarium should be carefully washed in lots of clean water (soap or detergents would be harmful to the animals you will put in it). Then let your container sit full of clean water for several days for the water to absorb any remaining impurities. Pour this water out. Place the container in a permanent location where it will get at least two hours of direct sun (morning or afternoon) each day, and begin to reproduce the habitat of the animals you have decided to collect. In collecting animals for an aquarium, remember that you cannot keep animals from different habitats in the same aquarium. Your aquarium must reproduce only one habitat.
To collect animals for your aquarium you will need a net for scooping animals out of water, a piece of screen for screening very small animals out of the water (optional), a fine meshed basket with a handle attached to scoop animals out of the water (optional), and glass or plastic containers to hold the animals in their water. A non-metalic tray would be helpful for sorting and choosing the animals you will keep. Any animal that you don't want should be returned to the water. Remember the size of your container as you are collecting. For a small container, several small animals are more interesting than one large one. Do not over-populate your container space; if you want variety you can change your collection frequently.
1. Cover the bottom of the container with well washed soil from the animal's habitat if you will be growing water plants.
2. Cover the soil with 2-3 cm of well-washed gravel from the animal's habitat.
3. Cover the gravel with 1-2 cm well washed sand if there is any in the animal's habitat.


4. Cover the sand with a piece of newspaper and pour the water (see #5) into the container, then lift the paper off carefully. This way the sand and gravel won't be disturbed by the water.
5. The water should be clean water from the animal's habitat. However, if you use tap water, let it stand in a clean plastic or glass container for several days to allow any harmful gases to escape.
6. Carefully collect plants with their roots from the animal's habitat and carry them to the container in a bucket or jar of water so that they don't dry out. Wash them carefully in water several times.
7. Plant the plants in the container by pushing the roots down into the soil.
8. You can plant 1 or 2 plants for every 2 litres of water. The plants are necessary to provide oxygen for the animals.

9. When the plants are established (in about a week) you are ready to collect your animals.
10. If it is possible, before you put the animals into the containers, float the collecting jar with the animals in it, in the container, until the two waters are the same temperature. This will avoid temperature shock to the animals when you add them to the container.

Some fresh water habitats for collecting are:
- a stream with water plants
- a lake or pond with water plants
- a rocky lake or pond with no plants
- a pond with sandy bottom
- a pond with muddy bottom
Some possible inhabitants of a fresh water aquarium are:
- small fish
- tadpoles and salamanders (good for small jars, starting with the eggs)
- crayfish (good for large jars or pyrex pan; need rock to climb out of water)
- leeches
- snails (clean shells with old toothbrush before putting in aquarium)
- water insects
Fresh water animals will eat a variety of things: algae growing in the water, the water plants, tadpole eggs, chopped earthworms, chopped snails, chopped fish meat, and each other. You will have to experiment to find the right combinations. Remove uneaten food so it does not rot in the water.
FISH POPULATION
The amount of water needed for fish in an aquarium is approximately 3/4 litre water for each centimeter of fish. An aquarium which holds 50 liters of water could hold:
|
25 |
2 cm fish |
|
|
or |
||
|
10 |
5 cm fish |
|
|
or |
||
|
10 |
2 cm fish and 30 1 cm fish |
1. Cover the bottom of the container with 4-5 cm of clean beach sand.
2. If you are planning to have animals from a tidal pool, provide a ramp (a piece of wood or rock) where they can spend some time out of water, as they would at low tide.
3. Collect your animals, green seaweed, brown seaweed and sea water at one time. Put them in non-metalic containers. Include a few seaweed-covered stones. Do your collecting at low tide.
4. Place a newspaper over the sand in the container while you are pouring in the sea water, then lift it off carefully.
5. Add the seaweed and the stones, then the animals.
Some salt water habitats for collecting are:
- tidal pool of a rocky shore
- tidal pool of a sandy shore
- tidal pool of a mud flat
- open sea
Some possible inhabitants of a marine aquarium:
- small sea fish
- starfish crabs, including hermit crabs mussels, clams
- sea snails sea urchins
- shrimp
These animals will eat algae, sea plants, tiny floating animals, small pieces of chopped meat such as earthworms, fish or clams, and each other. Remove uneaten food so it does not rot.
Your sea aquarium will lose water through evaporation. You can replace this with an equal amount of fresh water. Mark the high-water line on the container, and re-fill only to this level as the water evaporates. The amount of salt in the water will remain about the same.
You should provide a good supply of green seaweed to give oxygen to the aquarium.
Remember to keep the water temperature as close as you can to that of the sea. If the animals get too warm, they will die.
Animals which have climbed out of the water (as they would be out of the water during low tide) may have to be moved back into the water after a couple of hours.

A terrarium is a container for a land habitat. It can be just a plant habitat (see Appendix A), or it can include the animals which live in that kind of plant habitat. A terrarium can hold a desert habitat, a forest-type habitat, or a swamp habitat.
Depending on the kind of habitat that you will collect, a terrarium might hold some of the following kinds of animals:
Reptiles
snakes (harmless)
lizards
turtles & tortoises
Amphibians
frogs
toads
salamanders
Insects and Spiders
crickets
praying
mantises
grasshoppers
caterpillars
centipedes (harmless)
millipedes
spiders (harmless)
A terrarium container can be a large glass jar, or you can build a glass box. Both methods are shown. (You can also use an aquarium).
Materials needed for a glass box Terrarium:
- 1 metal tray, a sheet of metal or a board approximately 35 cm x 50 cm
- 1/2 kilo plaster of paris
- 2 pieces of glass 30 cm x 45 cm
- 2 pieces of glass 30 cm x 30 cm
- 1 piece of glass 31 cm x 46 cm for the top OR 1 piece fine wire screen 35 cm x 50 cm
- 1 large can or other disposable container (for mixing plaster of paris)
- 1 roll adhesive or plastic tape 4 cm wide
- water
Procedure:
1. Lay the four pieces of glass out flat, the 30 cm sides together, leaving about 3 cm between them.
2. Cut four pieces of tape 30 cm long and press the pieces of tape along the sides A, B & C of the glass.

3. hid the glass inward carefully and tape the last corner D together.
4. Mix plaster of paris with water in a large can until it is a smooth thick mixture.
5. Pour the mixture quickly (it dries very fast) on to the metal sheet and smooth it evenly.
6. Gently and quickly press the taped glass into the mixture.

7. Let the mixture harden
If plaster of paris is not available, you might be able to sink the glass into sand or gravel in a flat box, making sure that the glass touches the base continuously, so that animals cannot crawl under it. Another alternative might be to use waterproof tape to fix the glass sides onto a base. This would not be as sturdy, and tape would probably need frequent replacement.
Materials needed for a Jar Terrarium:
- 1 clean 4-litre glass jar with a large opening and lid (or wire mesh)
- 1 box about 3 cm x 30 cm x 18 cm (a shoe box)
- 1/4 kilo plaster of paris
- 1 large can or other disposable container (for mixing plaster of paris)
Procedure:
1. Mix plaster of paris with water in a large can until it is smooth and thick.
2. Pour mixture quickly into the box and place the Jar on its side in the plaster mixture.
3. Dry till hard.

If plaster of paris is not available, you can make a small terrarium habitat with the jar standing upright.
To mate your terrarium container into a Desert-type habitat:
1. Put a layer of soil on the bottom.
2. Cover the soil with a deep layer of clean (washed and dried) sand.
3. Plant one or two desert plants in the soil.
4. Place a small dish (or other container) for water in the sand, which can be removed for cleaning.
5. Place clean rocks carefully so as to give shelter for an animal.
6. Cover the terrarium with wire screening.
7. Hold the screening down with stones if necessary.
Desert snakes, lizards, tortoises or insects are the kinds of animals you can keep in this terrarium. Snakes like live food, and depending on the type, will eat insects, earthworms, frogs or mice. They may also eat eggs or small bits of meat. A snake will not eat every day. However, if it does not eat at all, you should let it go. Lizards are meat and insect eaters; a few are plant eaters. Identify an animal's food needs before you decide to collect and keep it.
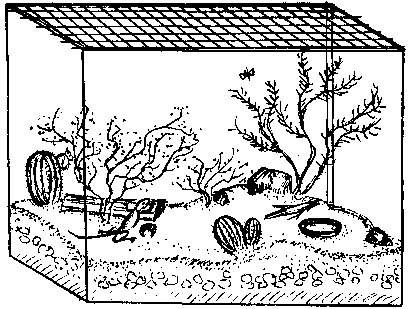
To make your terrarium container into a Forest-type habitat:
1. Cover the bottom of your container with a mixture of gravel, charcoal (optional) and soil. This will give air and drainage, and nutrients for the plants.
2. Plant forest-type plants, ferns, mosses, in the soil to the same depth that they were growing in their original habitat.
3. Place a removable water dish in one corner. If the animal needs to swim, the water container should be large enough for this.
4. Place stones, sticks or small branches to provide climbing and shelter for animals.
5. Water the soil by sprinkling it, so that it will retain moisture. It should not be soggy with water, however.
6. Cover the top with glass if it's a box type. If it's a Jar type, make air holes in the lid and screw it onto the jar.
7. If the terrarium becomes too moist and mold starts to grow, raise the glass top or open the lid for a day or two until the excess moisture has evaporated. Tie a piece of cloth over the opening to prevent the animals' escape while the top is open.
This can be the habitat for insects, spiders, frogs, salamanders, and turtles, for example. Spiders eat insects which they have caught, and the insects will often be plant-eaters. Frogs and toads eat flies and earthworms. Some turtles will eat both plants and worms. Be sure you can find food for your animals before you collect them,

A large glass jar will make a fine home for an ant colony. You should choose only ants which are not dangerous, and which live in the soil. To make an ant colony, you will need a queen, workers, and some eggs. To find them, dig into a small ant nest. The queen is larger and shinier than the others.
1. Fill a jar with soil from the area of the ant nest.
2. Put in the queen, workers and eggs.
3. Place a wet sponge on the top of the soil to provide moisture, Wet it whenever it dries out.
4. Cover the top of the jar tightly with fine mesh wire so no ants can escape.
5. Wrap the jar with black paper. This way the ants will make their tunnels against the sides of the jar. Remove the paper only to observe the ants.
6. Feed the ants bits of earthworm, flies, live aphids, scraps of rice, leaves, a drop of honey, until you know what food they prefer.

You can make an earthworm colony in a large jar, just as you do for ants. Earthworms live in and eat decaying plant matter. That is the habitat you will find them in.
1. Fill a jar with a mixture of sand, leaf mold and rich topsoil.
2. Put in several small earthworms.
3. Keep the soil moist so that the worms can burrow.
4. Wrap the jar with black paper. This way the earthworms will tunnel against the sides of the jar, and can then be seen.
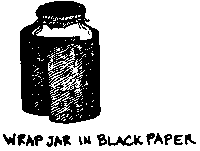
5. Cover the jar with fine mesh wire.
6. Feed the worms by putting fresh leaves, dead leaves, bits of discarded vegetables, pieces of grass into the jar.
7. Add worms as you find them, but do not let the jar get too crowded.
8. These worms can be a food supply for other animals.
For short-term insect study, you may want to build a simple cardboard container. Because it will not be waterproof, YOU will use containers (any kind of low-sided can, pot, dish, calabash) filled with moist soil into which you can stick cut branches, flowers, moss, or other plant material, rather than putting soil directly on the box bottom.
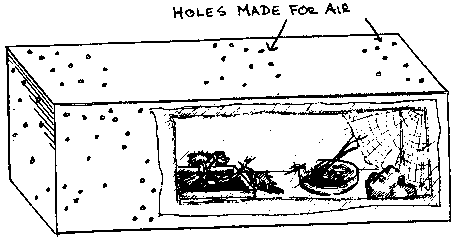
Materials needed:
- 1 cardboard box (any size) with at least five sturdy sides
- transparent paper, plastic, glass, cloth netting, or wire screening
- glue or adhesive tape
- scissors and knife
Procedure:
1. If the box has all six sides, cut a large rectangle in one side, for a window.
2. Glue or tape transparent paper, plastic, glass, cloth or screen over the window.
3. If the box has only five sides, glue or tape transparent paper, plastic, glass, cloth or screen over the sixth side.
4. Make a large door by cutting three sides of a rectangle through one side of the box, and bending along the fourth side. Glue or tape a piece of cardboard on the door for a handle.
5. If you have used cloth for your window, the box will have enough air. If you used other material, you may need to punch air holes in the box with a nail.
6. Place a piece of paper on the bottom to make cleaning the box easier.
7. Place containers of moist soil with branches, flowers, etc. on the bottom.
8. Place a small rock or log on the bottom and add insects.
9 Keep the soil moist, replace the plant material when necessary, and keep the box clean.
You can keep a small mammal in a glass box with a wire top, like the one made for a terrarium or you can make a wood and screen box type. Another cage type would be made of small bamboo slats tied together to make sides, floor and top. Whichever you use, there must be a dish for water, a climbing branch, a small nest box or hollow log to hide in. Old newspapers, wood chips or straw should be provided for nesting material.
This wood and screen cage has a removable top, and should be large enough for two mouse-sized animals. It can be increased or reduced in size depending on your animal. Sizes of wood strips are approximate.
Materials needed:
- 8 pieces of wood 2 cm x 5 cm x55 cm
- 8 pieces of wood 2 cm x 5 cm x35 cm
- 8 pieces of wood 2 cm x 5 cm x 25 cm
- 4 pieces of wood 2 cm x 3 cm 3 28 cm
- 2 pieces of wire screen 40 cm x 60 cm
- 2 pieces of wire screen 30 cm x 60 cm
- 2 pieces of wire screen 30 cm x 40 cm
- nails & hammer
Procedure:
1. For the top:
2 pieces of wood 2 cm x 5 cm x 55 cm
2 pieces of wood 2 cm x 5 cm x 35 cm
1 piece of wire screen 60 cm x 40 cm
nail the four pieces of wood together as shown, and attach the wire screen with small nails pounded in and hammered sideways to lie over the screen.

2. For the bottom: proceed as for the top.
3. For the front:
2 pieces of wood 2 cm x 5 cm x 55 cm
2 pieces of wood 2 cm x 5 cm x 35 cm
1 piece of wire screen 60 cm x 30 cm
nail the four pieces of wood together as shown, and attach the wire screen with small nails pounded in and hammered sideways to lie over the screen.
4. For the back: proceed as for the front
5. For each side:
2 pieces of wood 2 cm x 5 cm x 35 cm
2 pieces of wood 2 cm x 5 cm x 25 cm
1 piece of wire screen 30 cm x 40 cm
nail the four pieces of wood together as before, and attach the wire screen with small nails pounded in and hammered sideways to lie over the screen.
6. Nail the two completed sides to the completed front and back.
7. Nail the bottom to the sides, front and back as shown.

8. Nail a piece of wood 2 cm x 3 cm 3 28 cm in each corner for bracing and support
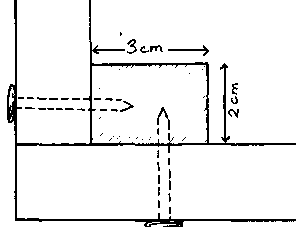
9. Lay top on completed cage. It could be hinged on, if desired.
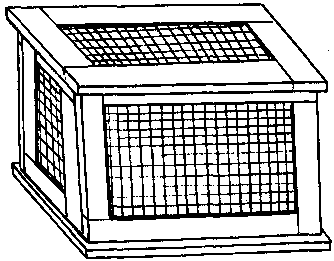
Although it is not recommended that you keep wild birds at your conservation center, you can attract them to live near-by if you provide the kinds of vines, shrubs and trees which give them shelter and food. An added attraction can be a bird bath. Since most birds love to bathe, you could provide a bath near a favorite tree or shrub. A calabash washstand as shown in Appendix E, would make a very good bird bath.* Since dripping water makes a bird bath even more attractive, hang a large can of water with a hole punched in the bottom, from a branch over the bath. Keep the bath clean and the can filled.
* A shallow wide bowl should be used

Miniature environment: an environmental education guidebook
U.S. Department of Interior
Bureau of Outdoor Recreation
Division of Information, Room 4241
Washington, D.C. 20240, USA
One hundred science experiments for everyone
UNESCO
Doubleday & Co., Inc.
Garden City, N.Y., USA
Ranger Rick's Nature Magazine (monthly)
National Wildlife Federation
1412 16th Street N.W.
Washington, D.C. 20036, USA
We share our environment with other living things. A balanced and healthy environment should have many different species living together in interdependence. Many species in the world today are in danger of disappearing because their numbers have been reduced_ by hunting, by loss of their habitat, or by an environmental change in their food chain - to where they can no longer reproduce efficiently.
It is of benefit to the total environment to maintain and encourage these endangered species, for when something goes wrong in the natural order, it can affect us all.
For example, jungle cats have become rare in many places. The rats which the cats used to eat have multiplied now that their natural enemies are gone. In their search for food the rats now invade villages, carrying disease to the inhabitants and eating their crops.
An important element in conservation education is awareness. In order for a community to be concerned about the endangered species of the area, people must know something about these species.
A school program to study a local endangered animal could be a very effective way to begin to develop community awareness.
Suggestions for study:
1. Choose an endangered animal.
2. Make poster pictures of it to display in the community.
3. Study the food chain of the animal,
4. Identify changes in the local environment which affected the animal's habitat.
5. List as many reasons as you can for the animal's disappearance.
6. Make up guessing games about the endangered animal.
7. Build a battery-powered guessing game to match relationships in the endangered animal's habitat, for example.
8. Invite a wildlife technician to the school or the community center to talk about endangered species.
9. Find and follow a suggestion on the "Action Treatment" list which is appropriate for you.
The International Union for Conservation of Nature and Natural Resources (ICUN) has proposed conservation measures to promote the survival of endangered and threatened species. (Endangered species are close to disappearing; threatened species are likely to become endangered). These measures, called "Action Treatment", are included here in order for you to determine if any would be possible for you to undertake as part of a community conservation program.
Action Treatment
1. Fact-finding:
(1) To make a brief status survey to determine the status of the species and the current threats to its survival;
(2) To make a longer ecological study to identify the species' requirements, the factors limiting its population growth, and the relationship between the species and local human population;
(3) To ascertain the legal and enforcement situation.
2. Action proposed:
(1)
(a) To prompt new legislation;
(b) To improve law enforcement;
(c) To improve the legal situation in any other way
(2) To acquire land as a reserve;
(3) To promote the formation by a Government or other appropriate agency of
(a) A National Park;
(b) A Nature Preserve.
(4) To establish the research station to study the fauna, flora and ecology of the region;
(5) To establish a research foundation possibly within an existing organization (such as a university) which will focus scientific attention on the species concerned;
(6) To create a continuing scientific presence by any other means;
(7) To promote a program of
(a) Captive propagation;
(b) Translocation.
(8) To offer bounties for successful rearing of young (chiefly applicable to birds).
(9) To control:
(a) Feral animal species;
(b) Introduced animal species.
(10) To increase food supply or living space.
3. Use of influence:
(1) To exert influence by persuading someone of importance to write:
(a) A personal letter;
(b) An official letter.
(2) To send a high level mission to confer with the heads of Governments or Ministers concerned;
(3) To promote a local meeting on the subject;
(4) To promote a resolution or recommendation at a Conference;
(5) To secure recognition in high places by some other means.
4. Publicity:
(1) To promote a publicity campaign;
(2) To propose the adoption by a group (e.g. city, school) of:
(a) The species;
(b) The project.
(3) To promote a program of long-term education.
5. Funding:
(1) To promote a World Wildlife Fund project;
(2) To seek financial aid from an individual or organization which may be linked with the species or project;
(3) To get help in kind from industry or commerce;
(4) To obtain the services of people able to give practical help.
From the
Red Data Book of the
International Union for
Conservation of Nature and
Natural Resources
|
Afghanistan |
Endangered Mammals: |
Wolf |
|
Indian Tiger |
||
|
Caspian tiger |
||
|
Leopard |
||
|
Snow Leopard |
||
|
Asiatic cheetah |
||
|
Bactian deer |
||
|
Markhor |
||
|
Kabul markhor |
||
|
Straight horned markhor |
||
|
Endangered Birds: |
Cheer pheasant |
|
|
Endangered Reptiles: |
Central Asian grey monitor |
|
|
Bahrain |
Endangered Mammals: |
Arabian gazelle |
|
South arabian leopard |
||
|
Dugong |
||
|
Belize |
Endangered Mammals: |
Giant anteater |
|
Ocelot |
||
|
Jaguar |
||
|
Caribbean manatee |
||
|
Endangered Reptiles: |
Central American caiman |
|
|
American crocodile |
||
|
Morelet's crocodile |
||
|
Benin |
Endangered Mammals: |
Olive colobus |
|
Chimpanzee |
||
|
African wild dog |
||
|
Leopard |
||
|
West African manatee |
||
|
Botswana |
Endangered Mammals |
Brown hyena |
|
African wild dog |
||
|
Leopard |
||
|
Black rhinoceros |
||
|
Lechwe |
||
|
Endangered Reptiles: |
Nile crocodile |
|
|
Brazil |
Endangered Mammals: |
Buff-headed marmoset |
|
Golden lion tamarin |
||
|
Golden-headed tamarin |
||
|
Golden-rumped tamarin |
||
|
Goeldi's marmoset |
||
|
White-nosed saki |
||
|
Bald uakar |
||
|
Red uakari |
||
|
Black-headed uakari |
||
|
Wooly spider monkey |
||
|
Giant anteater |
||
|
Small-eared dog |
||
|
Maned sloth |
||
|
Giant armadillo |
||
|
Brazilian three-banded armadillo |
||
|
Thin-spined porcupine |
||
|
Maned wolf |
||
|
Bush dog |
||
|
La Plata otter |
||
|
Giant otter |
||
|
Ocelot |
||
|
Jaguar |
||
|
Caribbean Manatee |
||
|
Amazonian manatee |
||
|
Marsh deer |
||
|
Endangered Birds: |
Red-rumped ant thrush |
|
|
Baer's cardinal |
||
|
Red-billed curassow |
||
|
Endangered Reptiles: |
Arran turtle |
|
|
Terecay turtle |
||
|
Spectacled caiman |
||
|
Paraguay caiman |
||
|
Broad-nosed caiman |
||
|
Black caiman |
||
|
Dwarf caiman |
||
|
Smooth-fronted caiman |
||
|
Queimada Island bothrops |
||
|
Cameroon |
Endangered Mammals: |
Chimpanzee |
|
Gorilla |
||
|
Cameroon clawless otter |
||
|
African wild dog |
||
|
Leopard |
||
|
West African manatee |
||
|
Black rhinoceros |
||
|
Endangered Birds: |
Kupe Mt. Bush shrike |
|
|
Grey-necked rock-fowl |
||
|
Endangered Reptiles: |
African slender-snouted |
|
|
crocodile |
||
|
Nile crocodile |
||
|
West African dwarf crocodile |
||
|
Endangered Amphibia: |
Goliath frog |
|
|
Central African Republic |
Endangered Mammals: |
Chimpanzee |
|
Gorilla |
||
|
African wild dog |
||
|
Leopard |
||
|
Square-lipped rhinoceros |
||
|
Black rhinoceros |
||
|
Chad |
Endangered Mammals: |
African wild dog |
|
Leopard |
||
|
Cheetah |
||
|
West African manatee |
||
|
African wild ass |
||
|
Black rhinoceros |
||
|
Scimitar horned oryx |
||
|
Addax |
||
|
Slender horned gazelle |
||
|
Endangered Reptiles: |
Nile Crocodile |
|
|
Chile |
Endangered Mammals: |
Chinchilla |
|
Marine otter |
||
|
Southern river Otter |
||
|
Juan Fernandez fur seal |
||
|
Vicuna |
||
|
South Andean huemul |
||
|
North Andean huemul |
||
|
Colombia |
Endangered Mammals: |
Cotton-topped tamarin |
|
Black-headed uakari |
||
|
Giant anteater |
||
|
Giant armadillo |
||
|
Small eared dog |
||
|
Bush dog |
||
|
Spectacled bear |
||
|
Giant otter |
||
|
Ocelot |
||
|
Jaguar |
||
|
Caribbean manatee |
||
|
Amazonian manatee |
||
|
Mountain tapir |
||
|
Central American tapir |
||
|
Endangered Birds: |
Barred tinamou |
|
|
Andean eared grebe |
||
|
Pygmy swift |
||
|
Red-eyed cowbird |
||
|
Endangered Reptiles: |
South American red-lined |
|
|
turtle |
||
|
Arran turtle |
||
|
Magdalena River Turtle |
||
|
Terecay turtle |
||
|
Spectacled caiman |
||
|
Rio Apaporis caiman |
||
|
Central American caiman |
||
|
Black caiman |
||
|
Dwarf caiman |
||
|
Smooth-fronted caiman |
||
|
American crocodile |
||
|
Orinoco crocodile |
||
|
Costa Rica |
Endangered Mammals: |
Giant anteater |
|
Ocelot |
||
|
Jaguar |
||
|
Caribbean manatee |
||
|
Central American tapir |
||
|
Endangered Birds: |
Cocos Island finch |
|
|
Cocos island mangrove cuckoo |
||
|
Cocos Island flycatcher |
||
|
Cocos island yellow warbler |
||
|
Quetzal |
||
|
Endangered Reptiles: |
Central American caiman |
|
|
American crocodile |
||
|
Endangered Amphibia: |
Golden toad |
|
|
Dominican Republic |
Endangered Mammals: |
Haitian solenodon |
|
Cuvier's hutia |
||
|
Dominican hutia |
||
|
Caribbean manatee |
||
|
Endangered Birds: |
Hispaniola least pauraque |
|
|
Endangered Reptiles: |
American crocodile |
|
|
Rhinoceros iguana |
||
|
Ricord's ground iguana |
||
|
Ecuador |
Endangered Mammals: |
Giant armadillo |
|
Small-eared dog |
||
|
Bush dog |
||
|
Spectacled bear |
||
|
Endangered Reptiles: |
Spectacled caiman |
|
|
Black caiman |
||
|
Dwarf caiman |
||
|
Smooth-fronted caiman |
||
|
American crocodile |
||
|
El Salvador |
Endangered Mammals: |
Giant anteater |
|
Ocelot |
||
|
Central American tapir |
||
|
Endangered Reptiles: |
Central American caiman |
|
|
American crocodile |
||
|
Ethiopia |
Endangered Mammals: |
Northern simian fox |
|
African wild dog |
||
|
Leopard |
||
|
Cheetah |
||
|
Dugong |
||
|
African wild ass |
||
|
Grevy's zebra |
||
|
Black rhinoceros |
||
|
Tora hartebeest |
||
|
Beira antelope |
||
|
Dibatag |
||
|
Walia ibex |
||
|
Mountain nyala |
||
|
Endangered Birds: |
African lammergeyer |
|
|
Teita falcon |
||
|
White-winged dove |
||
|
Turaco |
||
|
Scarce swift |
||
|
Endangered Reptiles: |
Nile Crocodile |
|
|
Fiji |
Endangered Mammals: |
Dugong |
|
Endangered Reptiles: |
Fiji iguana |
|
|
Fiji snake, Ogmodon |
||
|
Gabon |
Endangered Mammals |
Chimpanzee |
|
Gorilla |
||
|
Leopard |
||
|
West African manatee |
||
|
Gambia |
Endangered Mammals: |
Leopard |
|
West African manatee |
||
|
Western giant eland |
||
|
Endangered Reptiles: |
African slender-snouted |
|
|
crocodile |
||
|
Nile crocodile |
||
|
Ghana |
Endangered Mammals: |
Olive colobus |
|
Chimpanzee |
||
|
African wild dog |
||
|
Leopard |
||
|
West African manatee |
||
|
Endangered Birds: |
White-necked rock-fowl |
|
|
Endangered Reptiles: |
African slender-snouted |
|
|
crocodile |
||
|
Nile crocodile |
||
|
Guatemala |
Endangered Mammals: |
Giant anteater |
|
Ocelot |
||
|
Central American tapir |
||
|
Endangered Birds: |
Quetzal |
|
|
Giant pied-billed grebe |
||
|
Horned guan |
||
|
Golden-cheeked warbler |
||
|
Endangered Reptiles: |
Central American caiman |
|
|
American crocodile |
||
|
Morelet's crocodile |
||
|
Chiapan beaded lizard |
||
|
Honduras |
Endangered Mammals: |
Giant anteater |
|
Ocelot |
||
|
Jaguar |
||
|
Caribbean manatee |
||
|
Central American tapir |
||
|
Endangered Bipeds: |
Golden-cheeked warbler |
|
|
Endangered Reptiles: |
Central American caiman |
|
|
American crocodile |
||
|
Morelet's crocodile |
||
|
India |
Endangered Mammals: |
Lion-tailed macaque |
|
John's langur |
||
|
Golden langur |
||
|
Snub-nosed langur |
||
|
Assam rabbit |
||
|
Indus dolphin |
||
|
Wolf |
||
|
Asiatic wild dog |
||
|
Sloth bear |
||
|
Malabar large spotted civit |
||
|
Clouded leopard |
||
|
Asiatic tiger |
||
|
Leopard |
||
|
Snow leopard |
||
|
Asian elephant |
||
|
Dugong |
||
|
Indian wild ass |
||
|
Great Indian rhinoceros |
||
|
Sumatran rhinoceros |
||
|
Pygmy hog |
||
|
Swamp deer |
||
|
Manipur brow-antlered deer |
||
|
Kashmir stag (hangul) |
||
|
Asiatic buffalo |
||
|
Gaur |
||
|
Wild yak |
||
|
Himalayan musk deer |
||
|
Nilgiri tahr |
||
|
Markhor |
||
|
Endangered Birds: |
White-winged wood duck |
|
|
Cheer pheasant |
||
|
White-eared pheasant |
||
|
Sclater's monal |
||
|
Blyth's tragopan |
||
|
Western tragopan |
||
|
Siberian white crane |
||
|
Great Indian bustard |
||
|
Endangered Reptiles |
River terrapin |
|
|
Marsh crocodile |
||
|
Estaurine crocodile |
||
|
Gavial |
||
|
Indian python |
||
|
Yellow monitor |
||
|
Iran |
Endangered Mammals: |
Wolf |
|
Baluchistan bear |
||
|
Leopard |
||
|
Anatolian leopard |
||
|
Caspian tiger |
||
|
Asiatic cheetah |
||
|
Dugong |
||
|
Asiatic wild ass |
||
|
Persian fallow deer |
||
|
Endangered Reptiles: |
Marsh crocodile |
|
|
Ivory Coast |
Endangered Mammals: |
Olive colobus |
|
Chimpanzee |
||
|
African wild dog |
||
|
Leopard |
||
|
West African manatee |
||
|
Pygmy hippopotamus |
||
|
Jentink's duiker |
||
|
Endangered Reptiles: |
African slender-snouted crocodile |
|
|
Nile crocodile |
||
|
West African dwarf crocodile |
||
|
Jamaica |
Endangered Mummify: |
Jamaican hutia |
|
Caribbean manatee |
||
|
Endangered Beach: |
Jamaican black rail |
|
|
Endangered |
Repotted: American crocodile |
|
|
Jamaican boa |
||
|
Cayman island iguana |
||
|
Grand Cayman iguana |
||
|
Kenya |
Endangered Mandate: |
Tana River mangabey |
|
Tana River red colobus |
||
|
African wild dog |
||
|
Leopard |
||
|
Cheetah |
||
|
Dugong |
||
|
Grevy's zebra |
||
|
Black rhinoceros |
||
|
Hunter's hartebeest |
||
|
Endangered Birds: |
African lammergeyer |
|
|
Teita falcon |
||
|
Mrs. Morden's owlet |
||
|
Scarce swift |
||
|
Endangered Reptiles: |
Pancake tortoise |
|
|
Korea |
Endangered Mammals: |
Wolf |
|
Asiatic wild dog |
||
|
Siberian tiger |
||
|
Amur leopard |
||
|
Endangered Birds: |
Chinese egret |
|
|
Japanese white stork |
||
|
Tristam's woodpecker |
||
|
Lesotho |
Endangered Mammals: |
Leopard |
|
Cheetah |
||
|
Endangered Birds: |
African lammergeyer |
|
|
Endangered Reptiles: |
Nile crocodile |
|
|
Liberia |
Endangered Mammals: |
Olive colobus |
|
Chimpanzee |
||
|
Leopard |
||
|
West African manatee |
||
|
Pygmy hippopotamus |
||
|
Jentink's duiker |
||
|
Endangered Reptiles: |
African slender-snouted |
|
|
crocodile |
||
|
Nile crocodile |
||
|
West African dwarf crocodile |
||
|
Malawi |
Endangered Mammals: |
African wild dog |
|
Leopard |
||
|
Cheetah |
||
|
Black rhinoceros |
||
|
Endangered Repotted: |
Nile crocodile |
|
|
Malaysia |
Endangered Mammals: |
Orangutan |
|
Four-striped ground squirrel |
||
|
Asiatic wild dog |
||
|
Clouded leopard |
||
|
Indochinese tiger |
||
|
Leopard |
||
|
Asian elephant |
||
|
Dugong |
||
|
M al Ryan tapir |
||
|
Sumatran rhinoceros |
||
|
Asiatic buffalo |
||
|
Gaur |
||
|
Endangered Birds: |
White-winged wood duck |
|
|
Malaysian peacock pheasant |
||
|
Rufous-headed robin |
||
|
Rueck's blue fly-catcher |
||
|
Endangered Reptiles: |
River terrapin |
|
|
Estuarine crocodile |
||
|
Siamese crocodile |
||
|
Flase gavial |
||
|
Mali |
Endangered Mammals: |
African wild dog |
|
Leopard |
||
|
Cheetah |
||
|
Black rhinoceros |
||
|
Endangered Reptiles: |
Nile Crocodile |
|
|
Mauritania |
Endangered Mammals: |
Mediterranean monk seal |
|
Scimitar horned oryx |
||
|
Addax |
||
|
Rio de Oro dame gazelle |
||
|
Mauritius |
Endangered Mammals: |
Mauritian flying fox |
|
Endangered Birds: |
Mauritius kestrel |
|
|
Mauritius pink pigeon |
||
|
Mauritius ring-necked parakeet |
||
|
Mauritius cuckoo-shrike |
||
|
Mauritius olivaceous bulbul |
||
|
Mauritius fody |
||
|
Coq de bois |
||
|
Endangered Reptiles: |
Serpent Island gecko |
|
|
Round Island day gecko |
||
|
Macabe Forest Skink |
||
|
Round Island skink |
||
|
Round island boa |
||
|
Rodriguez day gecko |
||
|
Morocco |
Endangered Mammals: |
Barbary macaque |
|
Barbary hyena |
||
|
Barbary leopard |
||
|
Cheetah |
||
|
Morocco Dorcas Gazelle |
||
|
Cuvier's gazelle |
||
|
Mohrr gazelle |
||
|
Mediterranean monk seal |
||
|
Endangered Birds: |
Waldrapp |
|
|
Spanish imperial eagle |
||
|
Endangered Reptiles: |
Mediterranean spur-thighed tortoise |
|
|
Nepal |
Endangered Mammals: |
Wolf |
|
Asiatic wild dog |
||
|
Sloth bear |
||
|
Clouded leopard |
||
|
Indian tiger |
||
|
Leopard |
||
|
Asian elephant |
||
|
Pygmy hog |
||
|
Great Indian rhinoceros |
||
|
Himalayan musk deer |
||
|
Swamp deer |
||
|
Asiatic buffalo |
||
|
Gaur |
||
|
Wild Yak |
||
|
Endangered Birds: |
Cheer pheasant |
|
|
Endangered Reptiles: |
Indian python |
|
|
Nicaragua |
Endangered Mammals: |
Giant anteater |
|
Ocelot |
||
|
Jaguar |
||
|
Caribbean manatee |
||
|
Central American tapir |
||
|
Endangered Birds: |
Golden-cheecked warbler |
|
|
Nicaragua grackle |
||
|
Endangered Reptiles: |
Central American caiman |
|
|
American crocodile |
||
|
Nicer |
Endangered Mammals: |
African wild dog |
|
Scimitar horned oryx |
||
|
Addax |
||
|
Slender horned gazelle |
||
|
Endangered Reptiles: |
African slender-snouted |
|
|
Crocodile |
||
|
Nile crocodile |
||
|
Nigeria |
Endangered Mammals: |
Chimpanzee |
|
Gorilla |
||
|
African wild dog |
||
|
Cameroon clawless otter |
||
|
Leopard |
||
|
Cheetah |
||
|
West African manatee |
||
|
Black rhinoceros |
||
|
Pygmy hippopotamus |
||
|
Endangered Reptiles: |
African slender-snouted |
|
|
crocodile |
||
|
Nile crocodile |
||
|
West African dwarf crocodile |
||
|
Oman |
Endangered Mammals: |
South Arabian leopard |
|
Dugong |
||
|
Arabian oryx |
||
|
Arabian gazelle |
||
|
Arabian tahr |
||
|
Paraguay |
Endangered Mammals: |
Giant anteater |
|
Giant armadillo |
||
|
Greater pichiciego |
||
|
Maned wolf |
||
|
Bush dog |
||
|
La Plata otter |
||
|
Giant otter |
||
|
Ocelot |
||
|
Marsh deer |
||
|
Endangered Reptiles: |
Paraguay caiman |
|
|
Broad-nosed caiman |
||
|
Chaco broad- nosed caiman |
||
|
Philippines |
Endangered Mammals: |
Mindanao gymnure |
|
Gugong |
||
|
Calamian deer |
||
|
Asiatic buffalo |
||
|
Tamaraw |
||
|
Endangered Birds: |
Monkey-eating eagle |
|
|
Palawan peacock pheasant |
||
|
Mindoro imperial pigeon |
||
|
Giant seeps owl |
||
|
Koch's pitta |
||
|
Abu black shame |
||
|
Ashy ground thrush |
||
|
Endangered Repotted: |
Mindoro crocodile |
|
|
Estuarine crocodile |
||
|
Sail-fin lizard |
||
|
Rwanda |
Endangered Mammoth: |
Gorilla |
|
Mountain gorilla |
||
|
African wild dog |
||
|
Leopard |
||
|
Black rhinoceros |
||
|
Endangered Reptiles: |
African slender-snouted |
|
|
crocodile |
||
|
Nile crocodile |
||
|
Senegal |
Endangered Mammals: |
Chimpanzee |
|
Leopard |
||
|
West African manatee |
||
|
Western giant eland |
||
|
Endangered Reptiles: |
African slender-snouted |
|
|
crocodile |
||
|
Nile crocodile |
||
|
West African dwarf crocodile |
||
|
Seychelles |
Endangered Birds: |
Seychelles kestrel |
|
Seychelles turtle dove |
||
|
Seychelles vase parrot |
||
|
Seychelles owl |
||
|
Seychelles magpie robin |
||
|
Seychelles warbler |
||
|
Seychelles black paradise |
||
|
Seychelles black paradise flycatcher |
||
|
Seychelles white eye |
||
|
Seychelles fodi |
||
|
Endangered Repotted: |
Seychelle islands stink |
|
|
Endangered Amphibia: |
Seychelle islands frog |
|
|
Seychelle Islands tree frog |
||
|
Sierra Leone |
Endangered Mammoth: |
Olive colobus |
|
Chimpanzee |
||
|
Leopard |
||
|
West African manatee |
||
|
Pygmy hippopotamus |
||
|
Jentink's duiker |
||
|
Endangered Reptiles: |
African slender-snouted crocodile |
|
|
Nile Crocodile |
||
|
West African dwarf crocodile |
||
|
Solomon islands |
Endangered Mammals: |
Dugong |
|
Endangered Reptiles: |
Estuarine crocodile |
|
|
Swaziland |
Endangered Mammoth: |
Cheetah |
|
Leopard |
||
|
Endangered Repotted: |
Nile Crocodile |
|
|
Thailand |
Endangered Mammals: |
Pileated gibbon |
|
Asiatic wild dog |
||
|
Clouded leopard |
||
|
Indochinese tiger |
||
|
Leopard |
||
|
Asian elephant |
||
|
Ma 1 Ryan tapir |
||
|
Javan rhinoceros |
||
|
Sumatran rhinoceros |
||
|
Fea's muntjac |
||
|
Thailand brow-antlered deer |
||
|
Asiatic buffalo |
||
|
Gaur |
||
|
Kouprey |
||
|
Endangered Birds: |
Giant ibis |
|
|
White-winged wood duck |
||
|
Endangered Reptiles: |
River terrapin |
|
|
Siamese crocodile |
||
|
False gavial |
||
|
Burmese python |
||
|
Togo |
Endangered Mammals: |
Olive colobus |
|
Chimpanzee |
||
|
African wild dog |
||
|
Leopard |
||
|
West African manatee |
||
|
Endangered Reptiles: |
African slender-snouted |
|
|
crocodile |
||
|
Nile crocodile |
||
|
Tunisia |
Endangered Marmots: |
Barbary hyena |
|
Barbary leopard |
||
|
Barbary deer |
||
|
Morocco Dorcas gazelle |
||
|
Cuvier's gazelle |
||
|
Slender horned gazelle |
||
|
Mediterranean monk seal |
||
|
Endangered Reptiles: |
Mediterranean spur-thighed tortoise |
|
|
Upper Volta |
Endangered Mammals: |
Leopard |
|
Scimitar horned oryx |
||
|
Endangered Reptiles: African slender-snouted crocodile |
||
|
Nile crocodile |
||
|
Venezuela |
Endangered Mammals: |
Black-headed uakari |
|
Giant anteater |
||
|
Giant armadillo |
||
|
Sectacled bear |
||
|
Small-eared dog |
||
|
Giant otter |
||
|
Ocelot |
||
|
Jaguar |
||
|
Caribbean manatee |
||
|
Amazonian manatee |
||
|
Mountain tapir |
||
|
Endangered Birds: |
Barred tinamou |
|
|
Pygmy swift |
||
|
Endangered Reptiles: |
South American red-lined turtle |
|
|
Arran turtle |
||
|
Terecay turtle |
||
|
Sectacled caiman |
||
|
Central American caiman |
||
|
Dwarf Caiman |
||
|
Smooth-fronted caiman |
||
|
American crocodile |
||
|
Orinoco crocodile |
||
|
Aruba island rattle snake |
||
|
Yemen |
Endangered Mammals: |
South Arabian leopard |
|
Dugong |
||
|
Arabian gazelle |
||
|
Endangered Birds: |
African lammergeyer |
|
|
Zaire |
Endangered Mammals: |
Chimpanzee |
|
Pygmy chimpanzee |
||
|
Gorilla |
||
|
Mountain gorilla |
||
|
African wild dog |
||
|
Leopard |
||
|
Black rhinoceros |
||
|
Northern square-lipped rhinoceros |
||
|
Lechwe |
||
|
Endangered Birds: |
Graver's cuckoo shrike |
|
|
Endangered Reptiles: |
African slender-snouted crocodile |
|
|
Nile crocodile |
||
|
West African dwarf crocodile |
||
|
Congo dwarf crocodile |
Figure 18

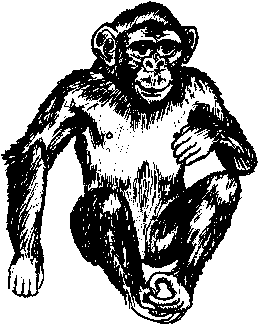
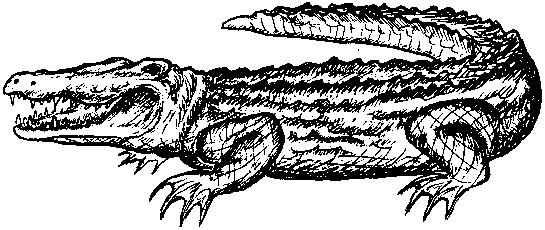
Figure 19


Figure 20
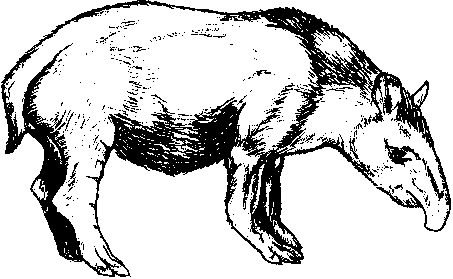
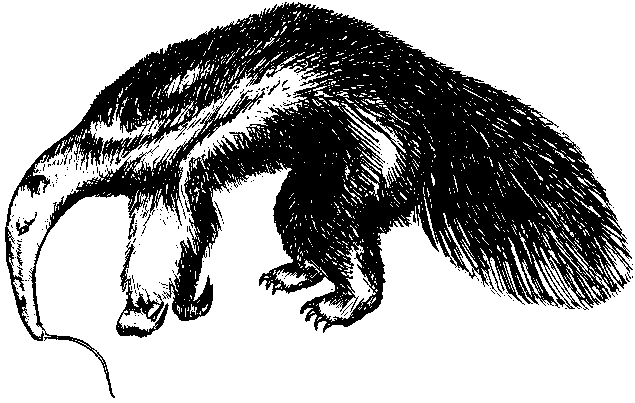
Figure 21

Figure 22


Endangered species of the United States
National Wildlife Federation
1412 16th Street N.W.
Washington, D. C. 20036, USA
Forest interpreter's primer on wildlife
Forest Service
U.S. Department of Agriculture
Washington, D.C. 20036, USA
List of foreign endangered & threatened species
National Wildlife Federation
1412 16th Street N.W.
Washington, D.C. 20036, USA
Red Book of the international Union for Conservation of Nature & Natural Resources
1110 Morges
Switzerland
Smithsonian-Peace Corps Environmental Program
Smithsonian Institution
Washington, D.C. 20560, USA
(may be able to indicate in-country environmentalist Peace Corps Volunteers for information sources)
Peace Corps Information & Exchange
Room M-1214
806 Connecticut Ave.
N.W. Washington, D.C. 20525, USA
American Public Health Association
1015 18th Street N.W.
Washington, D.C. 20036, USA
Caribbean Conservation News, published by
Caribbean Conservation Association
Savannah Lodge
The Garrison
Barbados
Conservation Foundation 1717
Massachusetts Ave., N.W.
Washington, D.C. 20036, USA
Ecology Council of America
Room 2200, 99 Park Ave.
New York, N.Y. 10016, USA
Institute of Tropical Forestry
University of Puerto Rico
Box AQ
Rio Piedras
Puerto Rico 00928
National Audubon Society
Education Services
950 3rd Ave.
New York, N.Y., 10022, USA
National Wildlife Federation
1412 16th Street N.W.
Washington, D.C. 20036
(publish Conservation Directory listing international, regional, national, interstate organizations, commissions & citizens groups)
National Wildlife Federation
Laurel Ridge Conservation Education Center
8925 Leesburg Pike
Vienna, Virginia 22180, USA
Soil Conservation Society of America
7515 N.E. Ankeny Rd.
Ankeny, Iowa 50021, USA
U.S. Department of Agriculture
Forest Service
Division of Information & Education
Washington, D.C. 20250, USA
and
Soil Conservation Service
Washington, D.C. 20240, USA
U.S. Department of Interior
National Park Service
Office of Environmental Interpretation
Washington, D.C. 20240, USA
Virgin Islands Conservation Society
P. O. Box 4187
St. Thomas
Virgin Islands 00801
United Nations Environmental Program
Ecosystems Natural Resource Division
P.O. Box 30552
Nairobi, Kenya
LATIN AMERICA
|
Brazil: |
Instituto Brasileiro de Desenvolvimento Florestal |
|
Forest Products Laboratory |
|
|
Universidade Federal do Parana |
|
|
Universidade Federal de Vicosa |
|
|
Aracruz Florestal S.A. Rua Professor Lobo 1128 |
|
|
Escola Superior de Florestas |
|
|
Chile: |
Universidad Austral de Chile |
|
Instituto Forestal |
|
|
FAO Regional Office for Latin America |
|
|
Facultad de Ciencias Forestales |
|
|
Columbia: |
Corporacion Nacional de Investigacion y Fomento Forestal |
|
Instituto de Investigaciones y Proyectos Forestales y Madereros |
|
|
Instituto de Desarrollo de los Recursos Naturales Renovables |
|
|
Facultad de Ciencias Agricolas |
|
|
Costa Rica: |
Centro Agronomico Tropical de Investigacion y Ensenanza (CATIE) |
|
Dominican |
Museo Nacional de Historia Natural |
|
Ecuador: |
Centro de Investigacion |
|
Seccion de Vida Silvestre |
|
|
El Salvador: |
Departamento Forestal |
|
Guatemala: |
Instituto Nacional Forestal |
|
Honduras: |
Gerente General |
|
Nicaragua: |
Director de Recursos Naturales Renovables |
|
CATASTRO e Inventario Recursos Naturales |
|
|
Paraguay: |
Instituto Nacional de Recnologia y Normalizacion |
|
Division of National Parks and Wildlife |
|
|
Venezuela: |
Facultad de Ciencias Forestales |
|
Instituto Forestal Latinoamericano |
|
|
ANFORES |
AFRICA
|
Benin: |
Eaux et Forets |
|
Botswana: |
Department of Wildlife and National Parks |
|
Cameroon: |
Office National de la Recherche Scientifique et Technique ONAREST |
|
Ecole de Faune |
|
|
Chad: |
Centre Technique Forestier Tropical |
|
CBLT (Arid Basin Commission) |
|
|
Ethiopia: |
The General Manager |
|
Gabon: |
Centre Technique Forestier Tropical (CTFT) |
|
Ghana: |
Forest Products Research Institute |
|
The Chief Conservator of Forests Forestry |
|
|
Ivory Coast: |
Centre Technique Forestier Tropical (CTFT) |
|
Institut Francais du Cafe et du Cacao |
|
|
Department of National Parks |
|
|
Kenya: |
East African Agriculture and Forestry |
|
Kenya Forestry Department |
|
|
Wildlife Clubs of Kenya Association |
|
|
Malawi: |
The Directory of Forestry |
|
Forest Research Institute |
|
|
Environmental Education Unit |
|
|
Morocco: |
Station de Recherches Forestieres |
|
Niger: |
Forestry and Environmental Information Center |
|
Eaux et Forets |
|
|
Nigeria: |
Conservator of Forests |
|
Institute for Agricultural Research |
|
|
Federal Department of Forest Research |
|
|
Department of Forest Resources Management |
|
|
Faculty of Agriculture, Forestry and Veterinary Science |
|
|
Senegal: |
Centre National de Recherches Forestieres |
|
Tunisia: |
Institut National de Recherches Forestieres |
|
Upper Volta: |
Centre Technique Forestier Tropical |
|
Zaire: |
Departement de Sylviculture |
NEAR EAST AND ASIA
|
Fiji: |
Curriculum Development Unit |
|
India: |
Forest Research Institute and Colleges |
|
Conservator of Forests |
|
|
Government of Andhra Pradesh, |
|
|
Department of Forestry |
|
|
Mysore State Forest Department |
|
|
Forest Resources Survey |
|
|
Indonesia: |
Forest Products Research Institute |
|
Faculty of Forestry |
|
|
Iran: |
College of Natural Resources |
|
Ministry of Agriculture and National Resource |
|
|
Korea: |
Forest Research Institute |
|
Malaysia: |
Forest Research Institute |
|
Research Branch, Forest Department |
|
|
Office of the Conservator of Forests |
|
|
Sabah Forest Department |
|
|
Micronesia: |
Micronesian Mariculture Demonstration Center |
|
Nepal: |
National Parks and Wildlife Conservation Office |
|
Philippines: |
Forest and Forest Products Research Center |
|
College of Forestry |
|
|
Forest Research Institute |
|
|
Thailand: |
Royal Forest Department |
|
Wildlife Conservation Division |
These definitions are related to environment and conservation and are not necessarily the only definitions for the words included highs.
|
ACCELERATED EROSION |
Erosion which is speeded up by human activities |
|
AMPHIBIAN |
Cold-blooded vertebrate which begins life in the water and develops air-breathing lungs: frog, salamander, toad, etc. |
|
ANNUAL |
A plant which grows only one year or one season |
|
AQUARIUM |
A water-filled container in which aquatic plants and animals are kept |
|
BIOTIC POTENTIAL |
The natural capacity of an organism to reproduce and survive |
|
BREED |
To produce young |
|
BRUSH |
A thick growth of bushes or shrubs |
|
BURROW |
An animal's hole or tunnel dug in the ground, such as by a mole or rabbit |
|
CAGE |
An enclosure to hold animals in captivity, with wire or bars on at least one side for air and light |
|
CARNIVORE |
An animal which is mainly flesh-eating; |
|
also an insectivorous plant |
|
|
CARRION |
Dead and decaying flesh |
|
COMMODITY |
Different kinds of animals and plants living together in a reasonably orderly manner |
|
COMPOST |
A mixture of decaying organic matter such as leaves and manure, used as fertilizer |
|
CONCEPT |
An idea or understanding developed from knowledge and observation |
|
CONDENSATION |
Water changing from a gaseous vapor to a liquid state |
|
CONSERVATION |
The preservation of natural resources from loss, waste and harm |
|
CONSUMER |
A living thing which obtains food from other organisms |
|
CONTOUR |
The outline shape of the land |
|
CRUSTACEA |
A class of water animals (arthropods) which includes lobster, crayfish, shrimp and crab |
|
CYCLE |
A periodically repeated sequence of events |
|
DEBRIS |
The remains of something broken down or destroyed |
|
DECAY |
Destruction of organic matter by the action of bacteria and fungi. Also: decompose, rot |
|
ECOLOGY |
The study of relationships of living things (organisms) to one another and to their environment |
|
ECOSYSTEM |
interaction of a community with its physical environment |
|
ENDANGERED SPECIES |
A wild animal or plant population whose survival is threatened by predation, disease, people or changing ecological conditions |
|
ENERGY |
The ability to do work vital power |
|
ENVIRONMENT |
The external surroundings that affect plants and animals: the air, land and water where they live |
|
EPIPHYTE |
A plant which grows nonparasitically on another plant or structure, whose nutrients are taken mainly from the air ; also air plant |
|
EROSION |
The removal of topsoil by the action of water, wind, ice, earth movement |
|
EVAPORATION |
The loss of water from its liquid form into the air as vapor |
|
EXCRETA |
Waste matter of an animal, such as urine or feces, excreted from the body |
|
EXPLOITATION |
The use, often excessive, of natural resources |
|
FECES |
Solid animal wastes eliminated through the intestinal tract |
|
FERAL |
A formerly domestic animal which lives as a wild animal (often predatory) |
|
FERTILIZER |
An organic or chemical material such as manure, nitrogen or phosphorous, added to the soil to increase its fertility |
|
FERTILITY |
The capacity of the soil to provide sufficient plant nutrients and to produce abundantly; also the ability of an organism to reproduce |
|
FOOD |
The substance which provides the energy required by living organisms |
|
FOOD CHAIN |
The series of feeding relationships in a community beginning with the plants and ending with the largest carnivores |
|
FOOD WEB |
All the possible feeding relationships(food chains) in an ecosystem |
|
FUNGI |
Plant organisms including yeasts, molds, mushrooms, which are present in organic decomposition |
|
GERMINATION |
The sprouting of a plant seed |
|
GRAZING |
The act of animals feeding on growing grass or other plants of the land |
|
GREEN MANURE |
Growing plant material plowed into the soil to increase its fertility |
|
HABITAT |
The area where a plant or animal lives and finds its food |
|
HERBICIDE |
A chemical which destroys plant growth |
|
HOST |
An organism on or in which a parasite lives |
|
HUMUS |
Rich layer of decomposed organic material in the soil which provides nutrients for the soil and increases its ability to retain water |
|
INSECT |
One of numerous invertebrate animals having three pairs of legs, a three-segment body and often two pairs of wings |
|
INSECTICIDE |
A chemical which is used to kill insects |
|
LANDSCAPING |
Improvement of the land by shaping and planting, for aesthetic and conservation purposes |
|
LARVA |
An independent, but immature, stage of an organism, hatched from an egg, which will undergo further metamorphosis to become adult |
|
LATRINE |
A toilet facility which concentrates excrete in one place for sanitary purposes |
|
LEACHING |
The process of a substance such as a mineral, being dissolved and carried away by water action through the soil (percolation) |
|
LITTER |
Waste materials such as paper, glass, cans, discarded at random by people in their environment; also the decomposing organic materials on the surface of the soil |
|
LARVA |
Soil consisting of a mixture of sand, silt and clay and organic matter |
|
MAMMAL |
A vertebrate which is warm-blooded, has hair or fur, and produces milk for its young which are born alive |
|
MANURE |
Animal excrete which is used as fertilizer to enrich the soil |
|
MARINE |
Of, or pertaining to, the sea |
|
MATURE |
Fully grown and developed |
|
METAMORPHOSIS |
Undergoing change, or a series of changes in the course of development |
|
MICRO-ORGANISM |
A living organism too small to be seen without a microscope |
|
MINERAL |
A natural inorganic substance, of a specific chemical composition, found mainly in the earth |
|
MULCH |
A protective covering such as compost, leaves, or shredded bark, placed around plants to prevent moisture loss |
|
NATURAL RESOURCES |
The minerals, water, plants and animals |
|
which occur naturally in the environment and which are the source of potential or realized value to society; often classified as renewable such as timber, cattle or food crops, and non-renewable such as copper, phosphate, gas or oil |
|
|
NATURE TRAIL |
A planned path through a natural area for the observation of natural features such as animal or plant life |
|
NURSERY |
A place where plants are grown for transplanting, experimentation or sale |
|
NUTRIENT |
Something that provides nourishment; the nutritive value in an organism's food |
|
NUTRITION |
The process of providing nourishment through food; the study of nutrients to improve the quality of nourishment to increase health and energy |
|
ORGANIC |
Of, or derived from, living organisms |
|
ORGANISM |
Any living thing capable of life functions of its own |
|
OXYGEN |
Gas in the earth's atmosphere, essential to animal and plant life |
|
PARASITE |
An organism which lives in or on a host organism of a different species; the host is usually harmed |
|
PERENNIAL |
A plant with a lifetime of more than two years |
|
PHOTOSYNTHESIS |
The process by which green plants absorb the sun's light energy and convert it into chemical (food) energy |
|
PHYSIOLOGICAL |
Of, or pertaining to, all the vital functions of an organism |
|
PIT |
A relatively deep hole in the ground, usually man-made |
|
POLLINATION |
The process by which a flowers pollen reaches the stigma (tip of the pistil) of the flower and fertilizes it. Common pollinating agents are flying insects and wind |
|
POLLUTION |
Anything added to the environment which accumulates in sufficient quantity to be undesirable |
|
POPULATION |
A group of plants or animals of the same kind living in the same area |
|
PRECIPITATION |
Drops of water (or ice) which have condensed from vapor in the atmosphere and fall to the earth's surface as rain (or snow) |
|
PREDATOR |
An animal that preys on another animal |
|
PREY |
An animal which becomes the food for another animal; to kill and eat |
|
RECREATION |
Voluntary use of one's free time to refresh the mind or body |
|
REPRODUCTION |
The process by which a species produces new organisms of the same species |
|
REPTILE |
A vertebrate which is cold-blooded, has dry, scaly skin, and whose young usually develop in eggs, such as a snake, lizard, turtle |
|
RESOURCES |
Anything that people take from their environment |
|
SANITATION |
The use of measures to provide healthy environmental conditions |
|
SEDIMENT |
Soil particles that are carried in or settle under water |
|
SEEDLING |
The young plant that develops shortly after germination of a seed |
|
SEQUENCE |
An orderly progression of events, one thing following after another |
|
SEWAGE |
Accumulated liquid and solid wastes |
|
SHRUB |
A low-growing woody perennial plant with several stems |
|
SILT |
Very fine soil material carried by water or deposited by water (siltation) |
|
SOD |
A section of grass-covered soil which is held together by the grass roots |
|
SOIL |
Top layer of the earth's surface in which plant life grows |
|
SOIL PROFILE |
A vertical section of soil shows the layers (horizons) and the parent material |
|
SOIL TEXTURE |
The composition of a soil, determined by the percentage of sand, silt and clay it contains |
|
SPECIES |
A group of organisms which breed naturally with each other and produce fertile young |
|
SPECIMEN |
A representative individual of a group, selected for testing, examination or display |
|
STRESS |
A condition of physical or emotional strain which disrupts the normal functional balance of an organism |
|
TERRARIUM |
An enclosed container in which small plants and/or animals such as insects or lizards are kept |
|
TERRITORY |
An area of land; any area an animal defends as its home |
|
THORAX |
The middle segment of the body of an arthropod (insect) |
|
URINE |
Liquid animal waste, excreted from the body |
|
VERTEBRATE |
An animal with a backbone |
|
WATERSHED |
A region of land which drains all water into a river, river system of body of water |
|
WILD AREA |
A region of land which has been left |
|
in a natural condition, without development; also called wilderness area |
|
|
WILDLIFE |
Wild animals living in their natural young The newly-born or babies of a species |
|
YOUNG |
The newly-born or babies of a species |